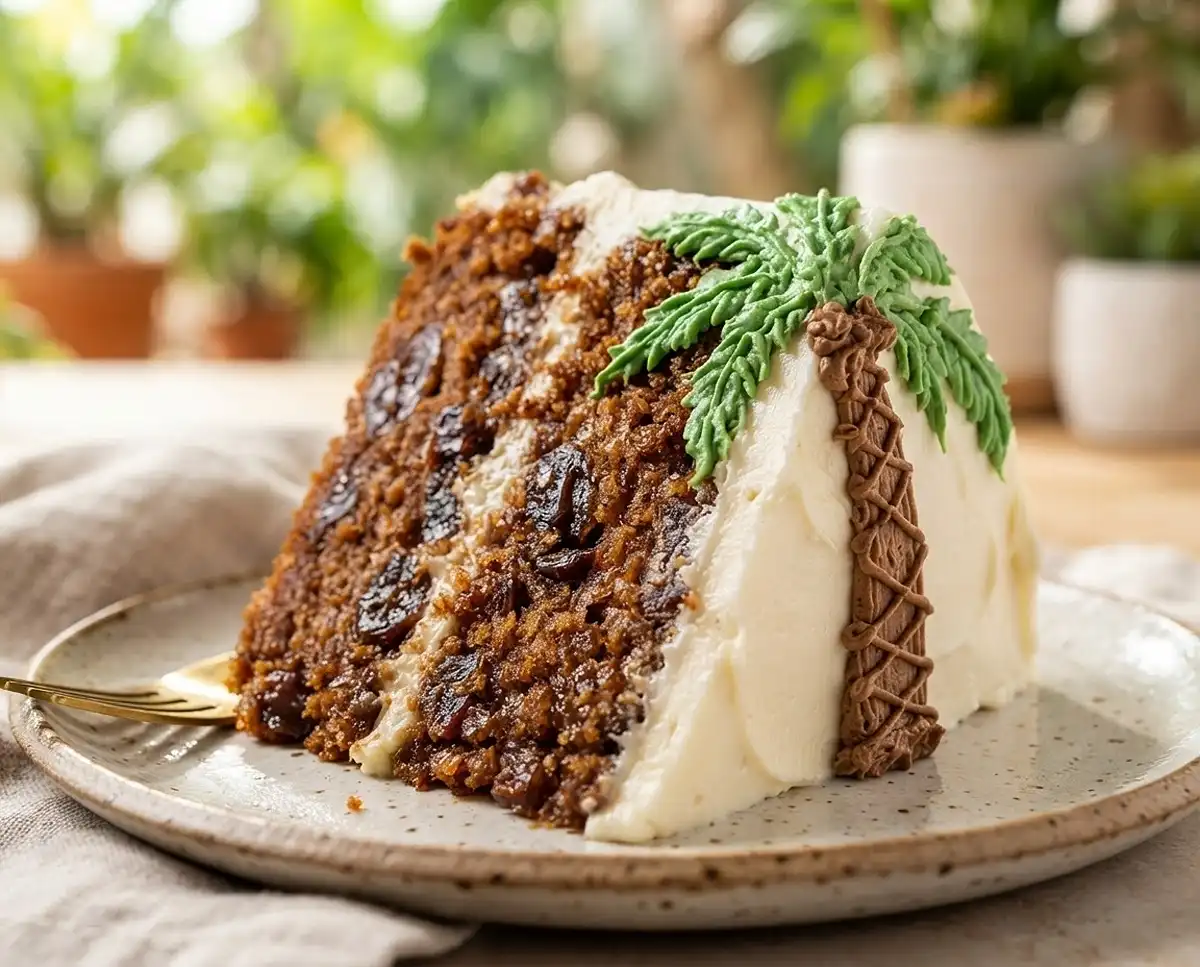
Date Palm Recipe
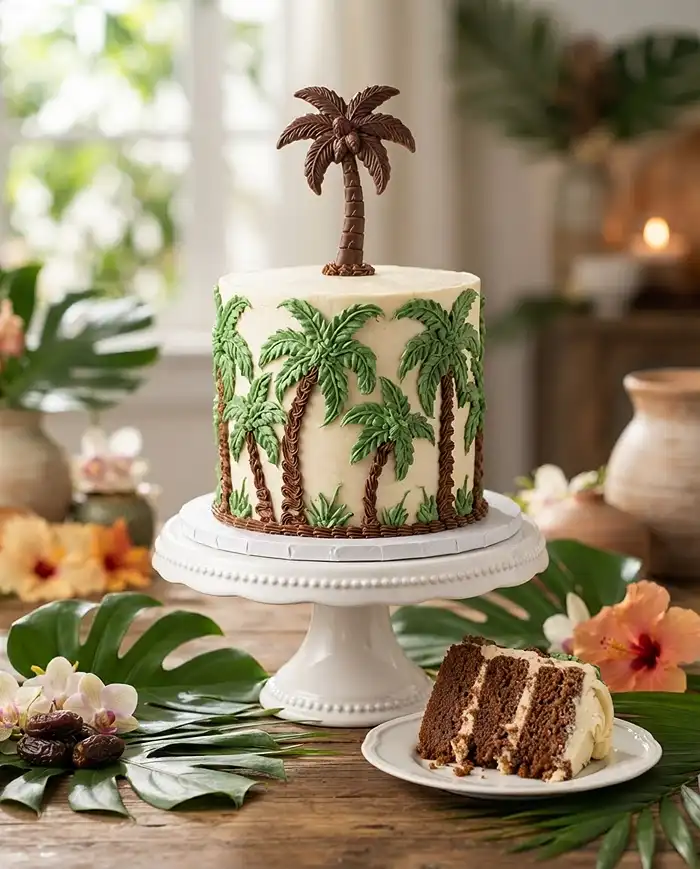
This date palm recipe transforms humble dates into a stunning showstopper cake that tastes as incredible as it looks, complete with a gorgeous palm tree decoration.
I’ve been making this date cake for years, and every single time I serve it, people ask for the recipe. There’s something magical about how dates transform into this moist, caramel-flavored cake that stays tender for days.
The best part? You can decorate it with a chocolate palm tree or a frosted one, making it perfect for tropical-themed parties or just because you want something beautiful on your table.
Table of Contents
Quick Recipe Snapshot
This date palm cake combines a supremely moist date cake with silky cream cheese frosting and your choice of chocolate or frosted palm tree decoration. The dates create natural sweetness and incredible texture, while the bicarb soda works magic to soften them into the batter. You’ll get a tender crumb that stays fresh for days, topped with decorations that look professionally made but are totally doable at home.
Total time from start to finish is about 2 hours, including baking and cooling. The decoration takes an extra 30 minutes, but trust me, it’s worth every second when you see people’s faces.
Why You’ll Absolutely Love This Date Palm Recipe
This isn’t just another date cake. The texture is something special—almost pudding-like in its moistness, but still light enough that you’ll want a second slice. The dates don’t just add sweetness; they create this deep, toffee-like flavor that pairs beautifully with the tangy cream cheese frosting.
The decoration options mean you can customize it for your skill level. Feeling ambitious? Go for the chocolate palm tree that looks like it came from a fancy bakery. Want something quicker? The frosted version is just as stunning and uses up your leftover icing.
I love that this cake actually improves overnight. The flavors meld together, and somehow it gets even more moist. It’s the rare cake that I actually prefer making a day ahead, which takes all the stress out of entertaining.
Plus, dates are naturally sweet and full of fiber, so you’re getting some nutritional value alongside all that deliciousness. Not that anyone’s counting when something tastes this good.
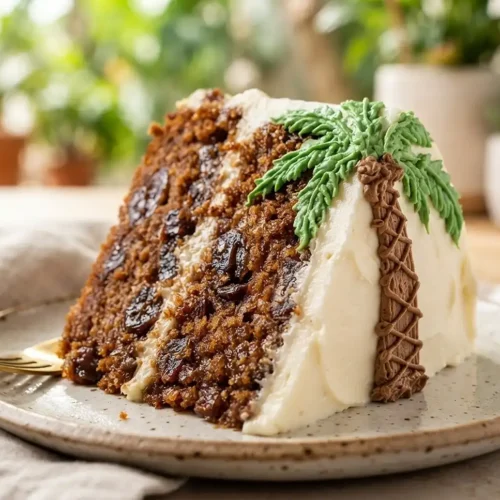
Date Palm Cake
Ingredients
Cake
- 2 ¼ cups roughly chopped pitted dates
- 1 ½ cups boiling water
- 1 ½ tsp bicarb soda
- 150 g softened butter
- 1 cup brown sugar
- 3 eggs – room temperature
- ¼ tsp vanilla
- 1 ½ cups self-raising flour
Cream Cheese Frosting
- 125 g softened unsalted butter
- 500 g softened cream cheese
- 1 tsp vanilla essence
- 3 ½ cups icing sugar
Palm Tree (Chocolate)
- ½ cup compound milk or dark chocolate
- ½ cup white chocolate or green candy melts
- Candy green colouring oil based
- Palm Tree Template
Palm Tree (Frosting)
- 2 tablespoons cocoa powder
- green gel food colouring
- 1 ½ cup leftover cream cheese frosting
Instructions
- Pre heat oven to 160c and prepare your pans by lining the bottom with baking paper and spraying with cooking oil. I used 2 x 6 inch pans with 3 cups of batter in each (alternatively you could use 2 x 8 inch pans with 3 cups of batter in each or 3 x 8 inch pans with 2 cups of batter in each).
- Pit your dates and roughly chop them, measure out 3 cups after chopping.
- Place you dates, water and bicarb soda in a food processor. Make sure all the dates are covered. Leave dates to steep for 10 minutes.
- While waiting for the dates, beat sugar and butter in a mixer on a medium speed until thick and creamy.
- Process date mixture and add to the butter and sugar.
- Beat till the dates are mixed through.
- Add in eggs and vanilla and mix till incorporated.
- Add in flour and beat until just combined.
- Pour your batter into your prepared pans. Place in the oven and bake for 40 minutes. If you’re using 8 inch pans, then check your cakes at the 30 minute mark. Put a skewer or thin knife into the cake and make sure there is no wet batter that sticks to it (you may get cooked crumbs, which is fine).
- Leave your cakes to cool.
- Place the butter and cream cheese into the bowl of your stand mixer.
- Beat until smooth.
- Add in the icing sugar one cup at a time on a low speed.
- This recipe is for a silkier cream cheese frosting, however if you want it more stiffer you can add a 1/2 – 1 cup more of icing sugar.
- Print the template and tape a piece of baking paper on top.
- Melt your chocolate and white chocolate in the microwave at 20 second intervals, checking each time until it is completely melted. Add in a a little green candy colouring into the white chocolate until the desired colour is reached. If you’re using green candy melts, you can skip the food colouring step.
- Fill 2 piping bags, one for each colour.
- Pipe the trunk, skipping a section in between (this will create more defined lines when you come back to pipe them). Pipe the skipped sections.
- Pipe the palm leaf stem, then move from the stem to the edges of the leaf in back and forth motions to create the frongs.
- Make sure that the leaves overlap the trunk and each other or the leaves or the palm will break easily. (if they do, don’t worry, just stick them back with more chocolate)
- Leave aside to set.
- Once set, gently slide a flat knife between the chocolate and baking paper.
- Gently pick up the tree and place it on your cake.
- Colour 3/4 cup of your left over icing with green colouring until desired colour is reached.
- Add cocoa to the other 3/4 cup of leftover icing and mix well.
- Fill the chocolate frosting into a piping bag with a 1cm wide round nozzle or cut the tip off the bag.
- Fill the green frosting into a a piping bag fitted with a leaf nozzle.
- Pipe a dot of chocolate frosting onto the base of the cake, use the back of a spoon or pallet knife to drag the dot upwards, continue till just below the top of the cake.
- Hold your green frosting tip at the top of the tree trunk and start piping with a slight side to side motion, this will add some edging to the leaf.
- Continue piping this all around the cake until you have made all the leaves.
- Best served the same or next day, but can be stored in the fridge in an airtight container for 1 week.
Notes
Ingredients for Date Palm Cake
You’ll need a mix of pantry staples and a few special touches to create this stunner. The dates are obviously the star, but don’t overlook the bicarb soda—it’s what transforms tough dried fruit into silky cake batter. Make sure your butter, eggs, and cream cheese are at room temperature for the smoothest results.
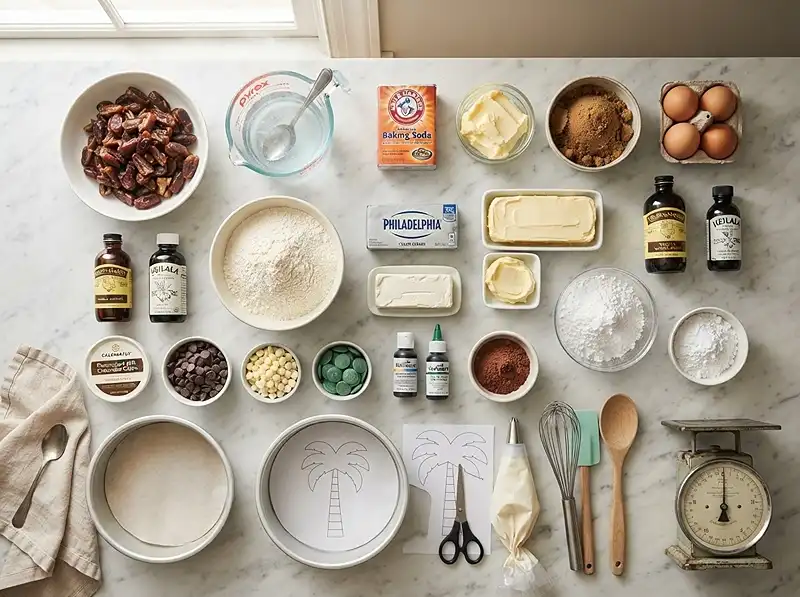
| Ingredient | Amount | Notes |
|---|---|---|
| Pitted dates, roughly chopped | 2 1/4 cups | Medjool or regular dates work beautifully |
| Boiling water | 1 1/2 cups | Must be actually boiling to soften dates properly |
| Bicarb soda | 1 1/2 tsp | Also called baking soda |
| Softened butter | 150 g | For the cake batter |
| Brown sugar | 1 cup | Light or dark both work |
| Eggs, room temperature | 3 | Room temp prevents curdling |
| Vanilla extract | 1/4 tsp | For the cake |
| Self-raising flour | 1 1/2 cups | Already contains leavening agents |
| Softened unsalted butter | 125 g | For the frosting |
| Softened cream cheese | 500 g | Full-fat works best |
| Vanilla essence | 1 tsp | For the frosting |
| Icing sugar | 3 1/2 cups | Also called powdered sugar or confectioner’s sugar |
| Compound milk or dark chocolate | 1/2 cup | For chocolate palm tree option |
| White chocolate or green candy melts | 1/2 cup | For palm leaves |
| Oil-based candy green coloring | As needed | Oil-based won’t seize chocolate |
| Cocoa powder | 2 tablespoons | For frosted palm tree option |
| Green gel food coloring | As needed | For frosted palm leaves |
Step-by-Step Instructions for Making Date Palm Cake
This recipe comes together in stages, but none of them are complicated. The key is letting the dates steep properly—that 10-minute rest transforms them completely. I’ll walk you through everything, including both decoration options so you can choose your adventure.
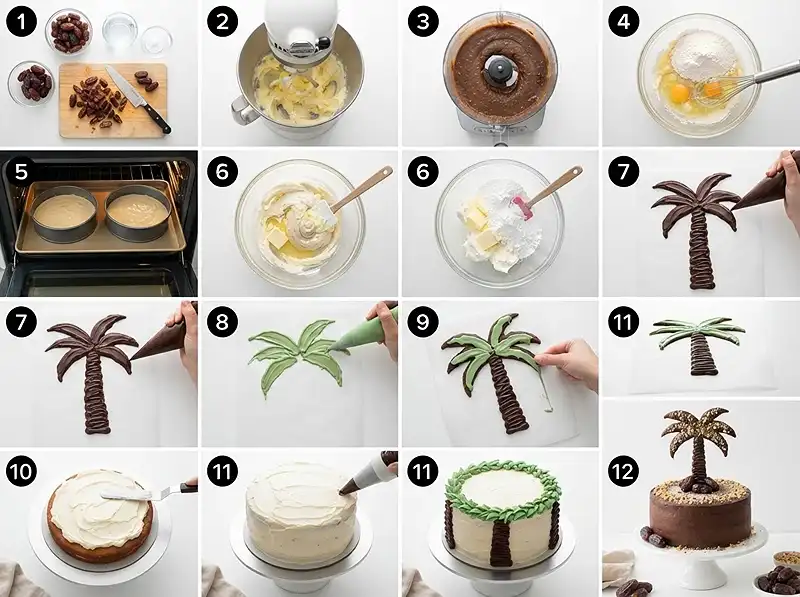
- Prepare your oven and pans: Preheat your oven to 160°C (320°F). Line the bottom of your cake pans with baking paper and spray the sides with cooking oil. I typically use 2 x 6 inch pans with 3 cups of batter in each, but you can also use 2 x 8 inch pans with 3 cups each, or 3 x 8 inch pans with 2 cups each if you want thinner layers.
- Prepare the dates: Remove any pits from your dates and roughly chop them. You want pieces about the size of a raisin—they don’t need to be perfect since they’ll break down further.
- Start the date mixture: Place your chopped dates, boiling water, and bicarb soda in a food processor. Make sure all the dates are submerged in the water. Set a timer and let this steep for 10 minutes. You’ll see the mixture start to darken and the dates will soften considerably—this is exactly what you want.
- Cream the butter and sugar: While the dates are steeping, beat the 150g of softened butter and brown sugar in your mixer on medium speed. Keep going until the mixture looks thick, creamy, and has lightened slightly in color. This usually takes about 3-4 minutes and creates air pockets that help your cake rise.
- Process and add the dates: Once the dates have steeped for 10 minutes, blitz them in the food processor until fairly smooth. A few small chunks are fine, but you want mostly a puree. Add this warm date mixture to your butter and sugar.
- Combine the date mixture: Beat on medium speed until the dates are thoroughly mixed through the butter mixture. It might look a bit curdled at this stage—don’t worry, that’s completely normal.
- Add eggs and vanilla: Crack in your eggs one at a time, along with the 1/4 teaspoon of vanilla. Mix until everything is incorporated and the batter looks smoother.
- Fold in the flour: Add your self-raising flour all at once and beat on low speed until just combined. Don’t overmix here—stop as soon as you can’t see any more dry flour. Overmixing develops gluten and makes your cake tough.
- Bake the cakes: Pour your batter into the prepared pans, dividing it evenly. Place in the preheated oven and bake for 40 minutes if using 6 inch pans. For 8 inch pans, start checking at the 30 minute mark. The cake is done when a skewer or thin knife inserted in the center comes out clean or with just a few moist crumbs—no wet batter should stick to it.
- Cool completely: Let the cakes cool in their pans for about 10 minutes, then turn them out onto a wire rack to cool completely. This is crucial before frosting—warm cakes will melt your cream cheese frosting into a puddle.
- Make the cream cheese frosting: Place the 125g of softened butter and 500g of cream cheese into your stand mixer bowl. Beat on medium speed until smooth and well combined with no lumps.
- Add the icing sugar: Add your icing sugar one cup at a time, mixing on low speed between additions. This prevents a sugar cloud in your kitchen. Once all the sugar is incorporated, you can increase the speed slightly to make it fluffier.
- Adjust frosting consistency: This recipe creates a silkier, more spreadable cream cheese frosting. If you prefer something stiffer that holds peaks better, beat in an additional 1/2 to 1 cup of icing sugar.
- Prepare for chocolate palm tree (if using): Print out a palm tree template and tape a piece of baking paper over it. This gives you a guide to pipe on.
- Melt the chocolates: Melt your milk or dark chocolate and white chocolate separately in the microwave at 20 second intervals, stirring between each burst until completely smooth. If using white chocolate, add tiny amounts of oil-based green candy coloring until you reach the shade you want. If using green candy melts, you can skip the coloring step entirely.
- Fill piping bags: Transfer each chocolate color into its own piping bag. You can use proper piping bags or even zip-top bags with a small corner snipped off.
- Pipe the trunk: Using the brown chocolate, pipe the palm trunk following your template, but skip sections as you go. This creates defined lines. Then go back and fill in the skipped sections—this technique creates that lovely segmented palm trunk look.
- Pipe the palm leaves: With your green chocolate, pipe the center stem of each palm frond first, then move from the stem outward toward the edges in quick back and forth motions to create the feathery fronds. Work quickly before the chocolate sets.
- Overlap for strength: Make sure your leaves overlap the trunk and each other slightly, or they’ll be too fragile and break easily. If they do break, don’t panic—just stick them back together with a dab of melted chocolate.
- Let chocolate set: Leave your piped palm tree aside at room temperature to set completely. This usually takes about 15-20 minutes, or you can pop it in the fridge for 5 minutes to speed things up.
- Remove from paper: Once fully set, gently slide a thin, flat knife between the chocolate and the baking paper to release it. Work slowly and carefully—this is the trickiest part.
- Place on cake: Very gently pick up your chocolate palm tree and position it on top of your frosted cake. Press down very lightly to secure it.
- Prepare for frosted palm tree (alternative): If you’re going the frosted route instead, take about 3/4 cup of your leftover frosting and color it green with gel food coloring until you reach your desired shade.
- Make chocolate frosting: Add 2 tablespoons of cocoa powder to another 3/4 cup of leftover frosting and mix thoroughly until the color is even and no lumps remain.
- Fill piping bags for frosting method: Put the chocolate frosting into a piping bag fitted with a 1cm round nozzle, or just cut the tip off the bag. Put the green frosting into a piping bag fitted with a leaf nozzle.
- Pipe the frosted trunk: Pipe a dot of chocolate frosting at the base of your cake where you want the trunk. Use the back of a spoon or a palette knife to drag the dot upward, creating a trunk shape. Continue this motion all the way up to just below the top of the cake, adding more frosting as needed.
- Create the frosted leaves: Hold your green frosting bag with the leaf tip positioned at the top of the trunk. Start piping with a slight side-to-side motion as you pull outward—this creates beautiful ruffled edges on your leaves.
- Complete the palm crown: Continue piping leaves all around the top of the cake until you’ve created a full palm tree crown. Space them evenly for the best effect.
Expert Tips for Perfect Date Palm Cake
The quality of your dates matters more than you’d think. Fresh, soft dates create a better texture than rock-hard ones. If your dates are super dry, you can soak them for an extra 5 minutes in the boiling water.
Don’t skip the steeping time for the dates. I know 10 minutes feels like forever when you’re eager to bake, but this step is what makes the dates incorporate smoothly into the batter. The bicarb soda also reacts with the dates to create a gorgeous dark color.
Room temperature ingredients are crucial for the frosting. Cold cream cheese creates lumps that no amount of beating will smooth out. I take mine out of the fridge about an hour before I need it, or you can soften it in the microwave for 10 seconds at a time, checking frequently.
When testing if your cake is done, remember that a few moist crumbs on the skewer are fine—you’re looking for no wet batter. This cake is meant to be incredibly moist, so don’t overbake it trying to get a perfectly clean skewer.
For the chocolate palm tree, work in a cool room if possible. If your kitchen is hot, the chocolate might be too soft to work with and won’t hold its shape properly. You can also chill your piped design in the fridge to set it faster.
Oil-based candy coloring is essential if you’re tinting white chocolate. Regular water-based food coloring will cause the chocolate to seize and become grainy and unusable. Trust me, I learned this the hard way.
If you’re nervous about piping the chocolate palm tree freehand, practice on a piece of baking paper first. Chocolate is forgiving—if you mess up, you can scrape it up, remelt it, and try again.
Creative Variations on This Date Palm Recipe
You can turn this into a spectacular layer cake by baking three thinner layers instead of two. This creates gorgeous height and more frosting layers. Just reduce the baking time to about 25-30 minutes for thinner cakes.
For a grown-up twist, add a tablespoon of espresso powder to your date mixture. It doesn’t make the cake taste like coffee—it just deepens the caramel notes from the dates and makes everything taste more intense.
If you can’t find self-raising flour, make your own by adding 2 teaspoons of baking powder and 1/2 teaspoon of salt to 1 1/2 cups of plain all-purpose flour. Whisk it together well before adding to your batter.
Want to make cupcakes instead? This batter makes about 18-20 cupcakes. Bake them at the same temperature for 18-22 minutes. Top each one with a small piped palm tree for an adorable tropical treat.
You can swap out half the dates for dried figs or prunes if you want a slightly different flavor profile. The texture stays beautifully moist, but you get interesting flavor variations.
For a simpler decoration, skip the palm tree entirely and just top the cake with chopped toasted pecans or walnuts. The nutty crunch contrasts beautifully with the soft cake.
Troubleshooting Common Issues
If your cake sinks in the middle, you probably opened the oven door too early or your oven temperature was too high. Resist peeking for at least the first 30 minutes, and consider using an oven thermometer to check your actual temperature.
Grainy cream cheese frosting usually means your ingredients weren’t soft enough. Always start with properly softened butter and cream cheese, and beat them together thoroughly before adding sugar.
If your chocolate palm tree breaks when you’re removing it from the paper, don’t panic. You can “glue” it back together with a tiny bit of melted chocolate. Or embrace the broken pieces and arrange them artistically on top of your cake—nobody will know it wasn’t intentional.
Dense, heavy cake texture typically comes from overmixing the batter once you add the flour. Mix just until the flour disappears, then stop immediately. Those few extra seconds of mixing develop too much gluten.
If your dates aren’t breaking down smoothly in the food processor, they might be too dry. Next time, let them steep for 15 minutes instead of 10, or add an extra splash of hot water before processing.
White chocolate that won’t melt smoothly has probably seized from water contact or overheating. Melt it slowly at 15-20 second intervals and stir gently. If it does seize, you can sometimes save it by stirring in a teaspoon of vegetable oil or cocoa butter.
Storage Tips for Date Palm Cake
This cake is actually one of those magical recipes that tastes better the next day. The flavors meld together and somehow the texture becomes even more luxurious. Store it in an airtight container in the refrigerator because of the cream cheese frosting.
| Storage Method | Duration | Notes |
|---|---|---|
| Room Temperature (covered) | 4-6 hours | Only if serving same day; cream cheese frosting needs refrigeration |
| Refrigerator (airtight container) | Up to 1 week | Best served same or next day for optimal texture |
| Freezer (unfrosted cake) | Up to 3 months | Wrap layers tightly in plastic wrap, then foil |
| Freezer (frosted cake) | Up to 1 month | Flash freeze uncovered first, then wrap well |
Before serving refrigerated cake, let it sit at room temperature for about 30 minutes. The texture and flavor are much better when it’s not ice cold, and the frosting softens to that perfect creamy consistency.
If you’re freezing the cake, I recommend freezing the layers unfrosted and making fresh frosting when you’re ready to serve. The cream cheese frosting can become slightly grainy after freezing, though it still tastes fine.
The chocolate palm tree decoration can be made up to a week in advance and stored in an airtight container at room temperature. Just keep it away from humidity, which can make chocolate develop a white bloom.
According to the FDA guidelines on food safety, any cake with cream cheese frosting should be refrigerated within 2 hours of assembly to prevent bacterial growth.
Date Palm Recipe FAQs
What are the best types of dates to use in recipes?
Medjool dates are the most popular choice for recipes due to their large size, soft texture, and natural sweetness. Deglet Noor dates are also excellent and slightly firmer, making them ideal for baking and cooking. For stuffing recipes, larger varieties like Medjool or Barhi dates work best, while smaller dates can be chopped and added to energy balls, smoothies, or baked goods.
How do I soften hard dates for use in recipes?
To soften hard or dried dates, soak them in warm water for 10-15 minutes until they become plump and tender. You can also use hot water for faster results, soaking for just 5-10 minutes. After soaking, drain the dates well and pat them dry before using. The soaking water can be saved and used as a natural sweetener in smoothies or other recipes.
Can dates be used as a sugar substitute in baking?
Yes, dates make an excellent natural sugar substitute in baking. You can make date paste by blending pitted dates with water until smooth, then use it to replace sugar in a 1:1 ratio in most recipes. Date paste adds moisture and natural sweetness to cookies, brownies, and cakes. Keep in mind that baked goods made with dates may be slightly denser and darker in color than those made with regular sugar.
What are some quick and easy date palm recipes for beginners?
Beginners can start with simple recipes like date energy balls, which require just dates, nuts, and cocoa powder blended together and rolled into balls. Stuffed dates with nut butter or cream cheese are another easy option requiring no cooking. Date smoothies made by blending dates with milk, banana, and ice create a nutritious drink. You can also chop dates and add them to oatmeal, yogurt, or salads for instant natural sweetness.
How should I store dates and how long do they last?
Fresh dates should be stored in an airtight container in the refrigerator where they will last for up to 6 months. For longer storage, dates can be frozen for up to a year without losing their quality. Dried dates can be kept at room temperature in a sealed container in a cool, dry place for several months. If dates develop a white coating, this is natural sugar crystallization and they are still safe to eat. Always check for any unusual odors or mold before using stored dates.
Time to Make Your Own Date Palm Masterpiece
This date palm recipe has become one of my most-requested cakes for good reason. The combination of that incredibly moist date cake with tangy cream cheese frosting is just unbeatable, and the palm tree decoration makes it feel special without requiring advanced decorating skills.
Whether you choose the elegant chocolate palm tree or the charming frosted version, you’re going to end up with something that looks impressive and tastes even better. The best part is watching people take that first bite and their eyes light up when they taste how good it actually is.
I’d love to hear how your date palm cake turns out! Did you go with chocolate or frosting for your palm tree? Try out this grated chocolate toast or baked spaghetti pie for your next baking adventure, and don’t forget to wash it down with a refreshing dirty lemonade. Happy baking!