Meringue Ducks Recipe
Light, crispy, and absolutely adorable, these meringue ducks are the charming cookie you never knew you needed in your baking repertoire.
I fell in love with meringue cookies years ago when I realized they’re basically edible clouds that you can shape into anything your heart desires. These little ducks? They’re my favorite party trick, and once you nail the basic technique, you’ll be piping them for every occasion.
Today I’m walking you through everything you need to know to make perfect meringue ducks that are crispy, sweet, and utterly delightful. Let’s get started.
Table of Contents
What Are Meringue Ducks?
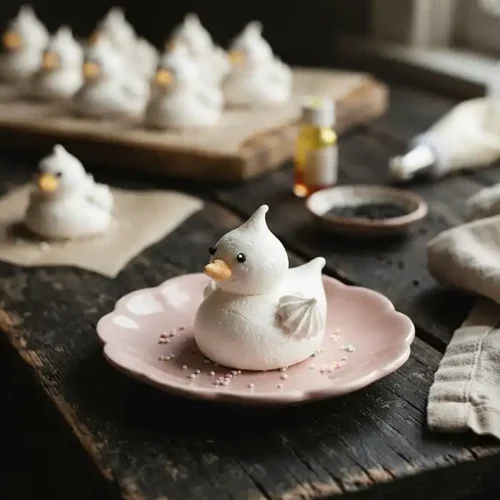
Meringue ducks are simply meringue cookies piped into adorable duck shapes. They’re made from whipped egg whites and sugar that are baked low and slow until they transform into crispy, melt-in-your-mouth treats. The duck shape comes from using a star tip to create textured “feathers” and piping the meringue in a way that resembles a little sitting duck.
These aren’t just cute—they’re surprisingly easy once you understand the basics of working with meringue. The key is patience and a completely clean bowl. Trust me on this.
Why You’ll Love These Meringue Ducks
First off, they’re absolutely precious. I mean, who can resist a tiny edible duck? They make any dessert table instantly more charming, and kids absolutely lose their minds over them.
But beyond the cuteness factor, meringue cookies are genuinely wonderful treats. They’re naturally gluten-free, relatively low in calories compared to butter-based cookies, and have this incredible crispy-light texture that’s completely addictive. Plus, they use ingredients you probably already have in your kitchen.
The baking process is hands-off once they’re in the oven, which means you can prep other things while they do their thing. And they store beautifully for days, making them perfect for make-ahead entertaining.
I also love that you can customize them endlessly. Want pastel yellow ducks for Easter? Pink ones for a baby shower? White swans for a wedding? The same technique works for all of them.
Meringue Ducks
Ingredients
Ingredients
- 4 large egg whites room temperature
- ½ teaspoon cream of tartar
- ⅛ teaspoon salt
- 1 cup granulated sugar
- 1 teaspoon vanilla extract¹
Instructions
- Preheat oven to 225F (105C) and line a large cookie sheet (or two regular-sized cookie sheets — make sure they will fit in your oven together) with parchment paper. Set aside.
- Combine egg whites, cream of tartar, and salt in a large, completely clean, completely grease-free bowl².
- Using an electric mixer or a stand mixer (with either the whisk or paddle attachment), stir on low speed until mixture becomes foamy.
- Increase speed to high.
- With mixer on high, gradually add sugar, about 1 Tablespoon at a time, stirring after each addition until sugar is dissolved (about 15-20 seconds between each addition).
- Beat until mixture is thick, shiny, and has increased in volume. Mixture should have stiff peaks and sugar should be completely dissolved (you can test this by rubbing a small bit of the mixture between your fingers, if it feels gritty, the sugar isn’t dissolved).
- Stir in vanilla extract and any other extract you may like to use. If using food coloring, add the food coloring at this stage, too.
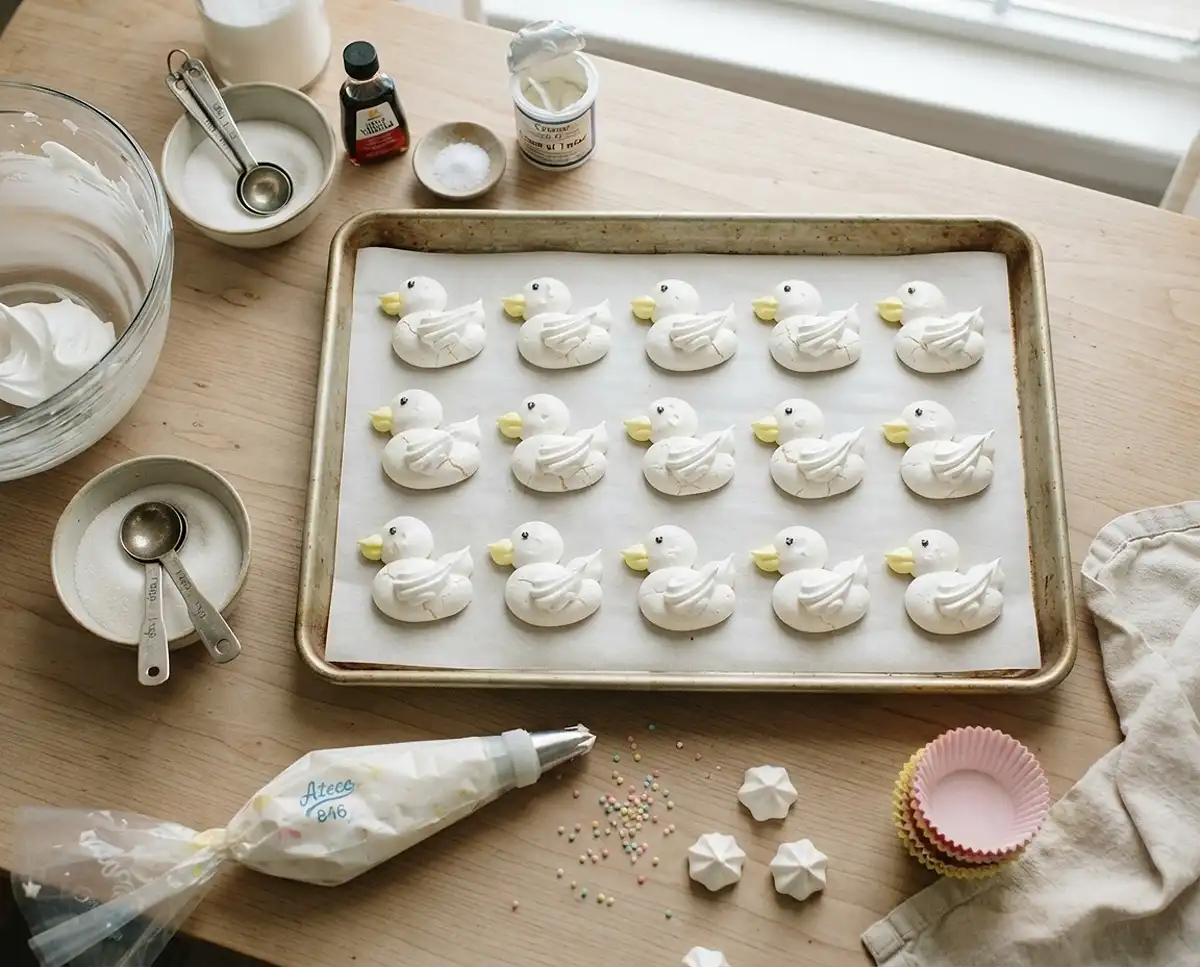
- Fit a large disposable piping bag with a large tip (I used Ateco 846, but any large star tip will work or you can just snip the edge of the piping bag for a “kiss” formation) and transfer meringue to prepared piping bag and pipe onto prepared cookie sheet. The meringue cookies can be pretty close to each other as they won’t spread, and you will want to bake all of the cookies at the same time, so make sure you make enough space.
- Bake on 225F (105C) for 1 hour. Turn off the oven once the baking time has passed, and do not open the oven. Leave the oven door closed and allow cookies to cool completely in the oven (1-2 hours) before removing.
- Meringue cookies should be crisp and can be stored in an airtight container. Keep away from heat and moisture as it can soften your meringues.
Notes
Ingredients You’ll Need for Meringue Ducks
The ingredient list for these meringue cookies is delightfully short. You need just five things, and I’m willing to bet you have most of them already.
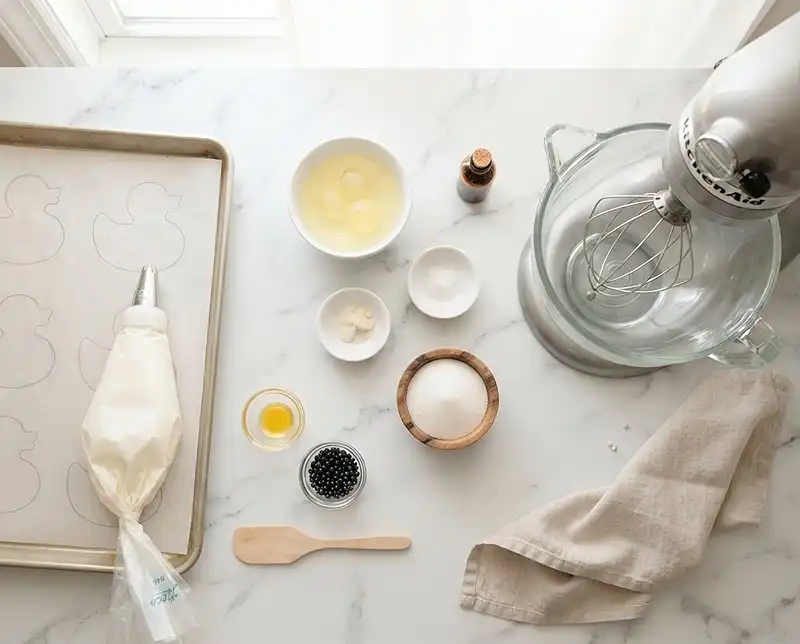
| Ingredient | Amount | Notes |
|---|---|---|
| Large egg whites | 4 | Must be room temperature and completely free of any yolk |
| Cream of tartar | ½ teaspoon | Stabilizes the egg whites and helps them hold their shape |
| Salt | ⅛ teaspoon | Just a pinch to balance the sweetness |
| Granulated sugar | 1 cup | Regular white sugar works best—superfine dissolves even faster |
| Vanilla extract | 1 teaspoon | Or use almond extract for a different flavor profile |
A note on the egg whites: room temperature is crucial. Cold egg whites don’t whip up as voluminously, and you want all the volume you can get. I usually separate my eggs and let the whites sit on the counter for about 30 minutes before I start.
The cream of tartar is your insurance policy. It’s an acid that stabilizes the protein structure in the egg whites, which means your meringue will hold its shape better and be less likely to weep or collapse. You can find it in the spice aisle of any grocery store, and a little container lasts forever.
Step-by-Step Instructions for Perfect Meringue Ducks
Making meringue ducks is all about technique and patience. The actual hands-on time is pretty short, but the baking and cooling process takes a few hours. Plan accordingly, and you’ll be rewarded with the crispiest, most satisfying cookies.
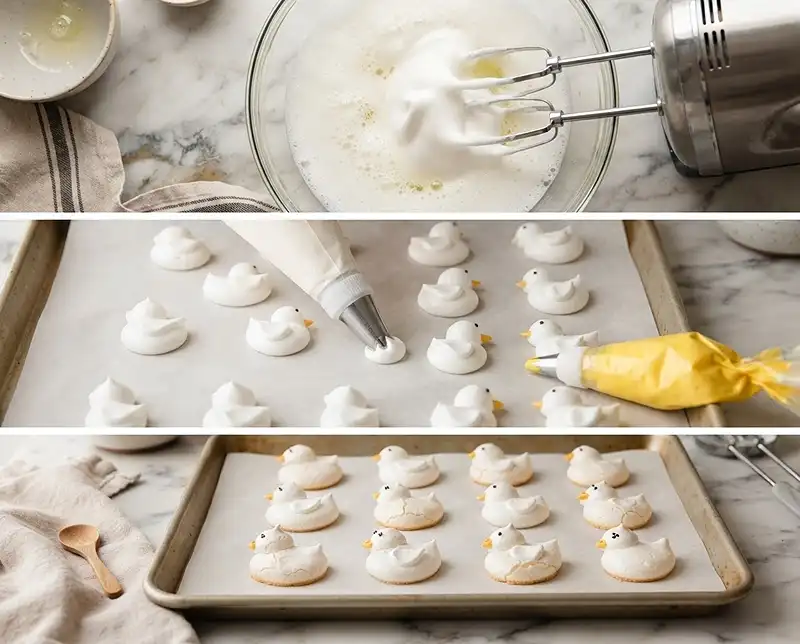
- Preheat and prep: Set your oven to 225°F (105°C) and line a large cookie sheet or two regular-sized sheets with parchment paper. Make absolutely sure your baking sheets will fit in your oven together—you want to bake all the meringue cookies at once for even results.
- Combine the base ingredients: In a large, completely clean, completely grease-free bowl, add your egg whites, cream of tartar, and salt. This clean bowl thing isn’t me being fussy—even a tiny bit of grease will prevent your egg whites from whipping properly. I usually wipe my bowl with a bit of white vinegar or lemon juice on a paper towel just to be sure.
- Start mixing slowly: Using an electric hand mixer or a stand mixer with the whisk or paddle attachment, stir on low speed until the mixture becomes foamy. It’ll look kind of bubbly and loose at this stage, almost like soap suds.
- Increase to high speed: Crank that mixer up to high. This is where the magic starts happening.
- Add sugar gradually: With the mixer running on high, add your sugar about 1 tablespoon at a time. Wait about 15 to 20 seconds between each addition to let the sugar dissolve into the egg whites. I know this feels tedious, but it’s the secret to glossy, stable meringue. If you dump all the sugar in at once, it won’t dissolve properly and your meringue will be grainy.
- Beat until stiff peaks form: Keep beating until the mixture is thick, shiny, and has increased dramatically in volume. You’re looking for stiff peaks—when you lift the whisk out, the meringue should stand straight up without drooping. To test if the sugar is completely dissolved, rub a small bit of the mixture between your fingers. If it feels gritty, keep beating. If it’s smooth, you’re golden.
- Add flavorings and color: Stir in your vanilla extract and any other extracts or food coloring you want to use. For yellow ducks, I use gel food coloring because it doesn’t add extra liquid. Just a tiny bit goes a long way—you want a soft pastel shade, not neon.
- Pipe the duck shapes: Fit a large disposable piping bag with a large star tip (Ateco 846 is perfect, but any large star tip works—or just snip the edge of the bag for a simpler kiss shape). Transfer your meringue to the piping bag and pipe duck shapes onto your prepared cookie sheet. For a duck, pipe a larger blob for the body, then a smaller one on top and slightly to one side for the head. Meringue cookies don’t spread, so you can place them pretty close together.
- Bake low and slow: Bake at 225°F (105°C) for exactly 1 hour. Set a timer so you don’t forget about them.
- Cool completely in the oven: When the hour is up, turn off the oven but do NOT open the door. This is critical. Leave the cookies inside the closed oven for 1 to 2 hours to cool completely. This gradual cooling prevents cracks and ensures they dry out completely, giving you that perfect crispy texture throughout.
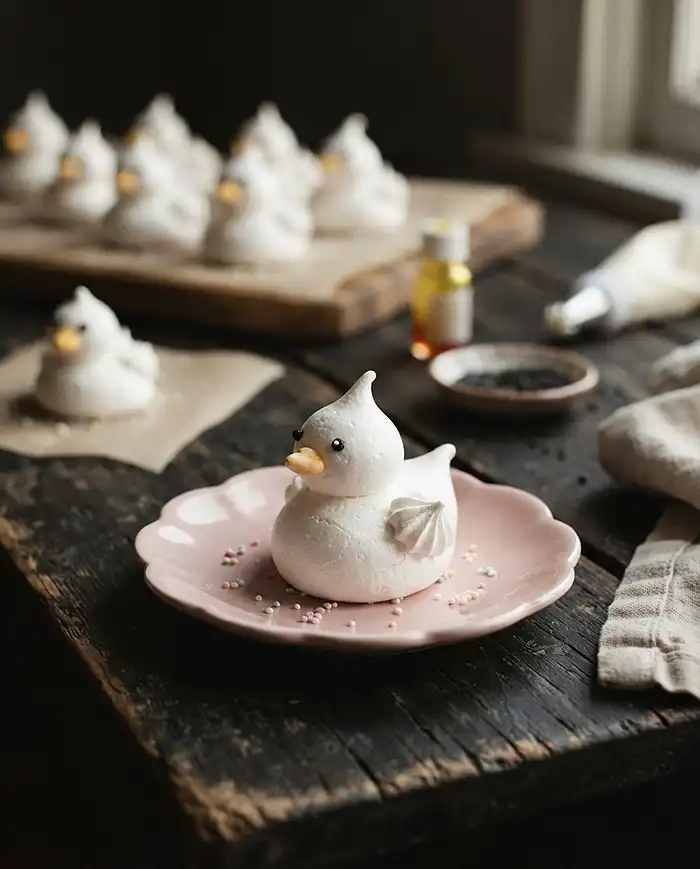
Once they’re completely cool, your meringue ducks should lift easily off the parchment paper and feel crisp all the way through. If the bottoms feel soft or sticky, they need more drying time.
Expert Tips for Meringue Success
After making more batches of meringue cookies than I can count, I’ve learned a few tricks that make all the difference.
Pick a dry day to make these if possible. Humidity is meringue’s enemy. On super humid days, meringues can absorb moisture from the air and turn sticky or soft. If you live somewhere humid and can’t wait for a dry day, try making them when your air conditioning is running.
Use a copper bowl if you have one. Copper reacts with egg whites in a way that creates more stable meringue. It’s not necessary, but it’s a nice bonus if you happen to have one tucked away somewhere.
Separate eggs when they’re cold, then let the whites come to room temperature. Cold eggs separate more cleanly without breaking the yolk, but room temperature whites whip to greater volume.
If you accidentally get even a speck of yolk in your whites, fish it out with the eggshell. The shell works like a magnet for yolk bits.
Don’t skip the cream of tartar. I’ve tried making meringue without it, and while it’s possible, the results aren’t as reliable. It’s worth keeping a small container in your pantry.
Test your oven temperature with an oven thermometer. Meringues need that low, steady heat. If your oven runs hot, they’ll brown. If it’s too cool, they’ll take forever and might stay sticky inside.
Practice your piping technique on parchment paper first. You can scrape up your practice attempts and put them back in the piping bag until you get the hang of the duck shape.
Creative Variations to Try
Once you’ve mastered the basic technique, the world of meringue cookies opens up to you. Here are some of my favorite variations.
Make classic meringue kisses by piping simple tall swirls with a star tip. These are elegant and work for any occasion.
Try swans instead of ducks by piping an S-shaped neck and spreading the body slightly with a damp finger before baking.
Create rainbow meringues by dividing your mixture into several bowls, tinting each a different color, then spooning them into the same piping bag for a marbled effect.
Add chocolate by dipping the bottoms of cooled meringue ducks in melted chocolate. Let the chocolate set on parchment paper before storing.
Flavor them differently by swapping vanilla for almond extract, peppermint extract, or even a little instant espresso powder dissolved in the vanilla.
Make mini ducks by using a smaller piping tip and reducing the baking time slightly. Test one after 45 minutes to see if it’s crispy.
Try pavlova-style meringues by piping larger nests instead of ducks, baking them the same way, then filling with whipped cream and fresh fruit.
Troubleshooting Common Meringue Problems
Even experienced bakers run into meringue mishaps sometimes. Here’s how to fix the most common issues.
If your meringue won’t stiffen, you likely have grease in your bowl or a bit of yolk in your whites. Start over with a completely clean bowl and fresh egg whites. It’s frustrating, but there’s no way to fix it once it’s contaminated.
When meringue ducks turn brown during baking, your oven is too hot. Check with an oven thermometer and adjust accordingly. They should stay white or barely take on the slightest hint of color.
If they’re sticky or chewy inside instead of crispy throughout, they need more drying time. Put them back in a 200°F oven for another 30 minutes, then let them cool in the oven again.
Weeping or beading (little drops of moisture on the surface) happens when sugar doesn’t fully dissolve or when they’re baked at too high a temperature. Make sure you add sugar gradually and beat until completely smooth.
Cracked meringues usually result from too-rapid cooling or temperature fluctuations. Always cool them gradually in the turned-off oven.
If your meringue deflates after whipping, you either over-beat it (yes, that’s possible) or your cream of tartar was expired. Meringue should look glossy and smooth, not grainy or separated.
How to Store Meringue Ducks
Proper storage is key to keeping your meringue ducks crispy and perfect. These cookies are more sensitive to environment than regular cookies, but they’re not difficult to store once you know the rules.
| Storage Method | Duration | Best Practices |
|---|---|---|
| Room temperature (airtight container) | Up to 2 weeks | Use a container with a tight seal; add a small packet of food-safe silica gel to absorb any moisture |
| Room temperature (cookie tin) | Up to 1 week | Place parchment paper between layers; store in a cool, dry place away from heat sources |
| Freezer | Up to 1 month | Not recommended—they can absorb moisture when thawing and lose their crisp texture |
Never refrigerate meringue cookies. The refrigerator is too humid and will turn them soft and sticky within hours. Room temperature in an airtight container is always your best bet.
Keep them away from any source of heat or moisture. Don’t store them near the stove, dishwasher, or in a basement. A pantry shelf or cupboard works perfectly.
If your meringues do go soft from humidity, you can sometimes rescue them by placing them in a 200°F oven for 15 to 20 minutes to dry them out again. Let them cool completely in the oven before storing.
For maximum freshness, I recommend storing meringue ducks in a glass or plastic container with a locking lid rather than a cookie tin. The seal is usually better, which keeps moisture out more effectively.
Meringue Ducks FAQs
What are meringue ducks?
Meringue ducks are decorative desserts made from meringue that are shaped and piped to resemble ducks. They are typically made with egg whites and sugar, whipped to stiff peaks, then carefully piped or molded into duck shapes before being baked at low temperature until crisp. These whimsical treats are often used as cake toppers, party decorations, or standalone confections.
How do you make meringue ducks?
To make meringue ducks, whip egg whites with cream of tartar until foamy, then gradually add sugar while beating until stiff, glossy peaks form. Transfer the meringue to a piping bag fitted with a round tip. Pipe an oval body, a smaller round head, and a pointed beak onto parchment-lined baking sheets. Use a toothpick to add texture for wings and tail feathers. Bake at a low temperature, around 200°F, for 1-2 hours until dry and crisp.
Can you color meringue ducks?
Yes, you can color meringue ducks using gel food coloring. Add a small amount of gel coloring to the meringue after it reaches stiff peaks and fold it in gently to avoid deflating the mixture. You can create yellow ducks, white swans, or any color you desire. For a more realistic look, you can also dust the baked meringues with edible luster dust or paint details with diluted food coloring after baking.
How long do meringue ducks last?
When stored properly in an airtight container at room temperature, meringue ducks can last for up to two weeks. It is important to keep them away from humidity and moisture, as meringue absorbs water from the air and becomes soft and sticky. Do not refrigerate meringue ducks, as the cold, moist environment will ruin their crisp texture. Store them in a cool, dry place for best results.
What occasions are meringue ducks suitable for?
Meringue ducks are perfect for various occasions including baby showers, children’s birthday parties, Easter celebrations, and spring-themed events. They make charming decorations for dessert tables, can be used as cake toppers, or given as edible party favors. Their cute and whimsical appearance makes them especially popular for events celebrating new babies or young children, and they can be customized in different colors to match any party theme.
Let’s Make Some Meringue Ducks!
There’s something genuinely delightful about pulling a tray of crispy, perfectly shaped meringue ducks out of your oven. They’re impressive without being complicated, beautiful without being fussy, and absolutely delicious in that light, sweet, melt-on-your-tongue way that only meringue cookies can deliver.
I love serving these at parties because they spark joy in a way that regular cookies just don’t. People smile when they see them. Kids get excited. Even adults who think they’re too sophisticated for cute food end up popping three or four into their mouths.
The technique might seem intimidating at first, but I promise it becomes second nature after your first batch. And once you’ve mastered these meringue ducks, you’ll find yourself making them for every occasion—Easter, baby showers, birthday parties, or just because your Tuesday needs a little extra sweetness.
Give this recipe a try this weekend. Set aside an afternoon, get your piping bag ready, and create something adorable and delicious. Your kitchen will smell amazing, you’ll feel accomplished, and you’ll have the cutest treats to share—or keep all to yourself.
If you loved this recipe, check out more sweet treats like my jasmine sugar cookies and viral butter dipped ice cream, including savory favorites like crispy crunchy shrimp rolls!
Happy baking, and may all your meringue ducks be crispy, cute, and absolutely perfect.