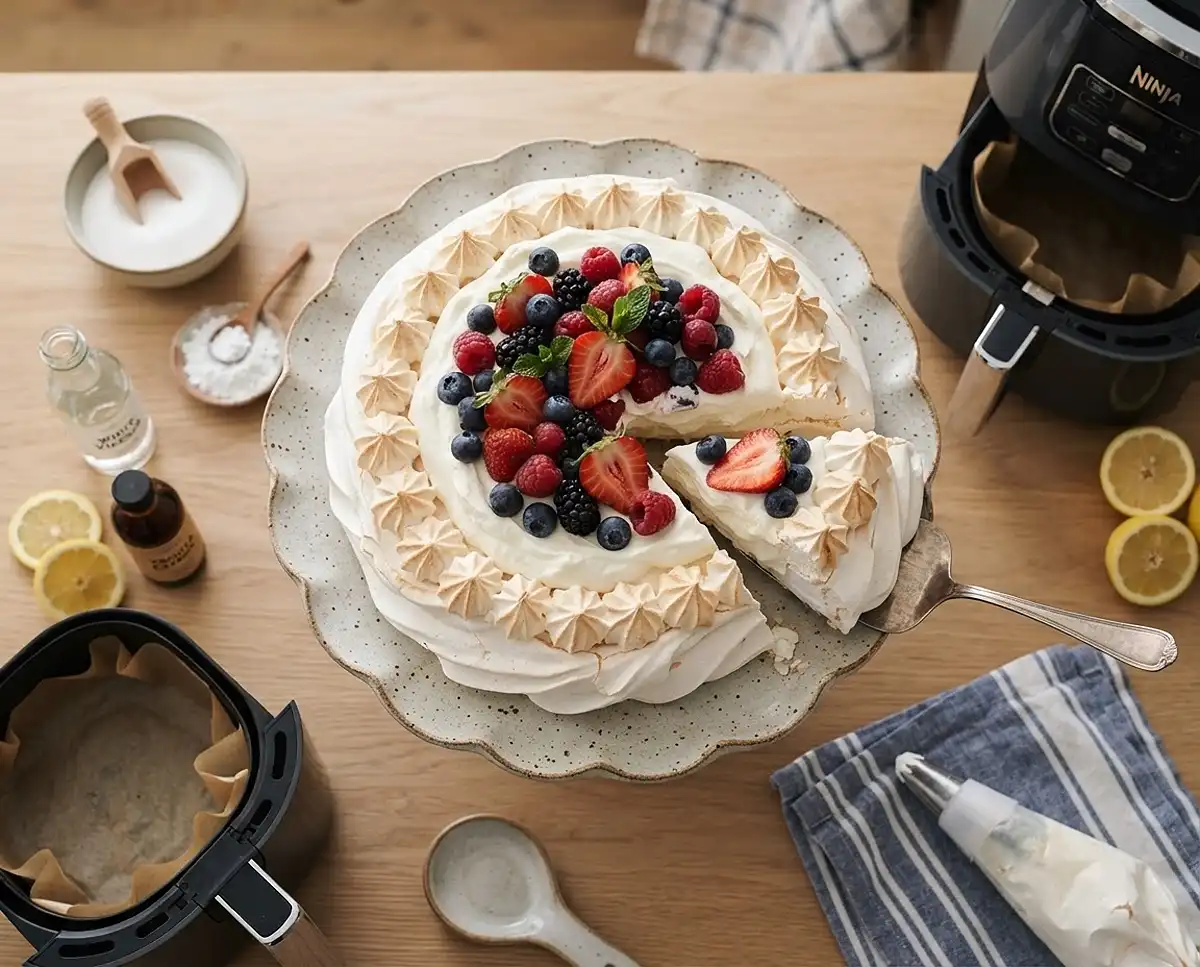
Air Fryer Meringue Cookies
Making fluffy, crispy meringue in an air fryer is surprisingly easy when you master one of three classic methods: French, Italian, or Swiss. Each creates a beautiful pavlova-style nest perfect for filling with cream and berries.
I’ll be honest—I was skeptical about making air fryer meringue at first. Could my little countertop appliance really handle something as delicate as meringue? Turns out, it absolutely can, and I’m here to show you exactly how to do it three different ways.
Table of Contents
What Is Air Fryer Meringue?
Air fryer meringue is a light, crispy dessert base made from whipped egg whites and sugar, baked at low temperatures in your air fryer instead of a traditional oven. The controlled heat and airflow in an air fryer create the perfect environment for drying out meringue into that signature crisp shell with a slightly chewy center. You can shape it into a pavlova nest and fill it with whipped cream and fresh fruit for an impressive dessert that looks like you spent hours in the kitchen.
The three methods—French, Italian, and Swiss—each bring something different to the table. French is the simplest and quickest. Italian is the most stable and glossy. Swiss sits right in the middle with a smooth, marshmallow-like texture. All three work beautifully in the air fryer, and once you understand the basics, you’ll feel confident choosing which method suits your needs.
Why You’ll Love This Air Fryer Meringue Recipe
This recipe gives you three proven techniques in one place, so you’re not hunting down separate recipes or wondering which method is best. Each one produces a stunning meringue nest that’s crispy on the outside and slightly soft inside—exactly what you want for a proper pavlova.
The air fryer makes this process faster and more energy-efficient than heating up your entire oven, especially during warmer months. You get precise temperature control, and the smaller space means more consistent results. Plus, there’s something deeply satisfying about pulling a perfectly golden meringue out of your air fryer and hearing that crisp tap when you touch the surface.
Whether you’re new to meringue or you’ve made it dozens of times, having all three methods at your fingertips means you can choose based on your schedule, confidence level, or how stable you need the meringue to be. French meringue takes minutes to whip together. Italian meringue is practically foolproof once baked. Swiss meringue gives you that silky, professional finish. All three taste absolutely divine.
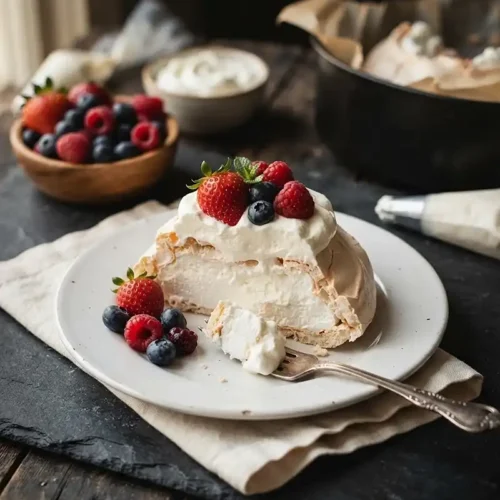
Air Fryer Meringue
Ingredients
French Meringue
- 5 Medium Egg Whites (5 Large US eggs, Or 4 large UK, 4 extra large US*)
- 220 grams Caster Sugar (7¾ oz, 1 cup Extra/Super Fine Sugar*)
- 1 tsp Cornflour (Corn Starch)
- 1 tsp White Vinegar
- 1 tsp Vanilla Extract
Swiss Meringue
- 5 Medium Egg whites (5 Large US eggs, Or 4 large UK, 4 extra large US*)
- 333 grams Granulated Sugar (11¾ oz, 1⅔ cup*)
Italian Meringue
- 5 Medium Egg Whites (5 Large US eggs, Or 4 large UK, 4 extra large US*)
- 225 grams Granulated Sugar (8 oz, 1⅛ cup – or 1 cup plus 2 tbsp*)
- 90 ml Water (3 fl oz, ⅓ cup or 6 tbsp)
Instructions
- Prepare The Mixer: For each method, ensure the mixing bowl & beaters are really clean and free of grease that can stop the egg whites whipping fully.
- After cleaning & drying, rub half a lemon (flesh side down), on the bottom and up the sides of the bowl, before rubbing onto the ends of the beating attachment(s). Place these down on some fresh kitchen paper/paper towel.
- To Make The French Meringue: Separate the eggs, making sure no yolk gets into the whites. Add the whites to the cleaned mixing bowl and attach the beating attachment. (Hand-mixer can be used but will take more time).
- Beat the whites on low to begin with till foamy, before increasing to medium speed & whipping till firm peaks form. Then slowly add in the caster (extra/super fine) sugar, 1 tbsp at a time until combined, thick, glossy & has stiff straight peaks. Sprinkle over cornflour/corn starch, vinegar & vanilla extract if using, and mix till combined. *For colouring the meringue, use a paste food colouring & add with these last ingredients.
- To Make The Swiss Meringue: Whisk egg whites & sugar in a heat-safe bowl, sitting on a cooking pot, but not touching the bottom (or use a double boiler or Bain Marie.) Add 1 inch (2½cm) of water to the cooking pot on low-medium heat & when barely simmering, place the bowl on top, making sure it does not touch the water.
- Whisk the egg whites and sugar continually, allowing the sugar to dissolve and the temperature to slowly come to 71°c/160°f. It should not be gritty, thick & tacky & then thin & frothy.
- Remove from the heat, and whisk the mixture in a stand-mixer on medium speed for about 20 minutes, until stiff straight peaks form. **If colouring the meringue, add the paste colouring at the firm peak stage and then beat to the stiff peak stage.
- To Make The Italian Meringue: Add the egg whites to the cleaned mixing bowl, beat on low-medium speed until firm bent peaks form.
- Now add the granulated sugar and the water to a cooking pot, on a medium heat & allow to dissolve. Let the mixture come to a fast boil and remove once the temperature is 120°c/250°f. **Any sugar sticking to the sides of the pot, use a pastry brush to brush it down.
- While whisking the egg whites, drizzle the syrup down the side of the mixing bowl, making sure it does not touch the beater. Continue whisking until you have shinny and stiff straight peaks. **If colouring the meringue, add before the syrup and while the syrup is coming to temperature & don’t use a liquid food colouring, paste is best.
- Prepare The Air Fryer: Cut baking/parchment paper to a 6″ (15¼ cm) circle. This will be placed on top of baking tray/baking sheet that will easily fit your own air fryer basket. I like to use the base of a 8″ (20cm) loose-based pie tin, that is about 7″ & gives me enough room to lift in and out of the small air fryer. Make sure too to not be baking directly on the bottom of the basket, to allow air to flow. Grease the paper in position so it does not slide, you can even use a little of the meringue mixture.
- Pipe The Meringue: Scoop the meringue mixture right away, into a piping bag fitted with a star-tipped nozzle (I used a closed star tip WIlton 2D), push the mixture down, twist closed and use a clip or peg to keep closed.
- Pipe a ring of rosettes around the paper circle, before roughly piping in the centre area and spread just this inner area flat, creating a base. Continue with 2 or 3 more rows of rosettes, on top of the first row, ending on the final row with tall peaks on each piped rosette. You can have the meringue wall straight or slightly inclined, with the rosettes overlapping a little on each tow, making the top row smaller than row one.
- Bake The Meringue: Carefully lower the meringue into the air fryer basket, making sure it is not on the very bottom of the basket to allow air to flow. Bake the pavlova @ 100°c/212°f for 20 minutes. (Preheat your air fryer if required). Reduce the temperature to 90°c/200°f & bake for 1 hr 30 mins till fully set & crispy to touch.
- **Alternatively, for meringue that is not crispy most of the way through, you can bake @120°c/250°f for 20-25 minutes. But a lower temperature is recommended for Italian meringue and coloured meringue in particular.
- Dry Out The Meringue: Continue the drying-out process by leaving the meringue in the air fryer with it switched off, for 1 hour 30 minutes. **For air fryers that cool very quickly, I recommend just baking for another 15 minutes at the lower temperature & then switched off & leaving for 90 minutes, without opening the air fryer during that time.
- Serving & Storing: When ready to serve, fill the pavlova meringue nest with whipped cream and fresh berries. Slice into 4 or 5 pieces and enjoy immediately.
- Store the unfilled meringue in the air fryer or oven until ready to fill and serve. Placing in the fridge or covering and the meringue loses its crispiness & becomes very sticky. Keep in the air fryer/oven overnight if needed until ready to serve and this will keep any heat or moisture away from the meringue. And only fill when ready to eat as the cream and fruit in particular can make the meringue softer and sticky.
- Whole pavlovas can be frozen (fully cooled & unfilled), if wrapped airtight & placed in a container for the freezing for up to 1 month. Uncoloured meringue mixture can be frozen – see details at website Freezeit.co.uk-freezing meringues.
Notes
Ingredients for Air Fryer Meringue
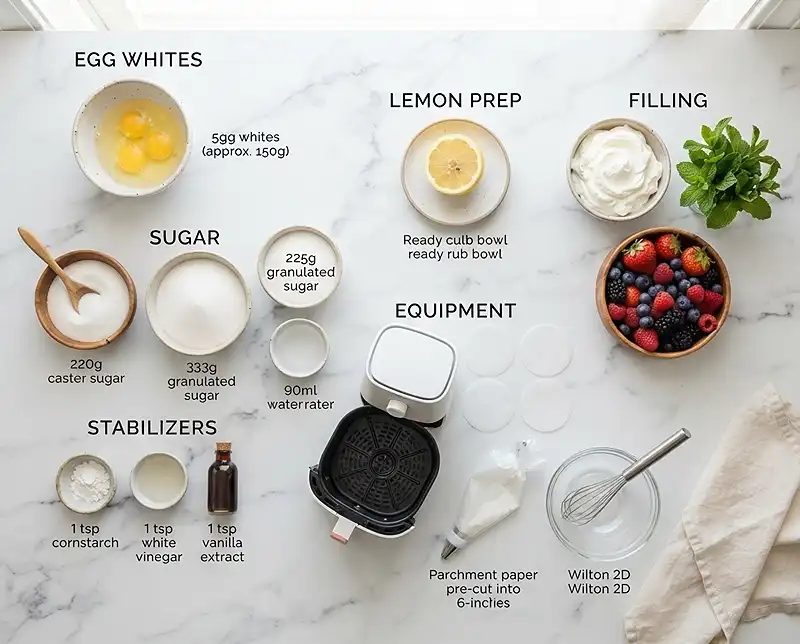
The beauty of meringue is its simplicity—just a few ingredients create something truly special. Here’s what you’ll need for each method, along with a couple of stabilizers for the French version.
| Ingredient | Amount | Notes |
|---|---|---|
| French Meringue | ||
| Medium Egg Whites | 5 (5 Large US eggs, or 4 Large UK, 4 Extra Large US) | Room temperature works best |
| Caster Sugar | 220g (7¾ oz, 1 cup Extra/Super Fine Sugar) | Fine texture dissolves quickly |
| Cornflour | 1 tsp (Corn Starch) | Helps stabilize and create chewiness |
| White Vinegar | 1 tsp | Adds stability and slight chew |
| Vanilla Extract | 1 tsp | Optional but recommended |
| Swiss Meringue | ||
| Medium Egg Whites | 5 (5 Large US eggs, or 4 Large UK, 4 Extra Large US) | Must be whisked with sugar over heat |
| Granulated Sugar | 225g (8 oz, 1⅛ cup or 1 cup plus 2 tbsp) | Dissolves during heating process |
| Italian Meringue | ||
| Medium Egg Whites | 5 (5 Large US eggs, or 4 Large UK, 4 Extra Large US) | Beaten separately from sugar syrup |
| Granulated Sugar | 333g (11¾ oz, 1⅔ cup) | Cooked into a hot syrup |
| Water | 90ml (3 fl oz, ⅓ cup or 6 tbsp) | Used to dissolve sugar for syrup |
Step-by-Step Instructions for Making Air Fryer Meringue
Let me walk you through each method step by step. Don’t skip the prep work—clean equipment is absolutely essential for successful meringue, and I’ll explain why as we go.
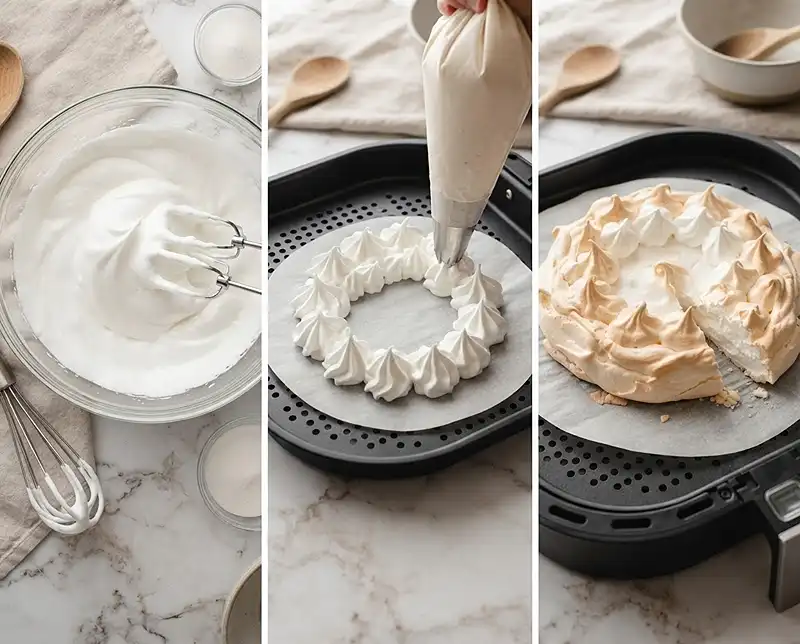
- Prepare the mixer: For each method, ensure your mixing bowl and beaters are completely clean and free of any grease, which can prevent egg whites from whipping properly. Even a tiny bit of oil will ruin your meringue’s volume.
- Clean with lemon: After cleaning and drying, rub half a lemon, flesh side down, on the bottom and up the sides of the bowl, then rub it onto the ends of your beating attachments. Place these down on fresh kitchen paper. The acid cuts through any remaining residue and gives you the best chance at stiff peaks.
- Start French meringue: Separate your eggs carefully, making absolutely sure no yolk gets into the whites. Add the whites to your cleaned mixing bowl and attach the beating attachment. A hand mixer works but will take longer than a stand mixer.
- Beat the whites: Beat on low speed to begin with until the whites turn foamy, then increase to medium speed and whip until firm peaks form. You’ll see the mixture transform from clear and liquid to white and fluffy.
- Add sugar gradually: Slowly add the caster sugar, one tablespoon at a time, until combined. This gradual addition is crucial—dump it all in at once and you’ll deflate your whites. Keep beating until the mixture is thick, glossy, and forms stiff straight peaks that stand up when you lift the beater.
- Finish French meringue: Sprinkle over the cornflour, vinegar, and vanilla extract if using, then mix until just combined. If you’re coloring your meringue, use paste food coloring and add it with these last ingredients—never use liquid coloring as the extra moisture can affect the texture.
- Start Swiss meringue: Whisk egg whites and sugar together in a heat-safe bowl that sits on a cooking pot without touching the bottom, or use a double boiler. Add about one inch of water to the pot and set it on low-medium heat.
- Heat and whisk: When the water is barely simmering, place your bowl on top, making sure it doesn’t touch the water. Whisk the egg whites and sugar continually, allowing the sugar to dissolve and the temperature to slowly reach 71°C/160°F. The mixture should feel smooth, not gritty, and will go from thick and tacky to thin and frothy.
- Beat Swiss meringue: Remove from heat and transfer to your stand mixer. Whisk on medium speed for about 20 minutes until stiff straight peaks form. This seems like forever, but it’s necessary for the structure. If coloring this meringue, add paste coloring at the firm peak stage, then beat to stiff peaks.
- Start Italian meringue: Add egg whites to your cleaned mixing bowl and beat on low-medium speed until firm bent peaks form. You want them stable but not at stiff peak stage yet.
- Make sugar syrup: Add granulated sugar and water to a cooking pot on medium heat and allow the sugar to dissolve completely. Let it come to a fast boil and remove once the temperature reaches 120°C/250°F. If any sugar sticks to the sides of the pot, use a wet pastry brush to brush it down—this prevents crystallization.
- Combine for Italian meringue: While whisking the egg whites, slowly drizzle the hot syrup down the side of the mixing bowl, making sure it doesn’t hit the beater directly or it’ll splatter. Continue whisking until you have shiny, stiff straight peaks. If coloring, add paste food coloring before adding the syrup, while the syrup is still coming to temperature.
- Prepare the air fryer: Cut a 6-inch circle of baking parchment paper. Place it on a baking tray or sheet that fits easily into your air fryer basket. I use the base of an 8-inch loose-based pie tin, which gives me about 7 inches of space and makes lifting in and out much easier. Make sure you’re not baking directly on the bottom of the basket—air needs to flow underneath.
- Grease the paper: Lightly grease the parchment in position so it doesn’t slide around. You can even use a tiny bit of your meringue mixture to stick it down.
- Prepare piping bag: Scoop the meringue mixture into a piping bag fitted with a star-tipped nozzle right away—don’t let it sit. I used a closed star tip Wilton 2D, which creates beautiful definition. Push the mixture down, twist the bag closed, and use a clip or peg to keep it sealed.
- Pipe the base: Pipe a ring of rosettes around the edge of your paper circle, then roughly pipe the center area and spread just this inner section flat with a spatula or the back of a spoon. This creates a stable base for your pavlova nest.
- Build the walls: Continue piping 2 or 3 more rows of rosettes on top of the first row, building upward. End the final row with tall peaks on each rosette for that classic pavlova look. You can keep the wall straight or angle it slightly inward, with rosettes overlapping a little on each row so the top is smaller than the bottom.
- Bake the meringue: Carefully lower your meringue into the air fryer basket, making sure it’s elevated off the very bottom to allow proper airflow. Preheat your air fryer if your model requires it, then bake at 100°C/212°F for 20 minutes.
- Continue baking: Reduce the temperature to 90°C/200°F and bake for 1 hour 30 minutes until the meringue is fully set and crispy to the touch. The low temperature dries it out without browning too much.
- Alternative baking method: For meringue that’s not crispy all the way through and has a softer, marshmallow-like center, you can bake at 120°C/250°F for 20-25 minutes instead. However, a lower temperature is recommended for Italian meringue and colored meringue in particular, as higher heat can cause uneven browning or weeping.
- Dry out completely: Continue the drying process by leaving the meringue in the air fryer with it switched off for 1 hour 30 minutes. This gradual cooling helps prevent cracking. For air fryers that cool very quickly, I recommend baking for an additional 15 minutes at the lower temperature, then switching off and leaving for 90 minutes without opening the air fryer during that time.
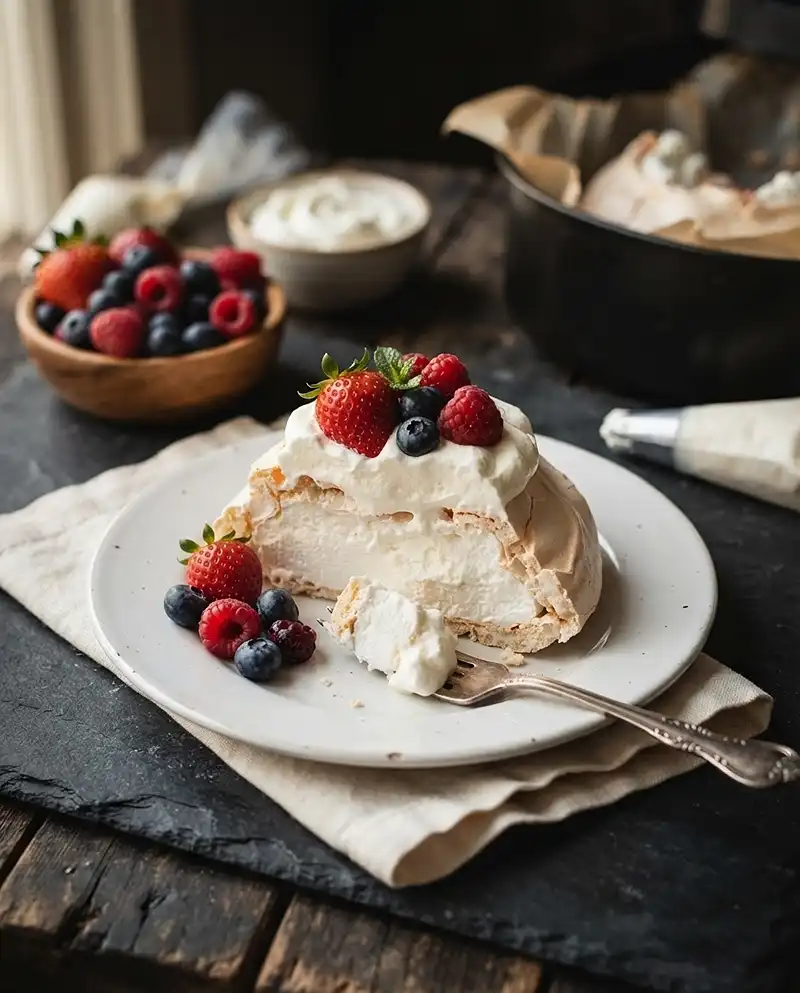
- Serve the pavlova: When ready to serve, fill your beautiful meringue nest with whipped cream and fresh berries. Slice into 4 or 5 pieces and enjoy immediately while the contrast between crispy meringue and soft cream is at its best.
Expert Tips for Perfect Air Fryer Meringue
After making meringue in the air fryer dozens of times using all three methods, I’ve learned a few tricks that make a real difference in your results.
Room temperature egg whites whip better. Cold eggs separate more easily, but room temperature whites create more volume. Separate them cold, then let them sit on the counter for 30 minutes before you start beating.
Use older eggs if you have them. The whites are slightly thinner and whip up with more volume than super fresh eggs. It seems counterintuitive, but eggs that are a week or two old actually work better for meringue.
Check your air fryer temperature accuracy. Some models run hotter or cooler than the display shows. If your meringue browns too quickly or takes much longer than expected, consider using an oven thermometer inside your air fryer basket to verify the actual temperature.
Humidity is your enemy. Don’t attempt meringue on a rainy or very humid day if you can avoid it. The moisture in the air prevents proper drying and can make your meringue weep or turn sticky. Dry, cool days are ideal.
Italian meringue is the most forgiving. Because the egg whites are partially cooked by the hot sugar syrup, this method produces the most stable meringue that’s less likely to weep or deflate. If you’ve had issues with other methods, try Italian next time.
Don’t rush the cooling process. Opening the air fryer too early causes temperature shock, which leads to cracks. Let it cool gradually in the turned-off air fryer, and your meringue will thank you with a smooth, crack-free surface.
A candy thermometer is essential for Swiss and Italian methods. Guessing temperatures leads to inconsistent results. Invest in a reliable candy or instant-read thermometer, and you’ll see immediate improvement in your success rate.
Variations on Air Fryer Meringue
Once you’ve mastered the basic recipe, there are so many fun ways to customize your air fryer meringue and make it your own.
Chocolate meringue: Fold in 2 tablespoons of cocoa powder after you reach stiff peaks. Sift it first to avoid lumps, and fold gently to maintain volume. The result is a beautiful marbled effect and rich chocolate flavor.
Lemon or almond meringue: Replace the vanilla extract with lemon extract or almond extract. Just half a teaspoon of almond goes a long way, so start small and taste the mixture before adding more.
Individual meringue nests: Instead of one large pavlova, pipe smaller individual nests about 3 inches across. Reduce the baking time to about 45 minutes at the lower temperature, then let them dry out for an hour.
Rainbow meringue: Divide your finished meringue into separate bowls and color each portion with paste food coloring. Layer the colors in your piping bag for a gorgeous rainbow swirl effect when you pipe.
Eton mess style: If your meringue cracks or doesn’t look perfect, don’t worry—break it into chunks and layer it with whipped cream and berries for a delicious Eton mess. No one will know it wasn’t intentional.
Flavored cream filling: Try different cream flavors or even ice cream as a filling. Mascarpone mixed with whipped cream adds richness, or fold in some lemon curd for a tangy contrast.
Troubleshooting Air Fryer Meringue
Even experienced bakers run into meringue problems sometimes. Here’s how to fix the most common issues.
Meringue won’t reach stiff peaks: This usually means grease contamination or a bit of yolk in your whites. Start over with thoroughly cleaned equipment and freshly separated eggs. Even a tiny drop of yolk contains enough fat to prevent proper whipping.
Meringue weeps or gets sticky: This happens when sugar hasn’t fully dissolved, you’ve underbaked it, or humidity got to it. Make sure you beat long enough for the sugar to dissolve completely—rub a bit between your fingers and it should feel smooth, not gritty. Store only in completely dry conditions.
Meringue cracks while baking: Usually caused by too high a temperature or cooling too quickly. Stick to the lower temperature settings and let it cool gradually in the turned-off air fryer. Some surface cracking is normal and actually quite charming on a pavlova.
Meringue browns too much: Your air fryer is running hot. Reduce the temperature by 10°C and check for doneness by feel rather than relying solely on time. The meringue should be dry and crisp but still pale.
Meringue is soft in the middle: If you want it completely crispy through, you need more drying time. Leave it in the air fryer longer after turning it off, or add another 30 minutes at the very lowest temperature your air fryer can manage.
Swiss or Italian meringue feels grainy: The sugar hasn’t dissolved properly. For Swiss, make sure you heat it long enough and the mixture reaches 160°F. For Italian, ensure your syrup reaches exactly 250°F—too cool and the sugar won’t fully incorporate.
Storage Guidelines for Air Fryer Meringue
Proper storage makes the difference between meringue that stays crispy for days and one that turns into a sticky mess overnight. Here’s exactly how to keep your creation perfect.
| Storage Method | Duration | Instructions |
|---|---|---|
| Air fryer/Oven (unfilled) | Overnight or up to 24 hours | Leave in the turned-off air fryer or transfer to a turned-off oven. This keeps heat and moisture away from the meringue. |
| Room temperature (unfilled) | 2-3 days | Store in an airtight container in a cool, dry place away from humidity. Do not refrigerate as moisture will make it sticky. |
| Freezer (unfilled) | Up to 1 month | Wrap completely cooled, unfilled meringue in plastic wrap, then place in an airtight container. Thaw at room temperature for 30 minutes before serving. |
| Filled meringue | Serve immediately | Once filled with cream and fruit, serve within 1-2 hours. The moisture from the filling will soften the meringue. |
| Meringue mixture (uncooked) | Not recommended for French; Italian/Swiss can freeze | Uncolored Italian or Swiss meringue can be piped onto parchment, frozen, then stored in freezer bags for up to 1 month. Bake from frozen, adding extra time. |
The most important rule: never refrigerate unfilled meringue. The moisture in the fridge is meringue’s worst enemy and will turn your crispy creation into a sticky, weepy mess within hours. If you need to make it ahead, store it in the air fryer or a completely dry container at room temperature.
Only fill your meringue nest right before serving. The cream and especially the fruit release moisture that will soften the base. If you’re serving this for a dinner party, have your whipped cream ready in the fridge and your fruit prepped, then assemble at the last possible moment. Your guests will be impressed by both the presentation and the perfect texture contrast.
Air Fryer Meringue FAQs
Can you make meringue in an air fryer?
Yes, you can make meringue in an air fryer. The key is to use a low temperature setting, typically between 200-225°F (93-107°C), and cook for 45-60 minutes. The air fryer’s circulating hot air helps dry out the meringues similar to a conventional oven, creating crisp, light meringues with a slight chewiness inside.
What temperature should I set my air fryer for meringue?
Set your air fryer to the lowest temperature possible, ideally between 200-225°F (93-107°C). Meringues require low, slow heat to dry out properly without browning or burning. If your air fryer doesn’t go below 250°F, you can still make meringues but will need to watch them more carefully and reduce the cooking time to prevent over-browning.
How long does it take to cook meringue in an air fryer?
Air fryer meringues typically take 45-60 minutes to cook at low temperature. The exact time depends on the size of your meringues and your specific air fryer model. Small meringue kisses may be done in 40-45 minutes, while larger meringues might need up to 60-70 minutes. They’re done when they easily lift off the parchment paper and feel dry to the touch.
Do I need to preheat the air fryer for meringues?
No, you should not preheat the air fryer for meringues. Starting with a cold air fryer and gradually bringing it up to temperature helps prevent the meringues from cracking or browning too quickly. Simply place your piped meringues in the cold air fryer basket, set the temperature, and let them cook slowly as the temperature rises.
Why are my air fryer meringues turning brown?
Meringues turn brown in an air fryer when the temperature is too high or they’re cooking too quickly. To prevent browning, ensure your temperature is set to 225°F or lower. You can also try placing a piece of aluminum foil loosely over the meringues if they start browning, or reduce the temperature further. Remember that meringues should dry out rather than bake, so low and slow is the best approach.
Final Thoughts on Making Air Fryer Meringue
There’s something truly magical about pulling a perfectly formed air fryer meringue out of your appliance and watching your family’s faces light up when you fill it with cream and berries. Whether you choose the quick simplicity of French meringue, the silky smoothness of Swiss, or the foolproof stability of Italian, you now have everything you need to create an impressive dessert that looks and tastes like it came from a fancy bakery.
The beauty of this recipe is that it scales beautifully for intimate dinners or larger gatherings, and once you’ve nailed the technique, you can experiment with flavors, colors, and different toppings to make it your signature dish. Don’t be discouraged if your first attempt isn’t perfect—meringue has a learning curve, but each time you make it, you’ll understand the texture cues and timing better.
I’d love to hear which method you try first and how your air fryer meringue turns out! And if you’re feeling adventurous, try pairing your meringue with air fryer salmon for a complete dinner party menu that shows off both savory and sweet cooking in your air fryer.
Now go preheat that air fryer and get ready to impress yourself with what you can create. Happy baking!