Oatmeal Creme Pie Cake Recipe
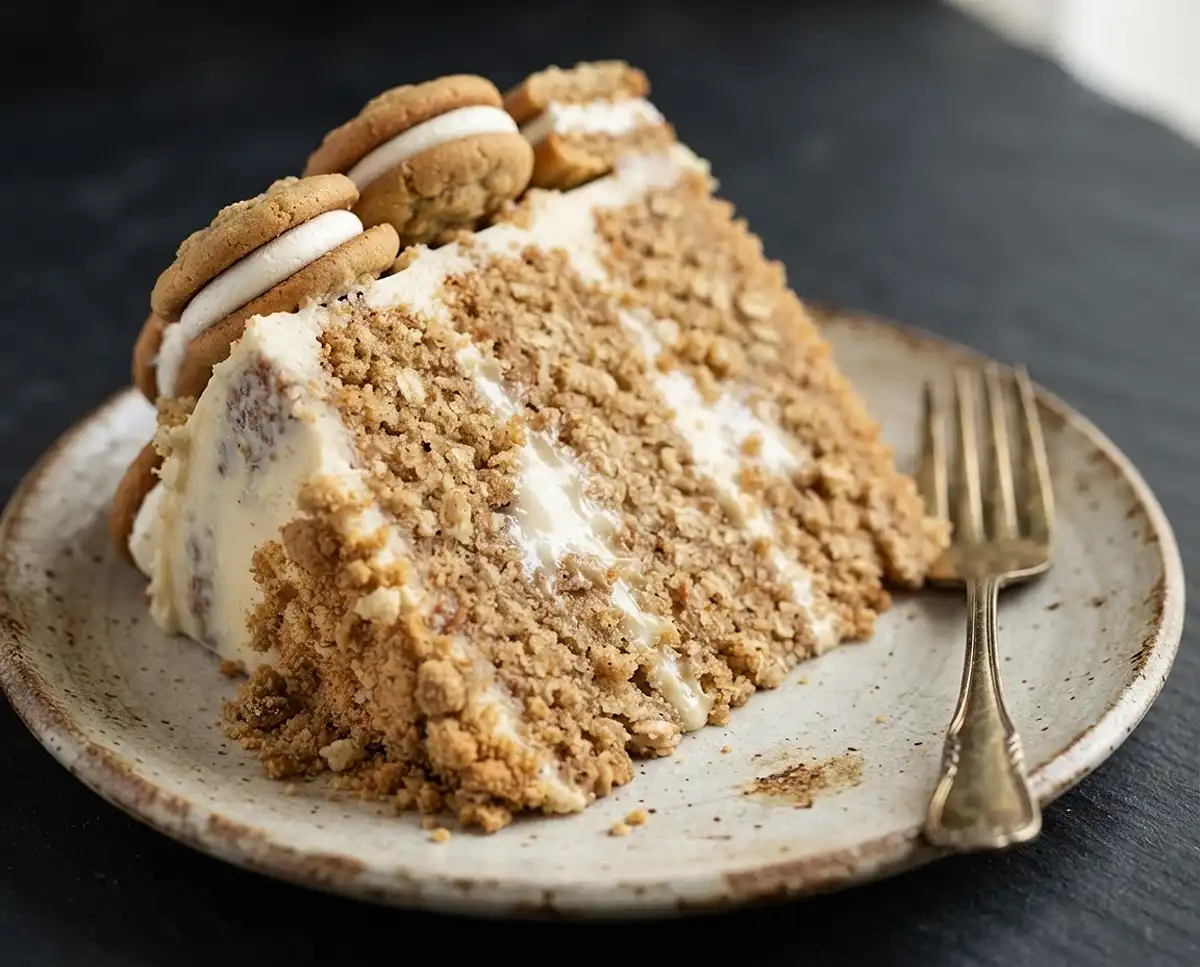
This oatmeal creme pie cake brings your favorite childhood snack to life in stunning layer cake form, with brown sugar oat cake layers, fluffy marshmallow creme filling, and swirls of vanilla buttercream that’ll make everyone at the table smile.
I’ve been obsessed with those soft, pillowy oatmeal creme pies since I was a kid, and one day it hit me—why not turn them into a showstopper cake? This recipe takes everything you love about the classic treat and transforms it into something you can actually serve at a birthday party without feeling like you just stacked snack cakes on a platter.
The cake itself is tender and warmly spiced with cinnamon, studded with finely ground oats that give it that authentic oatmeal cookie texture. Between each layer, you’ll find a cloud of marshmallow creme filling that’s sweet, sticky, and absolutely nostalgic. And the whole thing gets wrapped in a silky vanilla buttercream that ties it all together.
Table of Contents
Why You’ll Love This Oatmeal Creme Pie Cake
This isn’t just another layer cake—it’s a conversation starter. The moment you slice into it and people see that marshmallow filling oozing out, you’ll hear gasps. I promise.
The flavor is spot-on. If you’ve ever loved those store-bought oatmeal creme pies, this cake captures that exact flavor profile but with a homemade quality that’s worlds better. The brown sugar and cinnamon in the cake layers give you that warm, cozy oatmeal cookie vibe, while the marshmallow creme filling is sweet and fluffy without being cloying.
It’s also surprisingly doable, even if you’re not a cake decorating pro. The semi-naked frosting style is forgiving, and the crumbled oatmeal creme pies pressed onto the sides hide a multitude of sins. Plus, you can make the cake layers a day ahead and assemble the next day, which takes so much pressure off.
And let’s be honest—the nostalgia factor is off the charts. This cake brings people right back to their lunchbox days, but it’s fancy enough for a celebration. It’s the perfect balance of whimsy and elegance.
Oatmeal Creme Pie Cake
Ingredients
Brown Sugar Oatmeal Cake
- ¾ Cup 71g old-fashioned rolled oats, ground into small pieces (quick oats work as well)
- 1 ¾ Cups 186g sifted cake flour* (DIY recipe in notes)
- 1 ½ tsp baking powder
- ¼ tsp baking soda
- 1 tsp ground cinnamon
- ½ tsp salt
- ½ Cup 113g unsalted butter, room temperature
- 2 Tbsp 30ml vegetable oil
- ½ Cup 100g granulated sugar
- ½ Cup 100g packed brown sugar (light or dark)
- 2 large eggs room temperature
- ¼ Cup 60g sour cream, room temperature
- 2 tsp pure vanilla extract
- 1 Cup 240ml whole milk, room temperature
Marshmallow Creme Filling
- ½ Cup 113g unsalted butter, room temperature
- 1 Cup 105g powdered sugar
- 7 Oz 198g Jet-Puffed Marshmallow Creme**
- 1 tsp pure vanilla extract
- pinch of salt or to taste
Vanilla Buttercream Frosting
- 1 Cup 226g unsalted butter, room temperature
- 3 ½ Cups 420g powdered sugar
- 2 tsp pure vanilla extract
- 2 Tbsp whole milk room temperature
- pinch of salt or to taste
Decoration
- 2 Oatmeal Creme Pies quartered
- 2 Oatmeal Creme Pies crumbled
Instructions
- — Make the Brown Sugar Oatmeal Cake —
- Preheat the oven to 350°F. Prepare three 6-inch cake pans or two 8-inch cake pans by spraying the sides with baking spray and fitting a wax or parchment paper circle to the bottom of the pans. Alternatively, you can grease and lightly flour the pans.
- Using a food processor, pulse the old-fashioned rolled oats into small pieces and place them into a medium bowl. Add the cake flour, baking powder, baking soda, cinnamon, and salt. Whisk to combine and set aside.
- In the bowl of your stand mixer (a handheld mixer works fine too!), cream the butter on high until creamy, about 2 minutes. Add the vegetable oil, granulated sugar, and brown sugar and continue mixing on medium-high for another 2 minutes. Scrape down the bowl and paddle.
- Turn the mixer to low speed and mix in the eggs one at a time. Add the sour cream and vanilla, then turn the mixer to high speed and beat for 1 minute.
- With the mixer on low speed, add in the dry ingredients and mix until just combined, then add the milk in a slow stream and mix until just incorporated. Scrape down the sides and bottom of the bowl and give it a few stirs by hand to make sure there are no large lumps. The batter will be thick.
- Divide the batter evenly between the prepared cake pans and bake for 30-35 minutes. They’re done when they spring back to the touch and a toothpick inserted into the middle comes out clean. Let the cakes cool in the pan for five minutes before turning them out onto a wire rack for an additional few hours of cooling. Make sure they’re entirely room temperature before applying any frosting.
- — Make the Marshmallow Creme Filling —
- In the bowl of a stand mixer with the paddle attachment or using a hand mixer, whip the butter on high speed until smooth and creamy, about 5 minutes. Turn the mixer to low speed and add the powdered sugar. Mix until fully combined, about 2 minutes.
- Add the Jet-Puffed Marshmallow Creme, vanilla, and salt. Continue to mix on low speed until combined and uniform, 1-2 minutes.
- — Make the Vanilla Buttercream Frosting —
- With a hand mixer or paddle attachment on your stand mixer, cream the butter on medium-high until it’s creamy and light (almost white) in color. About 7 minutes.
- Turn the mixer to low speed and add the sifted powdered sugar one cup at a time, scraping down after each addition and making sure each cup is fully incorporated before adding the next one.
- Add the vanilla, milk, and salt and mix on low for another minute until fully incorporated, 1-2 minutes.
- — Assembly —
- Once the cake layers have cooled completely, level and torte each layer to your desired height. Add about 1 Cup of vanilla buttercream into a piping bag and snip off 1/2 inch opening.
- Place the first cake layer on a turntable and pipe a circle of vanilla buttercream around the edge of the cake layer. Fill in the center with half of the marshmallow cream filling. Here’s a detailed tutorial on this filling method in case this is your first time working with a soft filling.
- Place the next cake layer on top and repeat the process of piping the vanilla buttercream and filling in the center with the rest of the marshmallow cream filling. Place the final layer on top, upside down so that the bottom of the cake layer is the top of the cake. Crumb coat the cake with vanilla buttercream and place it in the refrigerator for at least 20 minutes to let everything set up.
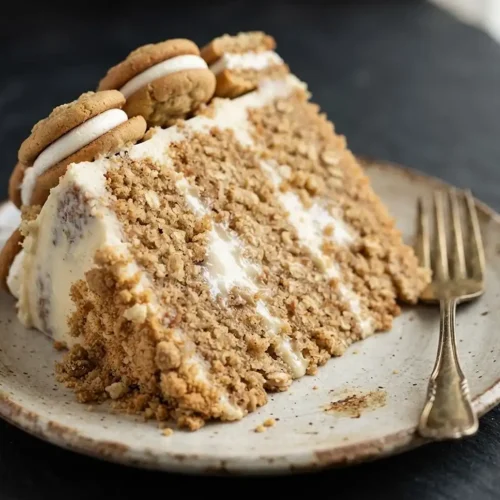
- To create the look pictured, use an icing smoother to create a semi-naked frosting finish with vanilla buttercream, then press the crumbled Oatmeal Creme Pies onto the bottom third of the cake. Place the cake into the refrigerator for about 10 minutes to let the frosting set while you add the rest of the vanilla buttercream into a piping bag fitted with Wilton Tip 4B. Pipe swirls around the top edge of the cake, leaving about 1/4 inch between each swirl, then place a quartered section of Oatmeal Creme Pie in between each swirl.
Notes
Ingredients You’ll Need for Oatmeal Creme Pie Cake
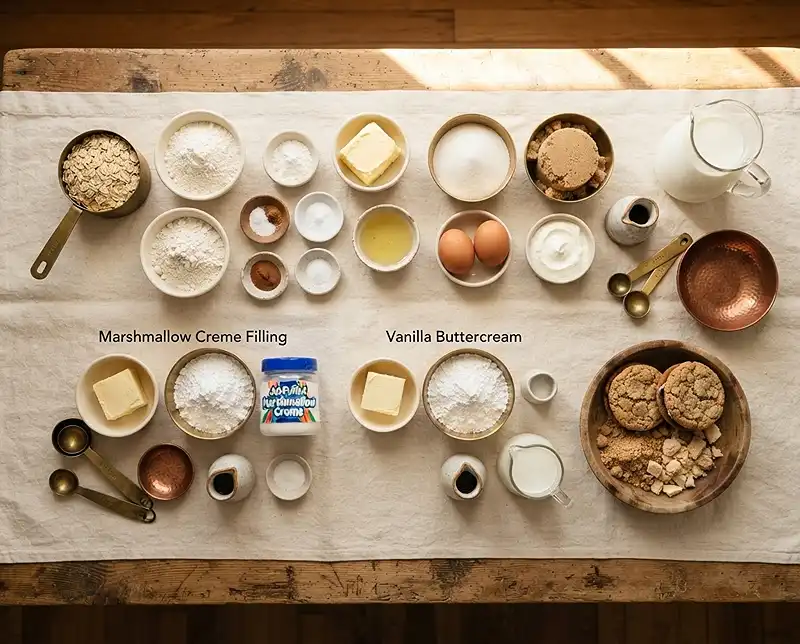
This recipe has three components—the cake layers, the marshmallow filling, and the buttercream frosting—so the ingredient list looks long, but most of it is pantry staples you probably already have. Here’s what you’ll need and why each ingredient matters.
| Ingredient | Amount | Notes |
|---|---|---|
| Old-fashioned rolled oats, ground | 3/4 cup (71g) | Quick oats work too; pulse in a food processor until coarsely ground |
| Cake flour, sifted | 1 3/4 cups (186g) | Creates a tender crumb; see notes for DIY version |
| Baking powder | 1 1/2 tsp | Make sure it’s fresh for proper rise |
| Baking soda | 1/4 tsp | Works with the sour cream for lift and tenderness |
| Ground cinnamon | 1 tsp | Adds warmth and that oatmeal cookie flavor |
| Salt | 1/2 tsp | Balances the sweetness |
| Unsalted butter, room temp | 1/2 cup (113g) | For the cake layers; must be soft for proper creaming |
| Vegetable oil | 2 Tbsp (30ml) | Keeps the cake moist for days |
| Granulated sugar | 1/2 cup (100g) | Provides sweetness and structure |
| Brown sugar, packed | 1/2 cup (100g) | Light or dark both work; adds moisture and molasses flavor |
| Large eggs, room temp | 2 | Room temperature eggs incorporate better |
| Sour cream, room temp | 1/4 cup (60g) | Creates a tender, moist crumb |
| Pure vanilla extract | 2 tsp | For the cake; use real vanilla for best flavor |
| Whole milk, room temp | 1 cup (240ml) | Brings the batter together; don’t skip the room temp step |
| Unsalted butter (filling) | 1/2 cup (113g) | For the marshmallow creme filling |
| Powdered sugar (filling) | 1 cup (105g) | Sweetens and stabilizes the filling |
| Jet-Puffed Marshmallow Creme | 7 oz (198g) | The star of the filling; use the jarred kind |
| Vanilla extract (filling) | 1 tsp | Enhances the marshmallow flavor |
| Salt (filling) | Pinch | Cuts the sweetness |
| Unsalted butter (frosting) | 1 cup (226g) | For the buttercream; room temperature is crucial |
| Powdered sugar (frosting) | 3 1/2 cups (420g) | Sift if lumpy for smooth buttercream |
| Vanilla extract (frosting) | 2 tsp | The main flavor in the buttercream |
| Whole milk (frosting) | 2 Tbsp | Thins the buttercream to spreading consistency |
| Salt (frosting) | Pinch | Balances the sweetness |
| Oatmeal Creme Pies (quartered) | 2 | For decoration on top |
| Oatmeal Creme Pies (crumbled) | 2 | For pressing onto the sides |
The cake flour is important here because it creates that soft, delicate crumb that mimics the texture of the original snack cake. If you don’t have cake flour, you can make your own by measuring out 1 3/4 cups of all-purpose flour, removing 3 1/2 tablespoons of it, and replacing those tablespoons with cornstarch. Sift it together a few times and you’re good to go.
Don’t skip the step of bringing your butter, eggs, sour cream, and milk to room temperature. Cold ingredients won’t emulsify properly, and you’ll end up with a denser cake. I usually set everything out on the counter about an hour before I start baking.
Step-by-Step Instructions
This cake comes together in three stages, but none of them are difficult. Just take your time with each component and you’ll end up with a cake that looks like it came from a fancy bakery.
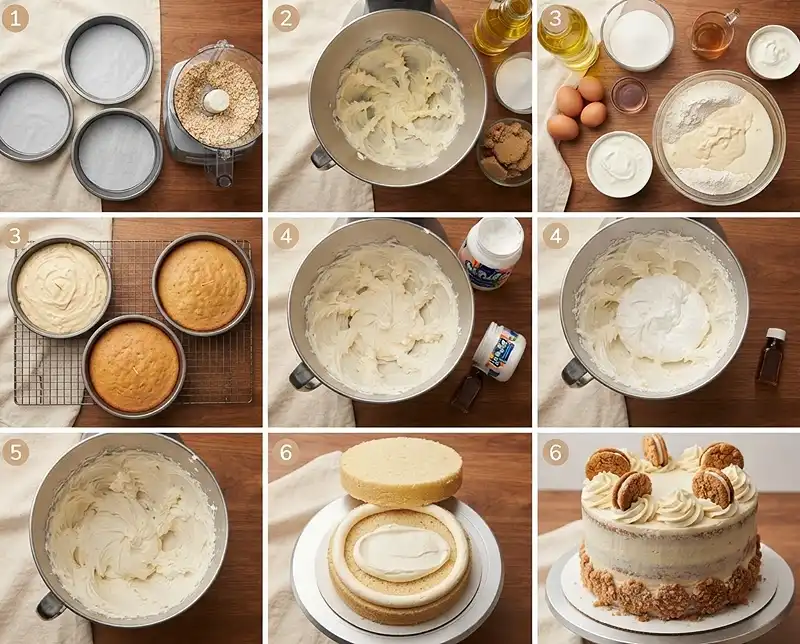
- Preheat and prep your pans. Set your oven to 350°F and get your cake pans ready. I used three 6-inch pans for a tall, dramatic cake, but two 8-inch pans work just as well if that’s what you have. Spray the sides with baking spray and line the bottoms with parchment paper circles. This ensures the cakes release cleanly every single time.
- Grind the oats. Pulse your old-fashioned rolled oats in a food processor until they’re broken into small pieces but not quite flour. You want some texture here—it should look like coarsely ground oats with some visible flakes. Quick oats work too if that’s what you have on hand.
- Mix the dry ingredients. In a medium bowl, whisk together the ground oats, sifted cake flour, baking powder, baking soda, cinnamon, and salt. Set this aside while you work on the wet ingredients.
- Cream the butter and sugars. In your stand mixer bowl (or using a hand mixer), beat the butter on high speed until it’s creamy and smooth, about 2 minutes. Add the vegetable oil, granulated sugar, and brown sugar, then continue mixing on medium-high for another 2 minutes. The mixture should look light and fluffy. Scrape down the bowl and paddle to make sure everything’s incorporated.
- Add the eggs and sour cream. Turn the mixer to low and add the eggs one at a time, letting each one incorporate before adding the next. Mix in the sour cream and vanilla, then crank the mixer up to high speed and beat for 1 minute. This step incorporates air and creates a lighter texture.
- Alternate dry ingredients and milk. With the mixer on low, add the dry ingredients and mix until you can’t see any more flour streaks. Then add the milk in a slow, steady stream while the mixer runs. Mix just until incorporated—overmixing leads to tough cake. Scrape down the sides and bottom of the bowl and give it a few gentle stirs by hand. The batter will be thick and almost mousse-like.
- Bake the cakes. Divide the batter evenly between your prepared pans. I like to use a kitchen scale to make sure each pan gets the same amount. Bake for 30-35 minutes, until the tops spring back when you touch them and a toothpick inserted in the center comes out clean or with just a few moist crumbs. Let them cool in the pans for 5 minutes, then turn them out onto a wire rack to cool completely. This usually takes a few hours—don’t rush it.
- Make the marshmallow creme filling. While the cakes cool, you can make your fillings and frosting. In a stand mixer with the paddle attachment, whip the butter on high speed until it’s smooth and creamy, about 5 minutes. It should look almost white and very fluffy.
- Add sugar and marshmallow creme. Turn the mixer to low and add the powdered sugar, mixing until fully combined, about 2 minutes. Add the Jet-Puffed Marshmallow Creme, vanilla, and a pinch of salt. Mix on low speed until everything is combined and uniform, 1-2 minutes. The filling will be soft and fluffy—almost like mousse.
- Make the vanilla buttercream. In a clean mixer bowl (or just wash and dry the one you’ve been using), cream the butter on medium-high speed until it’s very light in color, almost white. This takes about 7 minutes and it’s worth the wait—this is what creates silky buttercream.
- Add the powdered sugar gradually. Turn the mixer to low and add the sifted powdered sugar one cup at a time. Scrape down the bowl after each addition and make sure each cup is fully incorporated before adding the next. This prevents a powdered sugar cloud from exploding all over your kitchen.
- Finish the buttercream. Add the vanilla, milk, and a pinch of salt. Mix on low for another 1-2 minutes until everything’s incorporated and the buttercream is smooth and spreadable. If it seems too thick, add another tablespoon of milk. If it’s too thin, add more powdered sugar.
- Level and torte the cake layers. Once your cake layers are completely cool, use a serrated knife or cake leveler to trim off any domed tops so they’re flat. You can also split each layer horizontally if you want more layers, but that’s totally optional.
- Prep for assembly. Add about 1 cup of vanilla buttercream to a piping bag and snip off a 1/2 inch opening at the tip. Place your first cake layer on a turntable or cake board.
- Create a buttercream dam. Pipe a circle of vanilla buttercream around the outer edge of the cake layer, creating a barrier. This dam keeps the soft marshmallow filling from squishing out the sides. Fill the center with half of the marshmallow creme filling, spreading it evenly within the buttercream border.
- Add the second layer. Place your next cake layer on top and repeat the process—pipe the buttercream dam around the edge, then fill the center with the remaining marshmallow creme filling.
- Add the final layer. Place the final cake layer on top, flipped upside down so the flat bottom becomes the top of your cake. This gives you a perfectly flat surface to frost.
- Crumb coat the cake. Use a thin layer of vanilla buttercream to cover the entire cake. This doesn’t have to be perfect—it’s just trapping all the crumbs so your final layer of frosting is pristine. Pop the whole thing in the refrigerator for at least 20 minutes to let the crumb coat set up.
- Create the semi-naked finish. Use an icing smoother or offset spatula to apply another thin layer of vanilla buttercream, leaving some of the cake visible through the frosting. This semi-naked style is very forgiving and looks beautifully rustic. Press the crumbled oatmeal creme pies onto the bottom third of the cake, creating a textured border.
- Decorate the top. Chill the cake for about 10 minutes to let the frosting set, then add the remaining vanilla buttercream to a piping bag fitted with a Wilton Tip 4B (or any large star tip). Pipe swirls around the top edge of the cake, leaving about 1/4 inch between each swirl. Place a quartered piece of oatmeal creme pie between each swirl for that final wow factor.
Expert Tips for the Best Results
After making this oatmeal creme pie cake more times than I can count, I’ve learned a few tricks that make a huge difference in the final result.
Room temperature ingredients are non-negotiable. I know I mentioned this already, but it’s so important I’m saying it again. Cold butter won’t cream properly, cold eggs can cause your batter to curdle, and cold milk can make your batter seize up. Set everything out an hour before you start, or use the quick tricks—eggs can sit in warm water for 5 minutes, butter can be cut into small pieces to soften faster, and milk can be microwaved for 10-15 seconds.
Don’t skip sifting the cake flour. Cake flour clumps easily, and those lumps won’t break down in your batter. Sifting also aerates the flour, which contributes to that tender, delicate crumb.
The marshmallow creme filling is intentionally soft. It’s supposed to be almost spreadable, like a very thick frosting. If yours seems too loose, you can add a bit more powdered sugar, but resist the urge to make it too stiff or you’ll lose that signature fluffy texture.
When assembling, work on a turntable if you have one. It makes frosting so much easier. If you don’t have one, you can improvise with a large plate set on top of a bowl, but honestly, turntables are worth the investment if you bake cakes regularly.
Chill between steps. Whenever the frosting starts to feel soft or the cake feels wobbly, pop it in the fridge for 10-15 minutes. This makes everything easier to work with and helps your decorations stay crisp.
Use a bench scraper or icing smoother for that professional finish. You can get away with an offset spatula, but a smoother gives you those clean, sharp edges that make the cake look bakery-quality.
Variations to Try
Once you’ve mastered the classic version, there are so many fun ways to customize this cake.
Make it chocolate. Swap out 1/4 cup of the cake flour for cocoa powder to create chocolate oatmeal cake layers. It sounds weird, but chocolate and oatmeal are actually an amazing combination.
Add nuts. Fold 1/2 cup of finely chopped pecans or walnuts into the cake batter for extra texture and nutty flavor. This makes it taste more like an oatmeal raisin cookie’s sophisticated cousin.
Try cream cheese frosting. If vanilla buttercream isn’t your thing, you can frost this cake with cream cheese frosting instead. The tanginess pairs beautifully with the sweet marshmallow filling.
Make it a sheet cake. Not in the mood for layer cake drama? Bake this batter in a 9×13 inch pan for 35-40 minutes, let it cool, then spread the marshmallow filling on top and finish with swirls of buttercream. Much easier, still delicious.
Add mix-ins. Fold chocolate chips, butterscotch chips, or even dried fruit into the cake batter for extra flavor and texture.
If you love layered cakes, you might also enjoy this berry chantilly cake recipe or this angel food cake with lemon pie filling.
Troubleshooting Common Issues
Even experienced bakers run into problems sometimes. Here’s how to fix the most common issues with this recipe.
My cake layers are dense. This usually means you overmixed the batter after adding the flour, or your leavening agents (baking powder and baking soda) were old. Make sure you mix just until the flour disappears, and check the expiration dates on your baking powder and soda. They lose potency over time.
The marshmallow filling is too runny. This can happen if your butter was too soft or if you didn’t beat it long enough at the beginning. Try adding more powdered sugar, 1/4 cup at a time, until it firms up. You can also chill it in the fridge for 15-20 minutes to help it set.
The marshmallow filling is leaking out the sides. You probably didn’t pipe a tall enough buttercream dam, or you added too much filling. The buttercream border needs to be at least as tall as the filling layer to contain it properly.
My buttercream is grainy. This means the powdered sugar didn’t fully dissolve. Beat it on medium speed for another 3-5 minutes—the friction will help dissolve any remaining sugar crystals. You can also add a tablespoon of milk or cream to help smooth it out.
The cake is sticking to the pans. Make sure you’re using parchment paper on the bottom of the pans, not just greasing them. Cakes with this much sugar and moisture content can stick stubbornly. Let them cool for the full 5 minutes before trying to turn them out.
The frosting is melting. Your kitchen is probably too warm. Buttercream softens quickly in heat. Work in a cool room, and don’t hesitate to chill the cake between steps. If it’s summer and your house is hot, consider frosting the cake in stages, chilling thoroughly between each one.
Storage and Make-Ahead Tips
This cake actually gets better after a day in the fridge. The flavors meld together and the texture becomes even more tender and moist.
| Storage Method | Duration | Instructions |
|---|---|---|
| Room Temperature | 1 day | Cover loosely with plastic wrap or place under a cake dome; best for serving day |
| Refrigerator | 5-7 days | Cover tightly with plastic wrap or store in an airtight container; bring to room temp before serving |
| Freezer (unfrosted layers) | 3 months | Wrap each layer tightly in plastic wrap, then foil; thaw overnight in fridge before assembling |
| Freezer (assembled cake) | 1 month | Freeze uncovered until firm, then wrap in plastic and foil; thaw overnight in fridge |
Because of the dairy in the buttercream and marshmallow filling, I recommend storing this cake in the refrigerator if you’re not serving it within a few hours. Just take it out about 30 minutes before you plan to serve so it can come to room temperature. Cold cake tastes fine, but room temperature cake has better texture and more pronounced flavor.
If you want to make this ahead, you can bake the cake layers up to 2 days in advance. Wrap them tightly in plastic wrap and store at room temperature. You can also make the marshmallow filling and buttercream a day ahead and store them in the fridge. Just bring the buttercream back to room temperature and re-whip it before using—it might look curdled when cold, but it’ll come back together once it warms up and gets whipped.
The assembled cake freezes surprisingly well. Once it’s fully decorated, place it in the freezer uncovered for about an hour until the frosting is firm, then wrap the whole thing tightly in plastic wrap and a layer of foil. It’ll keep for up to a month. Thaw it overnight in the refrigerator, still wrapped, then bring it to room temperature before serving.
Individual slices can be frozen too. Wrap each slice in plastic wrap and store in a freezer bag for up to 3 months. This is perfect if you don’t want to commit to eating the whole cake quickly. According to the FDA’s food safety guidelines, properly wrapped cakes maintain their quality for several months in a consistently cold freezer.
Oatmeal Creme Pie Cake FAQs
What is an oatmeal creme pie cake?
An oatmeal creme pie cake is a dessert inspired by the popular Little Debbie snack. It typically consists of moist oatmeal cake layers filled and frosted with a sweet vanilla or marshmallow buttercream, recreating the flavors of the classic oatmeal creme pie cookie sandwich in cake form.
How do you store oatmeal creme pie cake?
Store oatmeal creme pie cake in an airtight container at room temperature for up to 2 days, or refrigerate it for up to 5 days. The cake can also be frozen for up to 3 months when wrapped tightly in plastic wrap and aluminum foil. Bring refrigerated cake to room temperature before serving for the best flavor and texture.
Can I make oatmeal creme pie cake ahead of time?
Yes, you can make oatmeal creme pie cake ahead of time. Bake the cake layers up to 2 days in advance, wrap them tightly, and store at room temperature or refrigerate. You can also freeze unfrosted layers for up to a month. Prepare the frosting the day before and refrigerate, then bring to room temperature before assembling and decorating the cake.
What type of oats should I use for oatmeal creme pie cake?
Old-fashioned rolled oats work best for oatmeal creme pie cake as they provide the right texture and authentic oatmeal flavor. Quick oats can be used as a substitute but may result in a slightly different texture. Avoid using steel-cut oats as they are too coarse and won’t soften properly during baking.
What frosting is best for oatmeal creme pie cake?
A classic vanilla buttercream or marshmallow frosting works best for oatmeal creme pie cake to mimic the original snack cake filling. Marshmallow frosting provides the most authentic flavor, made with marshmallow fluff or marshmallow creme. Some recipes also use a cream cheese frosting, though vanilla buttercream is the most traditional choice for replicating the sweet creme filling.
Final Thoughts
This oatmeal creme pie cake is one of those recipes that makes people genuinely excited. There’s something about the combination of nostalgia and elegance that just works. Every time I make it for a gathering, it becomes the centerpiece of the dessert table—and the conversation.
The best part is that it tastes even better than it looks. That brown sugar oat cake is tender and flavorful, the marshmallow filling is sweet and cloud-like, and the vanilla buttercream ties everything together without being too heavy. It’s indulgent without being overwhelming, which is exactly what you want in a celebration cake.
Don’t be intimidated by the multiple components. Take it one step at a time, and before you know it, you’ll have a gorgeous cake that looks like it came from a professional bakery. And honestly, once you make this oatmeal creme pie cake once, you’ll find yourself looking for excuses to make it again.
If you’re looking for more impressive cakes that are surprisingly doable, check out this simple yogurt cake recipe for something on the easier side, or try this baked spaghetti pie if you want to branch out into savory territory.
Give this recipe a try and let me know how it turns out. I’d love to hear about your variations and see photos of your finished cake. Happy baking!