How to Make Water Kefir
A bubbly, probiotic-rich drink you can make at home for pennies, water kefir is tangy, lightly sweet, and endlessly customizable with your favorite fruits.
I still remember the first time I tried water kefir at a friend’s house—I was hooked by the fizzy, slightly tart flavor that tasted like a healthier soda. When she told me she made it herself, I thought it would be complicated. Turns out, it’s one of the easiest fermented drinks you can make at home.
Once you get your hands on some water kefir grains (which aren’t actually grains at all, but little translucent SCOBY clusters), you’re basically set for life. They keep growing, you keep making fresh batches, and your gut keeps thanking you.
Table of Contents
What Is Water Kefir?
Water kefir is a naturally fermented, probiotic beverage made by combining water kefir grains with sugar water. The grains are living cultures of bacteria and yeast that consume the sugar and produce beneficial probiotics, enzymes, and a bit of carbonation. The result is a tangy, lightly effervescent drink that’s much lower in sugar than what you started with—because the grains literally eat most of it during fermentation.
Unlike milk kefir, water kefir is dairy-free and has a milder, more refreshing flavor. It’s also incredibly forgiving, making it perfect for beginners who want to dip their toes into fermentation without worrying about precise temperatures or sterilized equipment.
The real magic happens during the second fermentation, when you add fresh fruit. That’s when the flavors bloom and the bubbles really start to build. Think of it like homemade probiotic soda—but way better for you.
Why You’ll Love This Water Kefir Recipe
This recipe walks you through both fermentation stages so you end up with a fizzy, flavorful drink that rivals anything you’d buy at the store. Here’s why it’s worth making:
It’s incredibly affordable. Once you have your grains, each batch costs less than a dollar to make. Compare that to $4 bottles of kombucha, and you’ll see why so many people are hooked.
You control the sweetness and flavor. Want it tangier? Ferment longer. Prefer it sweeter? Cut the fermentation time. Add strawberries, ginger, mango, or whatever sounds good that week.
It’s gut-friendly. Water kefir is loaded with probiotics that support digestion and overall gut health. The fermentation process creates beneficial bacteria that help balance your microbiome.
It’s naturally bubbly. No fancy equipment needed. The fermentation creates its own carbonation, giving you that satisfying fizz without a soda machine.
Your grains keep multiplying. As you make batch after batch, your grains grow. You’ll have enough to share with friends or keep multiple jars going at once.
Water Kefir
Ingredients
First Fermentation
- ½ cup alive water kefir grains
- 8 cups tap or well water- divided
- ½ cup sugar divided organic cane sugar, coconut sugar, or a mixture-see notes. ( FYI this will be metabolized or consumed by the kefir grains, so it will NOT end up in the finished drink!)
- 2 lemon wedges optional
- 2 prunes or dates, or or dried fruit optional
Second Fermentation
- 1 -2 cups fresh fruit- berries stonefruit (peaches, plums, nectarines), apples, pears, mango, pineapple, etc.
Instructions
- Fill two, half-gallon mason jars with 4 cups cool tap water in each.
- Add ¼ cup sugar in each, stirring to mostly dissolve. ( Feel free to make sugar mixture first)
- Add ¼ cup kefir grains to each jar.
- Add ¼ cup kefir water to each jar (optional—you can obviously only do this after your first batch of kefir, so just leave it out for the first batch.)
- Add ¼ of a lemon wedge to each jar.
- Add 1 prune to each jar.
- Cover both jars with a thin kitchen cloth and leave on the counter for 2-4 days. 2 days if warm out, 3-4 days if cold. This 2-4 day time period allows the grains “to eat” the sugar, so most of the sugar will actually be metabolized, and not end up in the drink itself. You want the water to get the point where it is just slightly sweet, and nicely tangy. So taste it before moving to the next step. If it tastes very sweet, it’s not ready. When it’s cold this takes longer.
- After 2-3 days the kefir will have fermented slightly, taste tangy or lightly sour, but there is one more step which gives it flavor and makes it effervescent and bubbly.
- Get your third jar ready and place 1- 1 1/2 cups fresh, ripe fruit in it— like fresh berries, peaches, mango, pineapple, plums, concord grapes, apples, pears — I muddle them up a bit to release their juices. Add a few thin slices of ginger, or whole spices if you wish. Or add 1 cup fruit juice — especially nice in winter when fresh fruit is limited.
- Strain both jars of the fermenting kefir water into the third clean jar with the fresh fruit in it, straining out the kefir grains ( set them aside), tossing the lemon and prunes, filling the clean jar (with the fruit in it) to a 1/2 inch from the top. Then cover tightly with a lid, and leave this on the counter another 24 hours, allowing pressure to build up yet, burping the lids (releasing the pressure), every 8-12 hours or so, more often especially if warm. Keep in mind, not burping may cause the jar to explode. If you must leave them for longer, either loosen the lid and place jar in a bowl to collect runoff, or place the jar in the fridge, to slow the fermentation down, and continue fermenting on the counter when you have more time.
- These metal lids like in the photos above, have pros and cons. They allow pressure to build up, with their tight seal, creating bubbly effervescent kefir, but they can explode if the pressure is not released occasionally. Plastic lids are “self-burping”, which if you are away from home for over 8 hours, I would recommend using. The downside is the plastic lids do not let the pressure build quite enough in my opinion so kefir is not quite as bubbly. Sometimes I switch between both, depending on if I am planning to be gone.
- To reiterate- During the 2nd fermentation phase, the water kefir is creating gas and building pressure, which you want it to do — this makes it nice and bubbly, but with the metal lids, you must let out some of the pressure, “burping it” every 6-12 hours or so, so the lid doesn’t bend or blast open (yes this happened to me). With a plastic lid, it stays on fine, it self burps, but it’s less bubbly.
- After 24 hours, the fruit will float to the surface and it’s time to refrigerate it. Burp it, place it in the fridge, lid tight. Once it’s chilled, give it a try. You can strain this and put it in a different pourable container, or just strain as you pour, leaving the fruit in for maximum infusion. Up to you.
- The kefir grains that you strained out earlier should be stored in a smaller jar, in the extra kefir water you will have after you merge the two jars into one. You can refrigerate them and feed with a tablespoon of sugar, every week —or if trying to grow more grains to give away, store the jar on the counter, feeding every couple of days. They grow faster at room temp, and grow slower in the fridge. They are happiest when they are actually making water kefir, so I usually make a jar a week. See notes.
Notes
Ingredients for Water Kefir
The ingredients are simple, but each one plays an important role in keeping your grains happy and your kefir delicious. Here’s what you’ll need to get started.
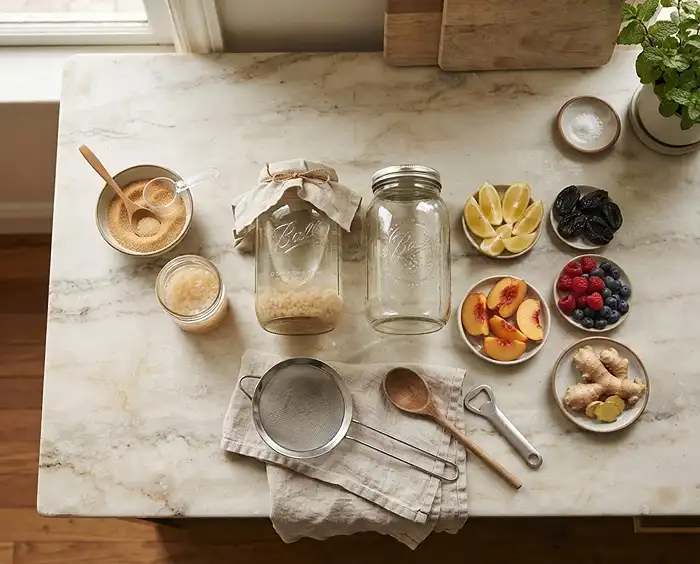
| Ingredient | Quantity | Notes |
|---|---|---|
| Alive water kefir grains | ½ cup | These are the living cultures that ferment the water. You can buy them online, get them from a friend, or find them at health food stores. |
| Tap or well water | 8 cups, divided | Room temperature or cool works best. Avoid distilled water—it lacks the minerals the grains need to thrive. |
| Sugar | ½ cup, divided | Use organic cane sugar, coconut sugar, or a mixture. The grains will metabolize most of it, so it won’t all end up in your drink. |
| Lemon wedges | 2, optional | Adds a hint of citrus and provides minerals that help the grains stay healthy. |
| Prunes or dried fruit | 2, optional | These add trace minerals and a subtle sweetness. Dates or raisins work too. |
| Fresh fruit for flavoring | 1–2 cups | Berries, stone fruit, mango, pineapple, apples, pears—whatever’s in season. This goes in during the second fermentation. |
A quick note on sugar: I know it sounds like a lot, but remember, the kefir grains consume most of it during fermentation. What’s left is a lightly sweet, tangy drink—not a sugar bomb. If you’re worried about sugar intake, just let it ferment a bit longer until it’s more tart than sweet.
How to Make Water Kefir: Step-by-Step Instructions
Making water kefir is a two-stage process. The first fermentation is where the grains do their work, and the second fermentation is where the flavors develop and the bubbles really kick in. Don’t worry—it’s easier than it sounds.
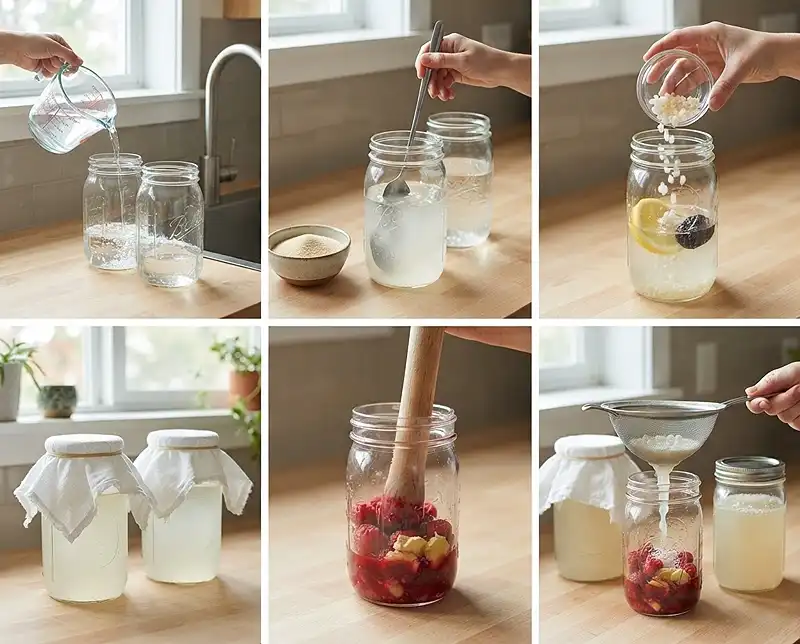
- Prepare your jars. Fill two half-gallon mason jars with 4 cups of cool tap water each. You want the water at room temperature or slightly cool—nothing too hot, or you’ll harm the grains.
- Dissolve the sugar. Add ¼ cup of sugar to each jar and stir until it’s mostly dissolved. It doesn’t have to be perfect—just get most of it broken up. If you prefer, you can make a sugar mixture first and then divide it between the jars.
- Add the kefir grains. Drop ¼ cup of water kefir grains into each jar. They’ll sink to the bottom at first, and that’s totally normal.
- Add starter liquid (optional). If you’ve made water kefir before, add ¼ cup of finished kefir water to each jar. This helps jumpstart fermentation. Skip this step for your very first batch—you won’t have any yet.
- Add lemon and dried fruit. Toss a small lemon wedge and one prune (or date) into each jar. These provide extra minerals that keep your grains healthy and happy.
- Cover and ferment. Cover both jars with a thin kitchen cloth or coffee filter secured with a rubber band. This keeps out bugs and dust but lets the grains breathe. Leave them on the counter for 2 to 4 days. In warm weather, 2 days is usually enough. In cooler temps, it might take 3 to 4 days.
- Taste and check. After a couple of days, taste the kefir. It should be just slightly sweet and nicely tangy. If it’s still very sweet, let it ferment longer. The goal is a balanced, tart flavor—not sugary.
- Prepare for the second fermentation. Once the first fermentation is done, the kefir will taste tangy and lightly sour. Now it’s time to add flavor and bubbles.
- Add fresh fruit to a clean jar. In a third clean half-gallon jar, add 1 to 1½ cups of fresh, ripe fruit. Berries, peaches, mango, pineapple, plums, grapes, apples, or pears all work beautifully. Muddle the fruit gently with a spoon to release some juices. You can also add a few thin slices of fresh ginger or whole spices like cinnamon sticks if you’re feeling creative. In winter, when fresh fruit is scarce, 1 cup of fruit juice works great too.
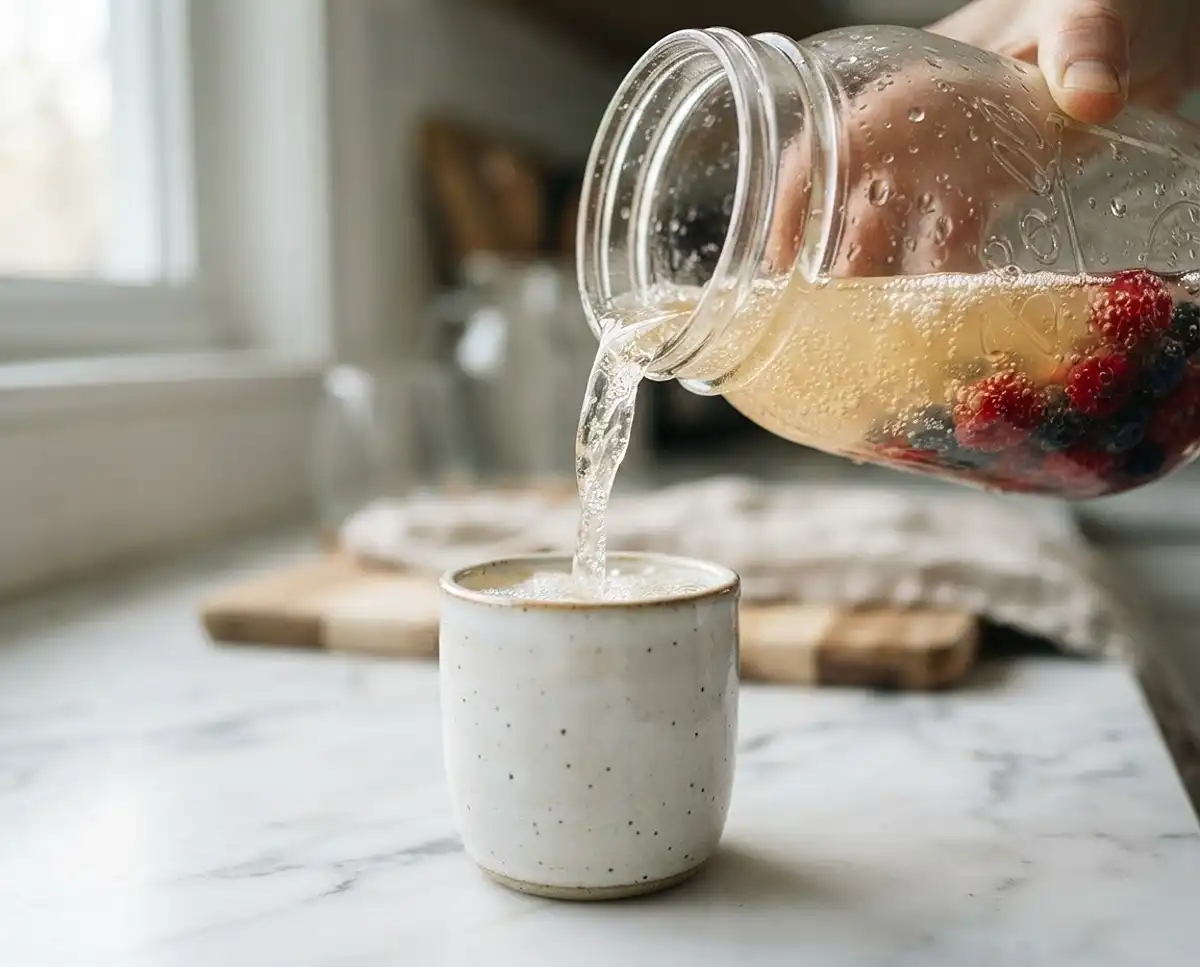
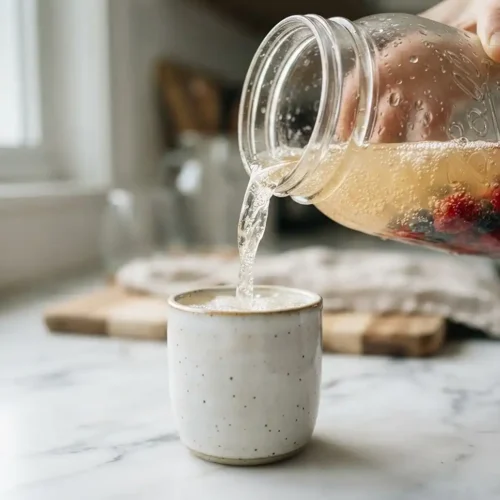
- Strain and combine. Strain both jars of fermenting kefir water into the jar with the fresh fruit, using a fine-mesh strainer or plastic funnel strainer to catch the grains. Set the grains aside—you’ll use them again. Toss the lemon wedges and prunes. Fill the jar to about half an inch from the top.
- Seal and ferment again. Put a tight-fitting lid on the jar and leave it on the counter for another 24 hours. This is when carbonation builds up. You need to “burp” the jar every 8 to 12 hours by loosening the lid slightly to release pressure. If you skip this step, especially in warm weather, the jar can explode (yes, I’ve had it happen).
- Understand your lid options. Metal lids create a tight seal, which means more bubbles—but you have to burp them. Plastic lids are “self-burping,” meaning they release pressure on their own, which is safer if you’re going to be away from home. The tradeoff is slightly less carbonation. I switch between both depending on my schedule.
- Monitor the second fermentation. During this phase, the water kefir is actively creating gas and building pressure. That’s what makes it bubbly. Just remember to burp metal lids every 6 to 12 hours so they don’t pop or bend. Plastic lids handle this on their own but won’t give you quite as much fizz.
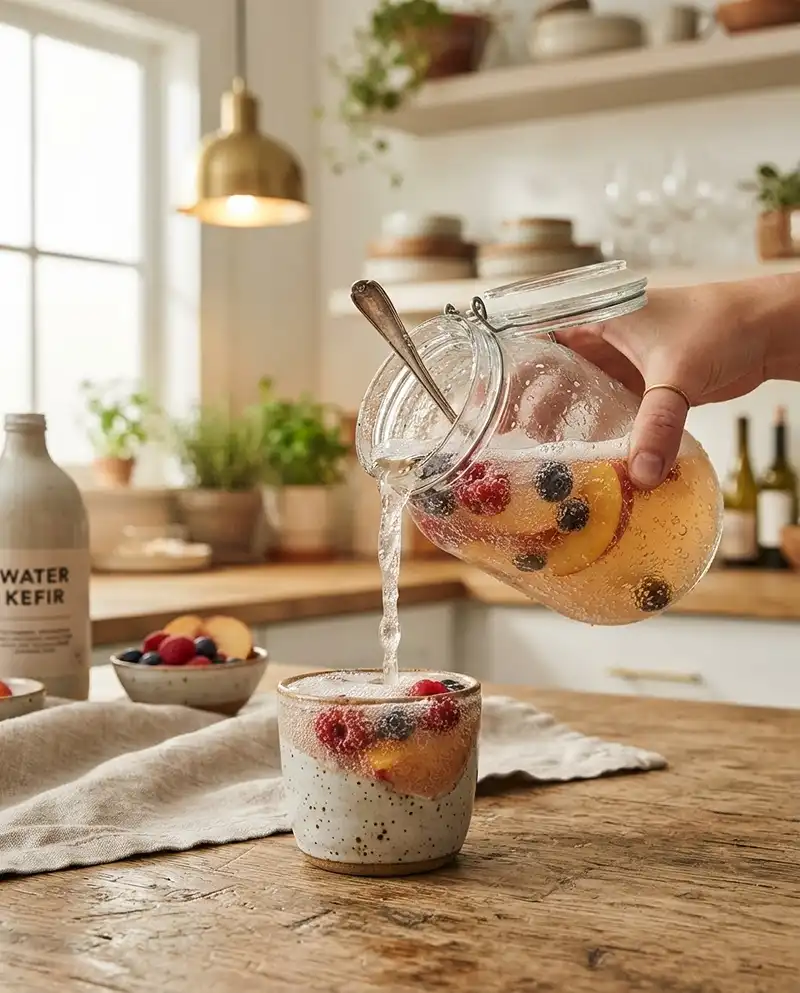
- Chill and enjoy. After 24 hours, the fruit will float to the top and your water kefir is ready. Burp it one last time, then refrigerate it with the lid tight. Once it’s cold, give it a taste. You can strain out the fruit and transfer the kefir to a pourable container, or just leave the fruit in for maximum flavor infusion. Either way works.
- Store your grains. The kefir grains you strained out earlier should go into a smaller jar with some of the extra kefir water. You can refrigerate them and feed them with a tablespoon of sugar once a week. If you want to grow more grains to share with friends, store them at room temperature and feed them every couple of days. They grow faster in warmth and slower in the fridge. They’re happiest when actively making water kefir, so I usually make a fresh batch every week.
Expert Tips for Perfect Water Kefir
Use mineral-rich water. Your grains need minerals to thrive. Tap water or well water usually works great. Avoid distilled or reverse-osmosis water unless you add a pinch of sea salt or a mineral drop.
Don’t use metal utensils long-term. While brief contact is fine, don’t store your grains in metal containers or stir with metal spoons for extended periods. Stick to glass, plastic, or wood.
Taste as you go. Every kitchen is different. Temperature, water quality, and even the mood of your grains can affect fermentation time. Trust your taste buds over the clock.
Burp regularly during second fermentation. This is especially important in warm weather. I set a phone reminder so I don’t forget. It only takes a second and prevents messy explosions.
Start with less fruit. You can always add more, but too much fruit can make the kefir overly sweet or ferment too fast. One cup is a good starting point.
Keep a backup batch of grains. If you’re experimenting with flavors or trying something new, keep a small jar of grains fermenting in plain sugar water as a backup. That way, if something goes wrong, you haven’t lost your whole culture.
Room temperature matters. In summer, fermentation can happen in as little as 24 hours. In winter, it might take 4 days. Adjust your timing based on the season and your kitchen temperature.
Delicious Water Kefir Variations
Berry Lemon Water Kefir. Use a mix of strawberries, blueberries, and raspberries with a squeeze of lemon juice during the second fermentation. Refreshing and vibrant.
Ginger Peach Water Kefir. Add sliced peaches and a few thin rounds of fresh ginger. The spice from the ginger balances the sweetness of the peaches beautifully.
Tropical Mango Pineapple. Combine fresh mango chunks and pineapple for a vacation-in-a-glass vibe. Add a sprig of mint if you’re feeling fancy.
Apple Cinnamon Water Kefir. Dice up a crisp apple and add a cinnamon stick during the second fermentation. This one’s perfect for fall and pairs wonderfully with apple cinnamon water recipes.
Concord Grape Water Kefir. If you can find fresh concord grapes in season, they make an incredibly rich, almost wine-like kefir. So good.
Hibiscus Berry Water Kefir. Brew a strong hibiscus tea, let it cool, and use it in place of some of the water during the first fermentation. Add berries during the second fermentation for a tart, floral drink.
Watermelon Mint Water Kefir. Muddle fresh watermelon with a few mint leaves during the second fermentation. Light, hydrating, and perfect for summer. Try pairing it with a feta cheese watermelon salad for a refreshing meal.
Troubleshooting Common Water Kefir Problems
My kefir isn’t fizzy. This usually means the second fermentation didn’t build enough pressure. Make sure you’re using a tight-sealing lid, and let it sit a bit longer at room temperature. Warmer temps help too.
My kefir tastes too sweet. It hasn’t fermented long enough. Let it go another day or two until it tastes tangy and just slightly sweet.
My kefir tastes too sour or vinegary. You over-fermented it. Shorten your fermentation time next batch. You can still drink it, but it’s more tart than most people prefer.
My grains aren’t growing. They might need more minerals. Try adding a tiny pinch of sea salt or a piece of dried fruit. Also make sure you’re feeding them regularly and using mineral-rich water.
My grains are shrinking or turning mushy. This can happen if the water is too hot, if you’re using distilled water, or if they’re not getting enough sugar. Make sure your water is cool and you’re following the sugar amounts.
My jar exploded or leaked everywhere. You didn’t burp it enough during the second fermentation. In warm weather, pressure builds fast. Burp every 6 to 8 hours, or switch to a plastic self-burping lid.
My kefir has a weird smell. A healthy water kefir should smell mildly yeasty, tangy, or fruity. If it smells rotten, moldy, or off, toss the batch and start fresh. It’s rare, but contamination can happen.
My grains are floating. Totally normal. Sometimes they sink, sometimes they float. As long as they look translucent and gelatinous, they’re fine.
How to Store Water Kefir
Once your water kefir is finished fermenting and you’ve chilled it in the fridge, it’ll stay fresh for about a week—though in my house, it rarely lasts that long. Keep it in a sealed jar or bottle, and it’ll maintain its fizz and flavor beautifully.
| Storage Method | Duration | Notes |
|---|---|---|
| Refrigerated finished kefir | Up to 1 week | Keep it sealed tightly. The flavor will continue to develop slightly, becoming more tart over time. |
| Refrigerated grains (short-term) | 1–2 weeks | Store grains in a small jar covered with kefir water. Feed with 1 tablespoon of sugar weekly. |
| Refrigerated grains (long-term) | Up to 3 months | Change the sugar water every 2 to 3 weeks. Grains may need a couple of batches to wake up fully after a long rest. |
| Room temperature active grains | Ongoing | Grains actively making kefir are the happiest. Feed every 2 to 4 days if not brewing a full batch. |
| Frozen grains (backup) | Up to 6 months | Rinse grains, pat dry, and freeze in a small amount of kefir water. Thaw slowly in the fridge when ready to use. |
If you need to take a break from brewing, the fridge is your friend. Just remember to feed your grains occasionally so they don’t starve. Think of them like a low-maintenance pet—they’re forgiving, but they do need a little attention now and then.
For more ways to stay hydrated with creative drinks, check out this watermelon juice recipe or explore the full collection in my recipe archive.
Water Kefir FAQs
What is water kefir?
Water kefir is a fermented, probiotic beverage made by combining water kefir grains with sugar water and allowing them to ferment for 24-48 hours. The kefir grains are not actual grains but symbiotic cultures of bacteria and yeast (SCOBY) that consume the sugar and produce beneficial probiotics, enzymes, and a slightly effervescent, tangy drink. It is a dairy-free alternative to milk kefir and can be flavored with fruits, herbs, or juices.
How do I make water kefir at home?
To make water kefir, dissolve 1/4 cup of sugar in 4 cups of non-chlorinated water. Let it cool to room temperature, then add 1/4 cup of water kefir grains to a glass jar. Pour the sugar water over the grains, cover with a breathable cloth, and secure with a rubber band. Let it ferment at room temperature for 24-48 hours, then strain out the grains. The resulting liquid is your water kefir, which can be consumed immediately or bottled for a second fermentation with added flavors.
What are the health benefits of water kefir?
Water kefir is rich in probiotics that support digestive health and help maintain a balanced gut microbiome. It may improve digestion, boost immune function, and enhance nutrient absorption. The beneficial bacteria and yeasts in water kefir can help reduce inflammation and support overall wellness. Additionally, water kefir contains B vitamins, enzymes, and organic acids that contribute to health. However, it is lower in sugar than many sodas and commercial beverages, making it a healthier alternative for those seeking a fizzy drink.
How do I care for and store water kefir grains?
Water kefir grains should be kept in sugar water and used regularly to stay healthy and active. After straining, immediately place them in fresh sugar water for the next batch. If you need a break from brewing, store the grains in sugar water in the refrigerator for up to 2 weeks, changing the water weekly. For longer storage, grains can be dried on parchment paper or frozen in fresh sugar water. Always use non-chlorinated water and avoid metal utensils during prolonged contact, as these can harm the grains.
Can I flavor my water kefir and how do I do it?
Yes, water kefir can be easily flavored through a second fermentation process. After straining out the grains from your first fermentation, transfer the liquid to airtight bottles and add your desired flavorings such as fresh fruit, fruit juice, ginger, herbs, or vanilla extract. Seal the bottles and let them ferment at room temperature for 1-3 days to develop carbonation and flavor. This secondary fermentation creates a fizzier drink. Remember to burp the bottles daily to release excess pressure and prevent explosions. Refrigerate once desired flavor and carbonation are achieved.
Final Thoughts on Making Water Kefir at Home
Once you get the rhythm down, making water kefir becomes second nature. You’ll find yourself looking forward to each new batch, experimenting with seasonal fruits, and maybe even giving away extra grains to friends who are curious about fermentation.
It’s one of those recipes that feels a little bit like magic—you mix sugar and water, add some weird little translucent blobs, wait a few days, and suddenly you have a bubbly, probiotic-rich drink that tastes better than anything you’d buy at the store. And it costs almost nothing.
If you’re new to fermentation, water kefir is a gentle, forgiving place to start. And if you’re already a fermenting fanatic, it’s a reliable staple that never gets boring.
Give it a try, trust the process, and don’t be afraid to experiment. Your gut—and your taste buds—will thank you.
Have you made water kefir before? What’s your favorite fruit combo? Drop a comment below—I’d love to hear what you’re brewing up in your kitchen!