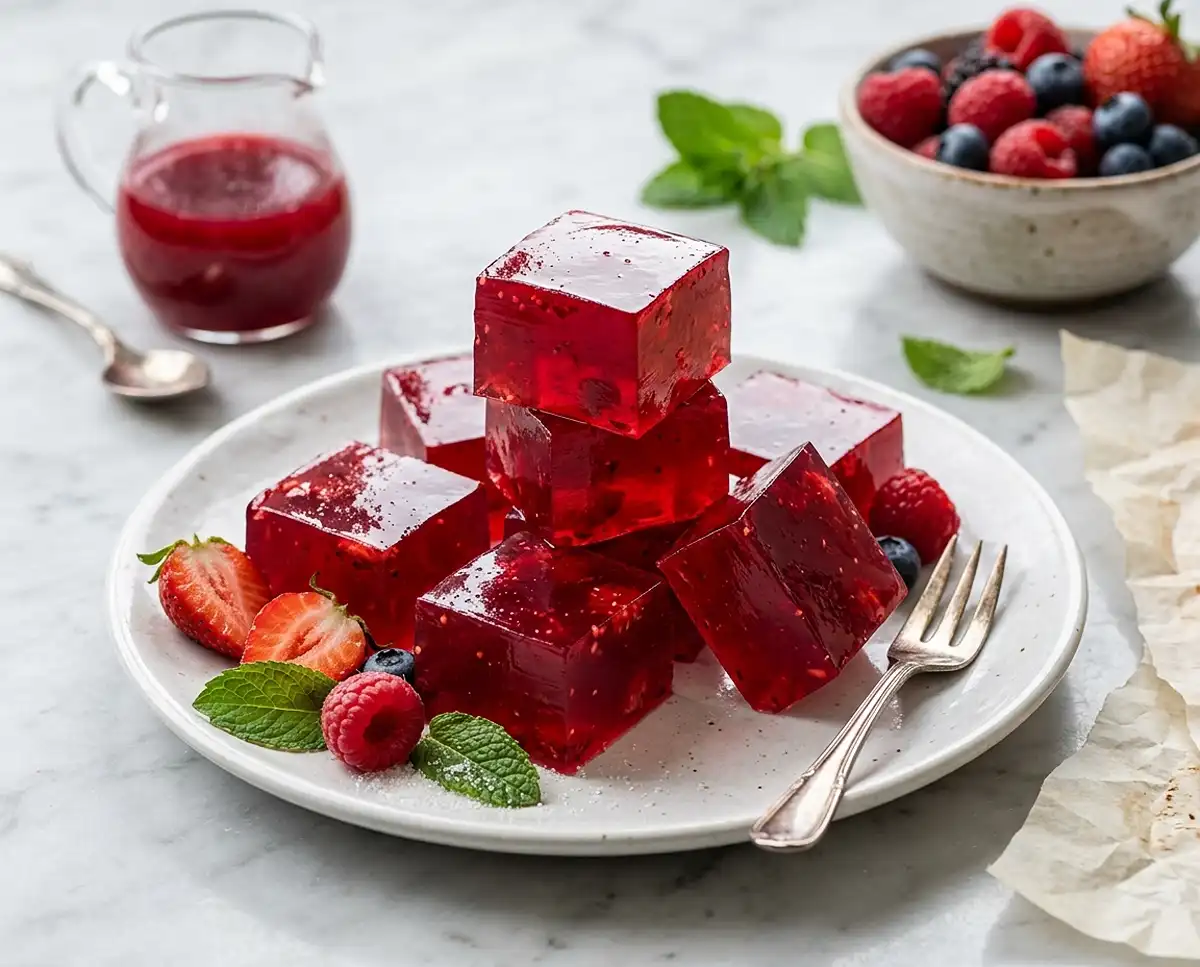
How to Make Jello
Learn how to make jello at home with real fruit juice and simple ingredients—no artificial colors or flavors needed for this delicious, wobbly treat.
I still remember the first time I realized store-bought jello didn’t have to be the only option. Making your own jello at home is surprisingly simple, and you get to control exactly what goes into it—real fruit juice, quality gelatin, and nothing else.
Once you try homemade jello, those neon boxes at the store just won’t have the same appeal. This version tastes brighter, more natural, and honestly just better.
Table of Contents
Quick Answer: How to Make Jello
To make homemade jello, you’ll bloom gelatin in cold fruit juice, dissolve it with boiling water, mix in more juice, then chill until firm. The entire process takes about 10 minutes of active work, plus 4 hours of refrigeration time. The result is a naturally sweet, wobbly dessert made with real fruit juice instead of artificial flavors and dyes.
Why You’ll Love This Homemade Jello Recipe
This isn’t your typical artificially-flavored jello. Here’s what makes this recipe so great:
You know exactly what’s in it. No mystery ingredients, no dyes, just fruit juice and gelatin. It’s perfect if you’re trying to avoid artificial additives but still want that classic jiggly texture everyone loves.
The flavor is incredible. Real fruit juice gives you a depth of taste that powdered mixes just can’t match. Use grape juice and it tastes like actual grapes. Use orange juice and you get bright, sunny citrus flavor.
It’s surprisingly versatile. You can use any 100% fruit juice you like, add fresh fruit pieces, or even layer different flavors for a rainbow effect. Kids love helping make it, and adults appreciate that it’s actually made with real food.
Plus, it keeps for up to two weeks in the fridge, so you can make a batch on Sunday and have healthy snacks ready all week. I like cutting mine into squares and keeping them in a container for quick grab-and-go treats.
How to Make Jello
Ingredients
Ingredients
- 3 ½ cups 100% fruit juice (divided)
- 2 tablespoons grass-fed gelatin
- ½ cup boiled water (or use boiled fruit juice)
Instructions
- Add ½ cup fruit juice to a large bowl and sprinkle the gelatin over the top. Use a whisk to briefly mix; it should thicken quickly.
- Pour the boiled water into the bowl, and whisk until smooth. There should be no visible chunks, and bubbles will start to form on top. Whisk in the remaining 3 cups of fruit juice.
- Prepare an 8-inch square baking dish by lightly spraying it with oil, then press a piece of parchment paper into the bottom of the pan. Pour the jello liquid into the pan and use a slotted spoon to remove as many bubbles from the top as possible. (This is just for looks, so no need to be perfect about it.)
- Place the pan on a flat shelf in the fridge to chill until firm, about 4 hours. Once it feels firm to the touch in the center, you can slice it into squares and serve. Leftovers can be stored in an airtight container in the fridge for up to 2 weeks.
Ingredients for Homemade Jello
This recipe uses just three simple ingredients. The star is the fruit juice—choose 100% juice without added sugars for the best flavor and cleanest ingredient list. Grass-fed gelatin gives you that signature jello bounce, and a bit of boiling water helps everything dissolve smoothly.
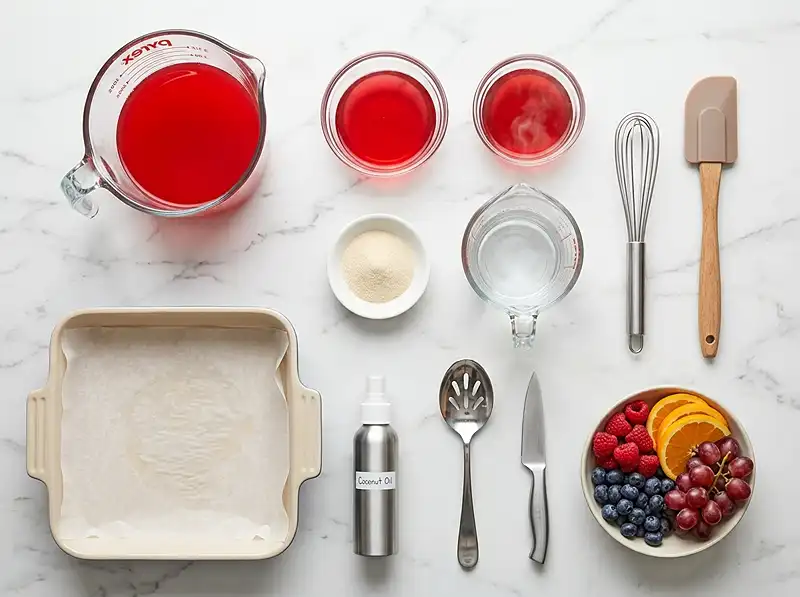
| Ingredient | Amount | Notes |
|---|---|---|
| 100% fruit juice | 3 ½ cups (divided) | Choose your favorite flavor—grape, apple, orange, or berry all work beautifully |
| Grass-fed gelatin | 2 tablespoons | Regular unflavored gelatin works too if that’s what you have |
| Boiled water | ½ cup | Can substitute with boiled fruit juice for more intense flavor |
What You’ll Need to Know About Gelatin
Gelatin is what gives jello its signature wobble. It’s a protein derived from collagen, and when you mix it with liquid and chill it, it forms that bouncy gel texture we all know and love.
The process of “blooming” gelatin—that first step where you sprinkle it over cold liquid—is important. It lets the gelatin granules absorb liquid evenly before you add the hot water. If you skip this and just dump gelatin into hot liquid, you’ll get clumps that are nearly impossible to dissolve.
Grass-fed gelatin tends to have a cleaner taste and comes from better-raised animals, but honestly, any unflavored gelatin will work for this recipe. Just make sure you’re using plain gelatin, not the sweetened, flavored kind.
Step-by-Step Instructions for Making Jello
Making homemade jello is genuinely easier than you might think. The whole process takes about 10 minutes of hands-on time, and then the fridge does the rest of the work while you go about your day.
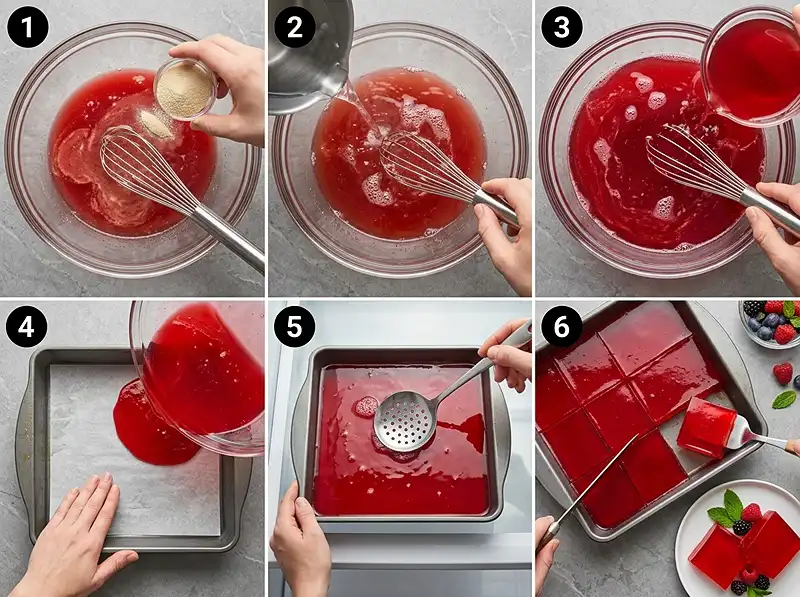
- Bloom the gelatin: Add ½ cup of fruit juice to a large bowl and sprinkle the gelatin evenly over the top. Use a whisk to briefly mix it together. You’ll notice it thickens almost immediately—that’s exactly what should happen. This step is called blooming, and it prevents lumps later on.
- Add boiling water: Pour the ½ cup of boiled water into the bowl with the bloomed gelatin. Whisk continuously until the mixture is completely smooth. You shouldn’t see any chunks of gelatin, just a clear liquid with some bubbles forming on top. This usually takes about 30 seconds of whisking.
- Mix in remaining juice: Whisk in the remaining 3 cups of fruit juice until everything is well combined. The mixture should be smooth and uniform in color. At this point it’ll still be quite liquid—that’s normal.
- Prepare your pan: Lightly spray an 8-inch square baking dish with oil, then press a piece of parchment paper into the bottom. This makes removing the jello so much easier later. Pour the liquid jello mixture into the prepared pan. Use a slotted spoon to gently remove as many bubbles as possible from the surface. This is purely for appearance—bubbles won’t affect taste, but removing them gives you a smoother, prettier final product.
- Chill until firm: Place the pan on a flat shelf in your refrigerator where it won’t get jostled. Let it chill for about 4 hours, or until the center feels firm when you gently press it with your finger. Once it’s set, you can slice it into squares or use cookie cutters for fun shapes. Serve cold and enjoy!
Expert Tips for Perfect Jello Every Time
After making this recipe dozens of times, I’ve picked up a few tricks that make the process even smoother.
Don’t skip the blooming step. I know it seems fussy, but those 30 seconds of letting the gelatin sit in cold juice first really do prevent lumps. Trust me, I’ve tried shortcuts and ended up with grainy jello.
Make sure your water is actually boiling. Hot tap water won’t cut it here. The gelatin needs that high heat to dissolve completely. If your liquid isn’t hot enough, you’ll end up with a softer set that might not hold its shape well.
Use a level shelf in your fridge. If your jello sets at an angle, you’ll have one thick side and one thin side when you cut it. Not the end of the world, but a level shelf gives you uniform squares.
Be patient with the chilling time. I know 4 hours seems long, but jello that hasn’t fully set is disappointing. It’ll be soft and might fall apart when you try to cut it. If you’re in a rush, you can chill it for about 2 hours and eat it with a spoon like a pudding—still delicious, just not as jiggly.
Oil your pan or use parchment. Trying to get jello out of an ungreased pan is frustrating. A light spray of oil and a parchment paper sling make removal so easy. You can lift the whole sheet out and cut perfect squares on a cutting board.
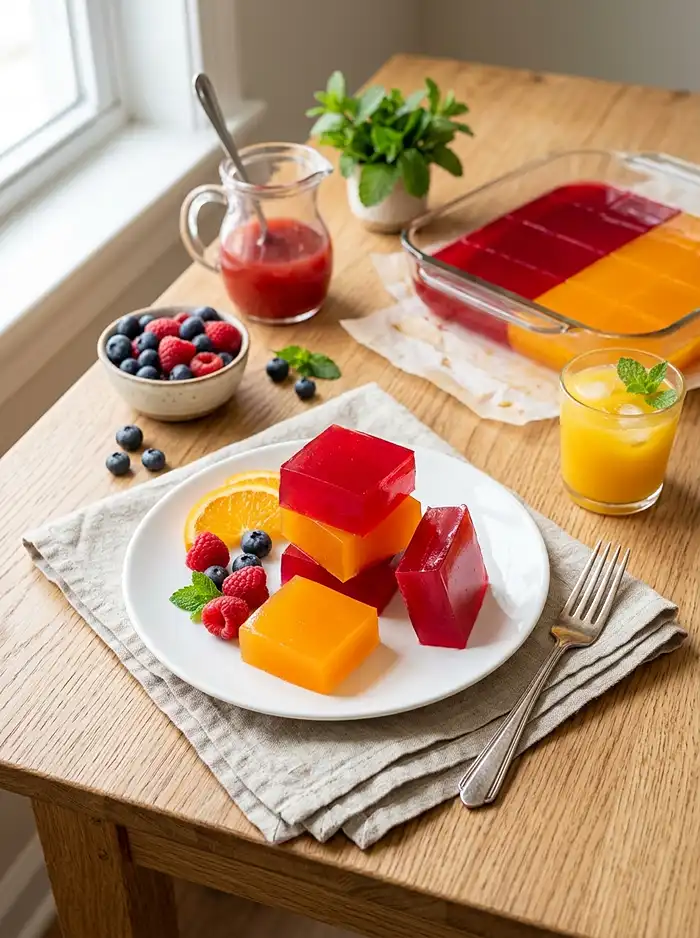
Creative Variations to Try
Once you’ve mastered the basic technique of how to make jello, the possibilities really open up. Here are some of my favorite ways to change things up.
Layered rainbow jello: Make multiple batches with different juice colors. Let each layer set for about 45 minutes before adding the next. It takes longer but looks spectacular, especially for kids’ parties.
Fresh fruit jello: Add fresh fruit pieces to your pan before pouring in the liquid. Berries, grapes, and diced peaches all work beautifully. Just avoid fresh pineapple, kiwi, or papaya—they contain enzymes that prevent gelatin from setting properly.
Creamy jello: Replace one cup of fruit juice with coconut milk or regular milk for a creamier, lighter-colored version. It has a softer, more pudding-like texture that some people prefer.
Herbal infusions: Use herbal tea instead of some of the water. Hibiscus tea with berry juice is amazing, or try chamomile with apple juice for a more subtle flavor.
Gelatin gummies: Use half the amount of liquid for a much firmer texture. Pour into silicone molds for homemade gummy candies. Kids go absolutely wild for these, and they’re so much better than store-bought versions.
I also love experimenting with juice combinations. Try mixing apple and cranberry, or orange and mango. You can check out more creative recipe ideas here if you’re feeling adventurous.
Troubleshooting Common Jello Problems
My jello didn’t set: This usually means the water wasn’t hot enough to fully dissolve the gelatin, or you accidentally used a juice that contains enzymes that break down gelatin. Fresh pineapple, kiwi, papaya, and ginger all contain these enzymes. Canned versions are fine because the canning process deactivates the enzymes.
My jello is too firm or rubbery: You likely used too much gelatin. Gelatin strength can vary by brand, so if this happens, use slightly less next time. The jello should be firm enough to hold its shape but still have that signature wobble.
I have lumps in my jello: The gelatin wasn’t fully dissolved. Next time, whisk more thoroughly when you add the boiling water, and make sure your water is actually at a rolling boil. If you catch lumps before chilling, you can gently reheat the mixture and whisk again.
My jello has a weird texture: If it feels grainy, the gelatin wasn’t completely dissolved. If it’s weepy or watery on top, it might have been disturbed while setting—try to keep it still in the fridge.
The jello stuck to my pan: For next time, use more oil or make sure your parchment paper covers the bottom completely. To rescue stuck jello, dip the bottom of the pan in warm water for about 10 seconds to loosen it, then try again.
Storage Guidelines for Homemade Jello
One of the best things about this recipe is how well it keeps. Homemade jello stays fresh in the refrigerator for up to two weeks, making it perfect for meal prep or having snacks ready whenever you need them.
| Storage Method | Duration | Best Practices |
|---|---|---|
| Refrigerator | Up to 2 weeks | Store in an airtight container; keep squares separated with parchment if stacking |
| Freezer | Not recommended | Jello becomes watery and loses texture when thawed |
| Room temperature | 2 hours maximum | Jello will start to soften and lose shape; return to fridge promptly |
I like to cut my jello into squares right after it sets, then store them in a container with parchment paper between layers. This way everyone can grab a piece without having to cut it themselves.
Keep your jello covered in the fridge to prevent it from absorbing other food odors. Gelatin is surprisingly good at picking up smells, and you definitely don’t want your fruit jello tasting like last night’s garlic chicken.
Don’t freeze homemade jello. I learned this the hard way. When it thaws, the texture becomes grainy and watery—nothing like the smooth, bouncy original. Just make smaller batches if you’re worried about waste.
How to Make Jello FAQs
What ingredients do I need to make basic jello?
To make basic jello, you need a package of jello mix (3 ounces), 1 cup of boiling water, and 1 cup of cold water. The jello mix already contains gelatin, sugar, and flavoring. Simply dissolve the powder in boiling water, add cold water, and refrigerate until set.
How long does jello take to set in the refrigerator?
Jello typically takes 4 hours to set completely in the refrigerator. For a softer, partially set consistency, you can check it after 2 hours. Individual servings in small cups may set faster, while large molds or deep dishes may take the full 4 hours or slightly longer.
Can I speed up the jello setting process?
Yes, you can speed up jello setting by using ice cubes instead of cold water. Use 1 cup of boiling water to dissolve the powder, then add enough ice cubes to equal 1 cup. Stir until ice melts completely. You can also place the jello in the freezer for 20-30 minutes, then move it to the refrigerator, but avoid leaving it in the freezer too long as it may freeze instead of gel.
Why didn’t my jello set properly?
Common reasons jello fails to set include not using enough boiling water to fully dissolve the powder, adding too much liquid, not refrigerating long enough, or adding fresh pineapple, kiwi, papaya, or figs which contain enzymes that prevent gelling. Make sure to follow package directions precisely and avoid these fruits unless they are canned.
How do I unmold jello from a mold successfully?
To unmold jello, first dip the bottom of the mold in warm water for about 15 seconds. Gently pull the jello away from the edges with your finger to allow air in. Place a serving plate on top of the mold, then quickly flip both over together. Shake gently if needed. The jello should slide out onto the plate.
Serving Ideas and Pairings
Homemade jello is delicious on its own, but there are so many fun ways to serve it.
Cut it into cubes and add to fruit salad for extra texture and sweetness. It’s especially good in a quinoa pistachio cranberry salad for a sweet-savory contrast that surprises everyone.
Layer it in parfait glasses with yogurt and granola for a fun breakfast or snack. Kids love this presentation, and it feels more special than just a bowl of jello.
Serve squares alongside fresh whipped cream for a simple but elegant dessert. A dollop of cream and a few fresh berries make even basic jello look fancy.
Use cookie cutters to make fun shapes for kids’ lunchboxes. Stars, hearts, and animal shapes make healthy snacks feel like treats. Pack them in small containers with a bit of juice to keep them moist.
Add a few cubes to smoothies for extra nutrition and a fun texture. Try it in a mango and spinach smoothie for an interesting twist.
Why Homemade Jello Is Better Than Store-Bought
I’m not usually the person who insists homemade is always better, but with jello, it really is worth making yourself.
Store-bought jello mixes are loaded with artificial colors and flavors. Those bright neon colors don’t come from real fruit—they come from petroleum-based dyes. When you make your own, the color comes directly from the juice, and it’s naturally beautiful.
The taste is incomparably better. Real fruit juice has depth and complexity that artificial flavoring just can’t replicate. Your homemade grape jello will actually taste like grapes, not like purple.
You control the sweetness level. Many commercial jellos are overly sweet. With homemade, you choose the juice, so you can make it as sweet or tart as you prefer.
It’s actually cheaper if you make it regularly. A box of jello mix might seem inexpensive, but when you calculate the cost per serving of homemade jello using bulk gelatin and juice, you’re spending less while getting better quality.
Plus, there’s something satisfying about making it yourself. It’s a simple recipe that feels a bit magical when you see it transform from liquid to that perfect wobbly solid.
The Health Benefits of Gelatin
While jello is definitely a treat, gelatin itself actually has some legitimate health benefits that are worth mentioning.
Gelatin is pure protein—about 6 grams per tablespoon. It contains amino acids that support joint health, skin elasticity, and gut health. It’s particularly rich in glycine and proline, amino acids that are harder to get from other food sources.
Many people use gelatin as a supplement for joint pain and arthritis. While more research is needed, anecdotal evidence is strong, and it certainly doesn’t hurt to get a little extra gelatin in your diet through delicious jello.
Gelatin can support digestive health by helping to seal and heal the gut lining. It’s one reason bone broth is so popular—the gelatin from simmered bones has the same beneficial properties.
That said, jello is still a sweet treat because of the fruit juice sugar content. I think of it as a “healthier treat” rather than a health food. It’s definitely better than artificial jello, candy, or other processed sweets, but it’s not something to eat unlimited amounts of.
Making Jello With Kids
This recipe is genuinely kid-friendly, both to make and to eat. My kids love helping with every step.
They can measure and pour the juice, sprinkle the gelatin (though supervise this part—gelatin powder gets everywhere), and whisk the mixture together. They love watching the gelatin bloom and thicken instantly.
The waiting is the hardest part for kids. Four hours feels like forever when you’re excited about jello. We usually make it in the morning so it’s ready after school, or make it before dinner so it’s ready for dessert.
Cutting the jello into shapes is their favorite part. We have a set of small cookie cutters that are perfect for making stars, hearts, and animals. The scraps get eaten immediately—the cook’s privilege.
It’s also a great way to sneak in fruit servings for picky eaters. Kids who won’t drink juice or eat fruit sometimes love jello made from that same fruit.
Final Thoughts on Making Homemade Jello
Learning how to make jello at home is one of those simple skills that feels surprisingly empowering. You’re taking something most people buy in a box and making it from scratch with just three ingredients.
The process is genuinely easy—if you can boil water and use a whisk, you can make this. There’s no complicated technique or special equipment needed. Just a bowl, a pan, and a few hours for the fridge to work its magic.
I love that this recipe lets you use whatever juice you have on hand or whatever sounds good in the moment. Grape one week, orange the next, mixed berry after that. It never gets boring.
Whether you’re making it as a healthier treat for your kids, bringing it to a potluck, or just wanting a nostalgic dessert that tastes like childhood but better, this homemade jello delivers.
Give it a try this weekend. Choose your favorite juice, follow these simple steps, and see how much better real jello can be. Once you taste the difference, those boxes of powder won’t tempt you anymore.
If you make this recipe, I’d love to hear how it turns out! Try pairing it with other homemade treats like easy eggless vanilla cake for a fun dessert spread. And if you’re looking for more simple, wholesome recipes, check out my complete recipe collection.
Happy jello making!