How to Make Hummus with Dried Chickpeas
You know that rich, creamy hummus you get at Middle Eastern restaurants and always wonder how they make it taste so perfect? The secret’s actually simpler than you think—it just starts with dried chickpeas instead of canned, and trust me, once you try making homemade hummus recipe this way, there’s no going back.
I’ll be honest, I used to think canned chickpeas were totally fine until a friend’s Lebanese mom showed me how she’d been making this chickpea dip from scratch for decades. The difference was mind-blowing—silkier, richer, and with this incredible nutty sweetness you just can’t get from a can.
Learning how to make hummus with dried chickpeas does take a bit more time upfront, but most of it’s hands-off soaking and simmering. What you get in return is authentic hummus recipe territory—the kind that makes people ask if you secretly studied in Beirut. Plus, you’ll have complete control over the texture and flavor, and honestly? It’s kind of magical watching dried chickpeas transform into the creamiest dip you’ve ever tasted.
Table of Contents
Why Dried Chickpeas Make All the Difference
Here’s the thing about canned chickpeas—they’re convenient, sure, but they’ve been sitting in that tin liquid for who knows how long, and they never quite cook down to that melt-in-your-mouth softness you need for truly creamy hummus. They’ve got a slightly metallic taste too, if we’re being real.
Dried chickpeas, on the other hand, let you control everything. You soak them until they’re plump and ready, then cook them until they’re so tender they practically fall apart when you press them. That extra tenderness is what gives you that restaurant-quality silky texture.
The baking soda trick (yes, we use it twice—once in soaking and once in cooking) is an absolute game-changer. It helps break down the chickpea skins and makes everything blend up impossibly smooth. According to food science experts, alkaline water from baking soda softens legumes faster and more thoroughly than plain water.
And let’s talk flavor—when you cook dried chickpeas yourself, they develop this deeper, nuttier taste that canned ones just can’t match. It’s worth the wait, I promise.
How to Make Hummus with Dried Chickpeas
Ingredients
Ingredients
- 1 cup dried chickpeas
- 1 teaspoon baking soda for soaking and cooking
- ½ cup tahini
- ¼ cup fresh lemon juice
- 2 cloves garlic minced
- ½ teaspoon salt or to taste
- ¼ cup ice water or more as needed
- Optional garnishes: olive oil paprika, fresh parsley
Instructions
- **Soak the chickpeas:** Rinse the dried chickpeas thoroughly. Place them in a large bowl and cover with plenty of cold water (at least 3 times the volume of the chickpeas). Add 1/2 teaspoon of baking soda. Let them soak for at least 12 hours or overnight. The chickpeas will expand significantly.
- **Cook the chickpeas:** Drain and rinse the soaked chickpeas. Transfer them to a large pot and cover with fresh water, again ensuring plenty of liquid (at least 2-3 inches above the chickpeas). Add the remaining 1/2 teaspoon of baking soda. Bring to a boil, then reduce heat to a simmer. Cook for 1 to 2 hours, or until the chickpeas are very tender and easily mashable. Skim off any foam that rises to the surface.
- **Prepare for blending:** Drain the cooked chickpeas, reserving some of the cooking liquid. For extra creamy hummus, you can peel the chickpeas, though this is optional and time-consuming.
- **Blend the hummus:** In a food processor, combine the cooked chickpeas, tahini, lemon juice, minced garlic, and salt. Process for a few minutes until a thick paste forms.
- **Achieve desired consistency:** While the food processor is running, slowly add the ice water, one tablespoon at a time, until the hummus reaches your desired creamy consistency. You may need more or less than 1/4 cup. If you prefer a thinner hummus, you can also add some of the reserved chickpea cooking liquid.
- **Taste and adjust:** Taste the hummus and adjust seasonings as needed, adding more salt or lemon juice if desired.
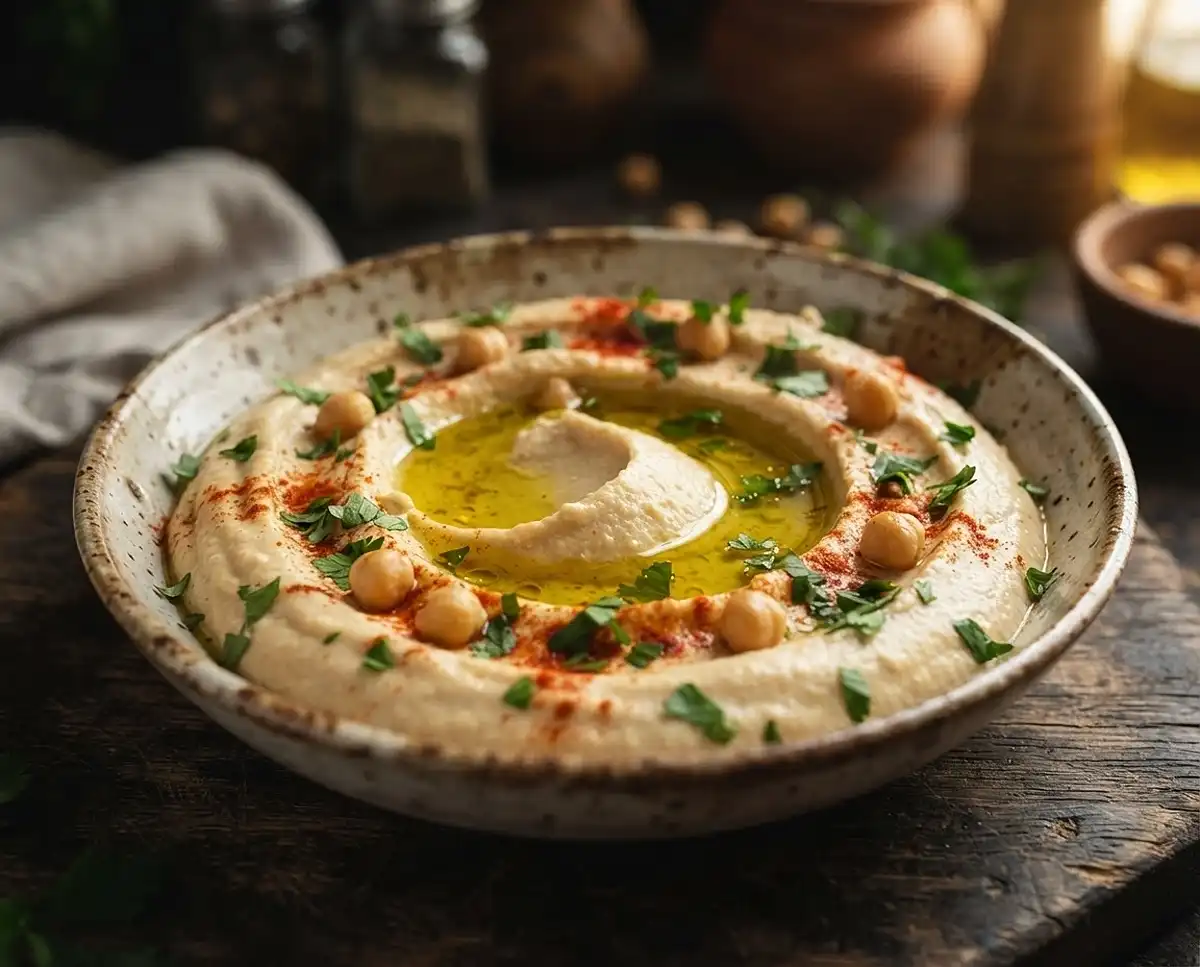
- **Serve:** Transfer the hummus to a serving bowl. Drizzle with olive oil and sprinkle with paprika and fresh parsley, if using. Serve with pita bread, vegetables, or as a spread.
Ingredients
Everything you need for this dried chickpea hummus is probably already in your pantry, except maybe the tahini (and if you don’t have that yet, grab a good quality jar—it makes a huge difference). This authentic hummus recipe keeps things simple and traditional.
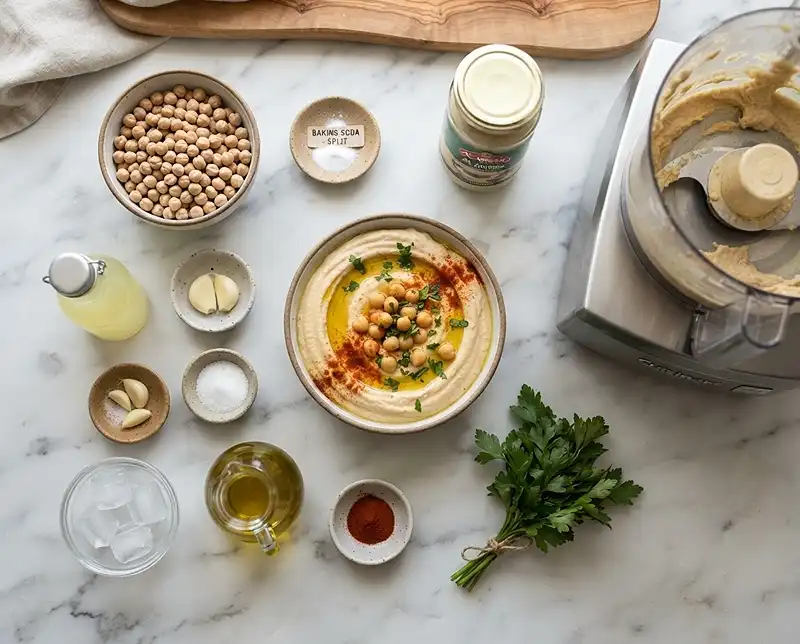
| Ingredient | Amount | Notes |
|---|---|---|
| Dried chickpeas | 1 cup | Will triple in size after soaking, yielding about 3 cups cooked |
| Baking soda | 1 teaspoon total | Split between soaking (½ tsp) and cooking (½ tsp) to tenderize chickpeas |
| Tahini | ½ cup | Well-stirred; the natural oil separates so mix thoroughly first |
| Fresh lemon juice | ¼ cup | About 1-2 lemons; freshly squeezed tastes best |
| Garlic cloves | 2, minced | Adjust to taste—some like it garlicky, some prefer it mild |
| Salt | ½ teaspoon | Start here and adjust after blending |
| Ice water | ¼ cup or more | The cold temperature helps create extra creaminess |
| Olive oil (garnish) | As desired | Optional but traditional; use good quality extra virgin |
| Paprika (garnish) | Pinch | Optional; adds color and subtle sweetness |
| Fresh parsley (garnish) | As desired | Optional; chopped for a fresh finishing touch |
Step-by-Step Instructions
Okay, here’s where the magic happens. Don’t let the longer cooking time intimidate you—most of this is just waiting around while the chickpeas do their thing. The actual hands-on work? Maybe fifteen minutes total.
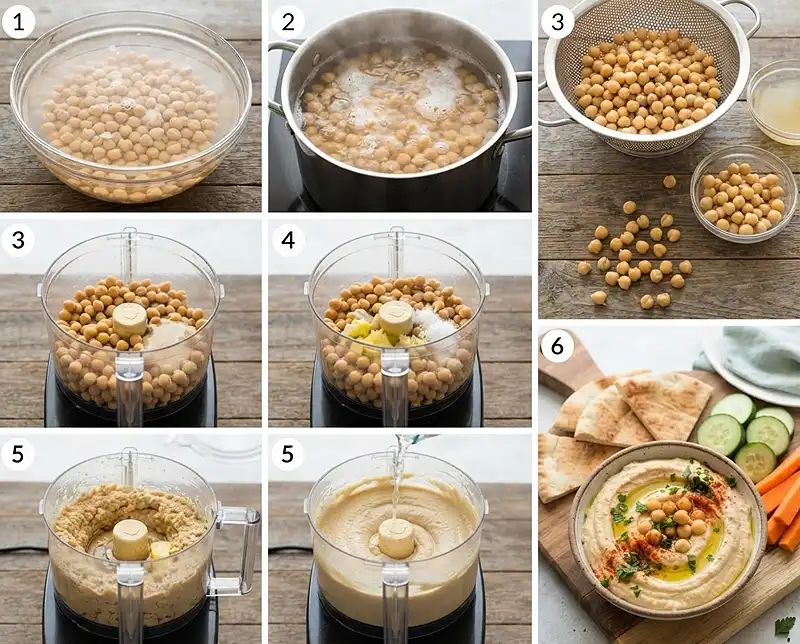
Soaking and Cooking the Chickpeas
- Soak the chickpeas: Start by giving your dried chickpeas a good rinse under cold water, picking out any weird-looking ones or little stones (rare, but it happens). Toss them into a large bowl—and I mean large, because these little guys are going to basically triple in size overnight. Cover them with plenty of cold water, at least three times their volume, then stir in half a teaspoon of baking soda. Let them hang out for at least 12 hours, or just leave them overnight while you sleep. When you wake up, you’ll have plump, pale chickpeas ready to cook.
- Cook the chickpeas: Drain and rinse your soaked chickpeas really well—you want to wash off that soaking water and the baking soda residue. Transfer them to a large pot and cover with fresh water, making sure there’s a good 2-3 inches of water above the chickpeas. Add the other half teaspoon of baking soda. Crank the heat up to bring everything to a boil, then dial it back down to a gentle simmer. You’ll notice some foam rising to the top—just skim that off with a spoon. Now here’s where patience pays off: let them simmer for 1 to 2 hours until they’re absolutely, ridiculously tender. We’re talking so soft you can squish one between your fingers with basically no pressure. This is the foundation of ultra-creamy hummus, so don’t rush it.
- Prepare for blending: Once your chickpeas are fall-apart tender, drain them in a colander but save about a cup of that cooking liquid—it’s liquid gold for adjusting consistency later. Now, here’s an optional step that some people swear by: peeling the chickpeas. I know, I know, it sounds incredibly tedious, and honestly? It is. But if you’ve got the time and you’re going for that restaurant-level silkiness, gently pinching off those little skins does make a noticeable difference. The hummus becomes almost impossibly smooth. That said, I skip this step half the time and still get fantastic results, so don’t feel obligated.
Blending to Perfection
- Blend the hummus: Dump your cooked chickpeas into a food processor along with the tahini, fresh lemon juice, minced garlic, and salt. Start processing and let it run for a few minutes—seriously, longer than you think. At first it’ll look like a chunky, thick paste, and that’s totally normal. Keep it going until everything’s broken down and combined into a thick, almost paste-like consistency. The longer you blend at this stage, the smoother your final hummus will be.
- Achieve desired consistency: Here’s where the real transformation happens. With the food processor still running, start drizzling in the ice water one tablespoon at a time. I know it seems weird to add ice water to hummus, but the cold temperature actually helps the mixture emulsify and become incredibly creamy. Watch as your thick paste suddenly starts to lighten in color and fluff up. You might need more or less than the ¼ cup depending on your chickpeas and how thick your tahini is. If you run out of ice water and it’s still too thick, that reserved chickpea cooking liquid comes to the rescue—it adds extra chickpea flavor while thinning things out.
- Taste and adjust: Stop the processor and grab a spoon for the best part—tasting. Does it need more salt? More lemon for brightness? Maybe another clove of garlic if you’re feeling bold? This is your chance to make it perfect for your palate. Blend again after any additions to incorporate everything evenly.
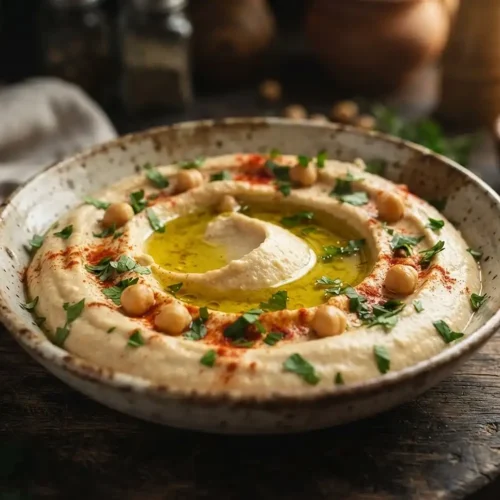
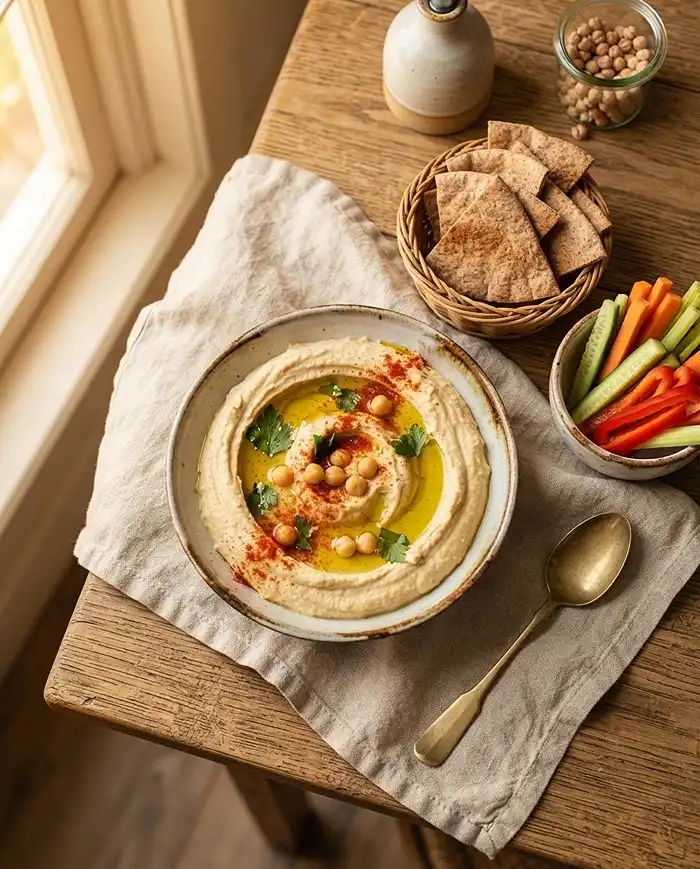
- Serve: Scoop your beautiful homemade hummus into a serving bowl, then use the back of a spoon to create a little well or swirl in the center—that’s where you’ll pool some good olive oil. Sprinkle with paprika for color and a touch of sweetness, and scatter some fresh chopped parsley over the top if you’re feeling fancy. Grab some pita bread, sliced veggies, or just use it as a spread on literally anything. It’s that good.
Expert Tips for the Creamiest Hummus
Temperature Matters
Using ice-cold water instead of room temperature water is seriously not optional if you want that ultra-smooth, almost whipped texture. The shock of cold helps the tahini and chickpeas emulsify into this light, fluffy consistency that’s just heavenly. Some people even blend their hummus over an ice bath for extra insurance.
Don’t Skip the Long Blend Time
I used to think a quick pulse was enough, but nope—you’ve really got to let that food processor run for several minutes. Stop occasionally to scrape down the sides, then keep going. The difference between a one-minute blend and a five-minute blend is the difference between grainy hummus and restaurant-quality smoothness.
Tahini Quality is Everything
Not all tahini is created equal, friends. Some brands are bitter and chalky, while others are smooth and nutty. Look for tahini that’s made from just hulled sesame seeds (sometimes with a bit of salt), and make sure you stir it really well before measuring—that separated oil on top needs to be incorporated. If your tahini tastes bitter on its own, your hummus probably will too.
The Peeling Debate
Should you peel those chickpea skins? Honestly, it depends on how much time you have and how obsessed you are with texture. Peeled chickpeas do create a noticeably smoother, more luxurious hummus. But I’ve made it both ways dozens of times, and when chickpeas are properly cooked until super tender and blended long enough, the difference is pretty minimal. Save peeling for special occasions or when you’re making hummus for someone who’ll really appreciate it.
Delicious Variations to Try
Roasted Garlic Hummus
Instead of raw garlic, roast a whole head until it’s golden and caramelized, then squeeze out those soft cloves and blend them in. The flavor becomes sweet and mellow instead of sharp—it’s absolutely divine. You could pair this with a chickpea feta avocado salad for a complete Mediterranean meal.
Spicy Red Pepper Hummus
Blend in a roasted red pepper (jarred is fine) and a pinch of cayenne or some harissa paste for a smoky, spicy kick. The color turns this gorgeous peachy-red that looks stunning on a mezze platter.
Herb-Loaded Green Hummus
Throw in a big handful of fresh herbs—cilantro, parsley, or basil all work beautifully. You’ll get this vibrant green hummus that tastes incredibly fresh and pairs perfectly with spring vegetables.
Extra Lemony Za’atar Hummus
Increase the lemon juice to ⅓ cup and stir in a tablespoon of za’atar spice blend. It’s bright, herbaceous, and totally addictive. Drizzle with extra olive oil and more za’atar on top for serving.
Troubleshooting Common Issues
My Hummus is Too Thick
This is the easiest fix—just add more liquid while blending. Start with ice water one tablespoon at a time, or use that reserved chickpea cooking liquid for extra flavor. Keep the processor running as you drizzle it in until you reach your ideal consistency.
It Tastes Bland or Flat
Usually this means it needs more salt or acid. Add another pinch of salt and a tablespoon of lemon juice, blend again, and taste. Sometimes a tiny bit more garlic helps too. Don’t be shy about seasoning—hummus needs a bold hand to really shine.
The Texture is Grainy
Two possible culprits here: either your chickpeas weren’t cooked long enough (they need to be genuinely fall-apart soft), or you didn’t blend long enough. If it’s already blended and still grainy, try running the processor for another full 3-5 minutes. If that doesn’t help, your chickpeas might’ve needed more cooking time from the start.
It’s Too Bitter
Bitterness usually comes from either too much or too-raw garlic, or from low-quality tahini. Try adding a tiny pinch of sugar or a bit more lemon juice to balance it out. Next time, use less garlic or look for a better tahini brand—it really makes a difference.
The Chickpeas Won’t Get Soft
Old dried chickpeas can take forever to soften, and sometimes they never quite get there. Make sure you’re buying from a store with good turnover so you’re getting relatively fresh dried beans. Also double-check that you’re using enough baking soda—it’s crucial for breaking down those tough fibers. According to the USDA food storage guidelines, dried beans can last years, but fresher is always better for cooking.
Storage
One of the best parts about learning how to make hummus with dried chickpeas is that it actually keeps really well, so you can make a big batch and enjoy it all week. Just store it properly and you’re golden.
| Storage Method | Duration | Best Practices |
|---|---|---|
| Refrigerator | 5-7 days | Store in an airtight container with a thin layer of olive oil on top to prevent drying. Press plastic wrap directly onto the surface before sealing. |
| Freezer | Up to 4 months | Portion into smaller containers or ice cube trays for easy thawing. Leave headspace for expansion. Label with date. |
| Room temperature | 2 hours maximum | Only during serving. Return to refrigerator promptly to prevent bacterial growth. |
Reheating and Serving from Cold
Honestly, hummus is usually served cold or at room temperature anyway, so there’s no real need to reheat it. If it’s been in the fridge and feels a bit stiff, just let it sit on the counter for 20-30 minutes before serving—it’ll soften up and the flavors will open up. You can also stir in a tablespoon of warm water or olive oil to loosen it back up if needed.
Kitchen Waste Ideas
That chickpea cooking liquid you saved? It’s called aquafaba and it’s weirdly useful. You can use it to thin out hummus, sure, but you can also whip it up like egg whites for vegan meringues or use it as an egg replacer in baking. Those chickpea skins you peeled off (if you went that route) can be roasted with a bit of oil and salt for a crunchy snack. And leftover hummus that’s maybe a day past its prime can be stirred into pasta, used as a base for salad dressing thinned with lemon juice, or spread on sandwiches—check out how it works in our dense bean salad recipe for inspiration. Nothing needs to go to waste here.
How to Make Hummus with Dried Chickpeas FAQs
Do I need to soak dried chickpeas before making hummus?
Yes, you should soak dried chickpeas for at least 8 hours or overnight in cold water. This softens them and significantly reduces cooking time. The chickpeas will roughly double in size, so use a large bowl with plenty of water. Soaking also helps make the chickpeas more digestible and results in creamier hummus.
How long does it take to cook soaked chickpeas for hummus?
After soaking, chickpeas typically need to simmer for 1 to 2 hours until they are very soft and can be easily mashed between your fingers. Cooking time varies based on the age of the chickpeas and your altitude. For faster results, use a pressure cooker which reduces cooking time to about 20-30 minutes. The chickpeas should be extremely tender for the smoothest hummus texture.
Should I remove the skins from chickpeas when making hummus?
Removing chickpea skins is optional but recommended for ultra-smooth, creamy hummus. While it adds extra time to preparation, peeling the skins results in a noticeably silkier texture. You can remove skins by rubbing cooked chickpeas gently between your hands or in a clean kitchen towel, then rinsing away the loose skins in water. Many people skip this step and still achieve delicious hummus.
What ratio of dried chickpeas to water should I use for hummus?
For soaking, use about 3 cups of water for every 1 cup of dried chickpeas. When cooking, drain the soaking water and use fresh water, covering the chickpeas by about 2 inches. One cup of dried chickpeas yields approximately 3 cups of cooked chickpeas, which makes about 2 to 3 cups of hummus depending on how much tahini, lemon juice, and other ingredients you add.
Can I use the chickpea cooking liquid in my hummus?
Yes, the chickpea cooking liquid, called aquafaba, is excellent for adjusting hummus consistency. It adds flavor and helps create a creamier texture than plain water. Start by adding a few tablespoons when blending your hummus, then gradually add more until you reach your desired consistency. You can also save aquafaba for other recipes as it works as an egg white substitute in vegan cooking and baking.
Ready to Make the Best Hummus Ever?
Now that you know how to make hummus with dried chickpeas from scratch, you’re basically unstoppable. Sure, it takes a little more time than cracking open a can, but that silky, restaurant-quality texture and deep, authentic flavor? Totally worth it.
This homemade hummus recipe has become my go-to whenever I’m having people over or just want to meal-prep something healthy and satisfying for the week. There’s something really satisfying about transforming those hard little dried chickpeas into the creamiest dip imaginable—it feels like actual kitchen magic.
Give this dried chickpea hummus a try this weekend. Start soaking those chickpeas tonight, cook them up tomorrow, and blend yourself into hummus heaven. Then come back and tell me what you think—did you go for the garlic-heavy version or keep it classic? Did you have the patience to peel those chickpeas or say “forget it” like I usually do?
And hey, if you love this recipe as much as I do, save it to Pinterest so you can find it again (trust me, you’ll be making this on repeat). Share your results in the comments—I genuinely love seeing how everyone’s hummus turns out and hearing about your favorite ways to eat it. Happy blending!