Publix White Mountain Bread
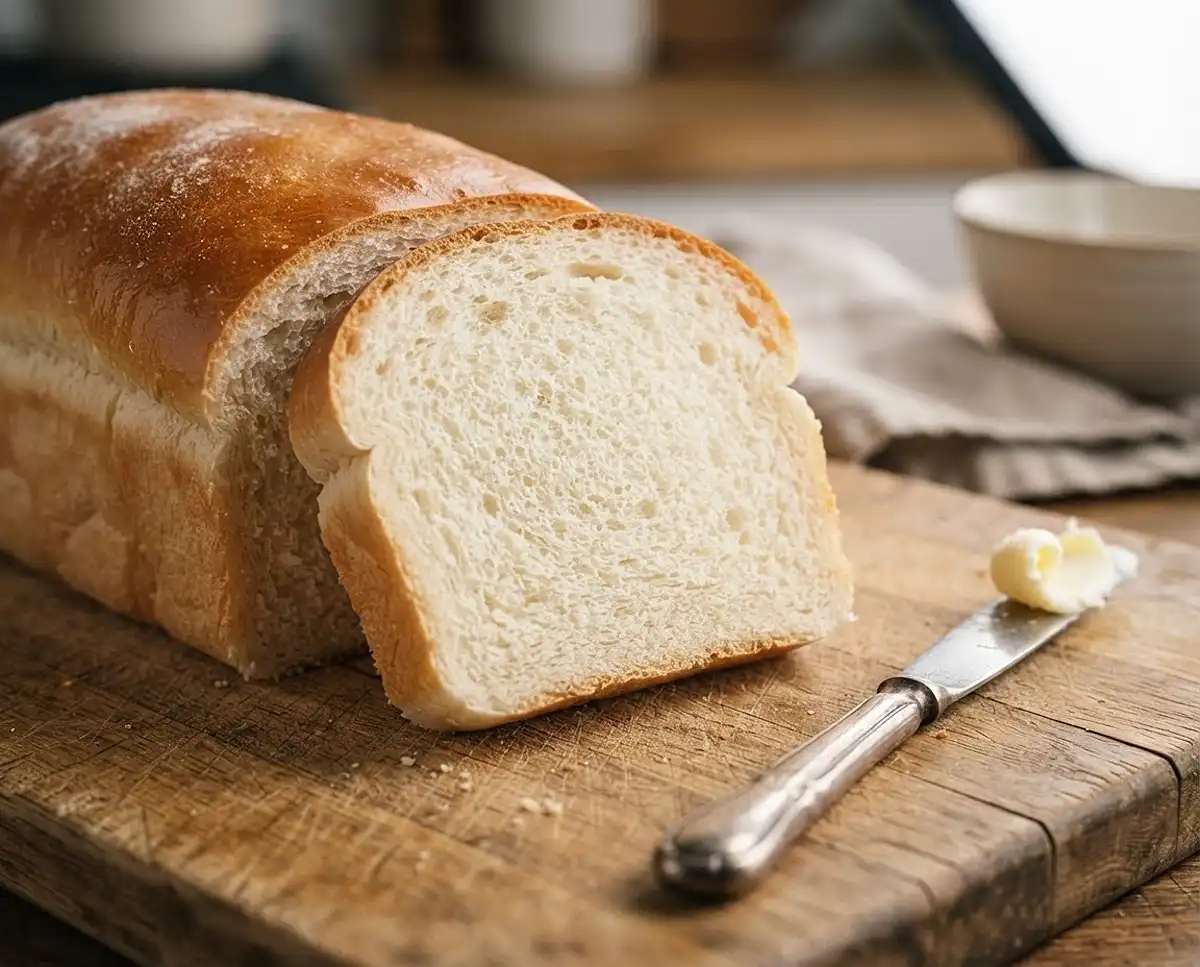
A soft, pillowy homemade bread recipe that rivals the beloved Publix bakery classic—perfect for sandwiches, toast, or eating warm with butter.
I’ve been trying to recreate that soft, slightly sweet Publix white mountain bread for years. You know the one—it’s sitting there in the bakery section, calling your name with that perfect golden top and fluffy interior that makes the best sandwiches. After countless batches and a few flour-dusted kitchen disasters, I finally nailed it, and I’m so excited to share this recipe with you.
This publix white mountain bread copycat is genuinely simple to make at home. You don’t need fancy equipment or professional skills—just a bowl, your hands, and a little patience while the yeast works its magic.
Table of Contents
Why You’ll Love This Homemade White Bread
This easy bread recipe delivers bakery-quality results without the bakery price tag. The texture is incredibly soft with just the right amount of structure to hold up to peanut butter and jelly or a loaded deli sandwich.
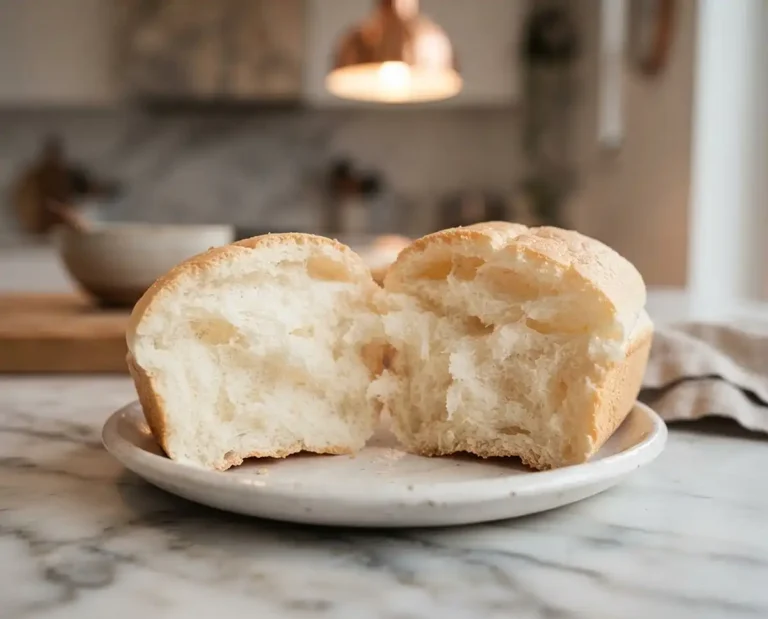
What sets this sandwich bread apart is the slightly sweet flavor and tender crumb. It slices beautifully without crumbling, toasts to golden perfection, and stays fresh for days when stored properly. Plus, your kitchen will smell absolutely amazing while it bakes—that warm, yeasty aroma is honestly worth making it for that alone.
I love that this recipe makes two loaves, so you can freeze one for later or share with a neighbor. It’s also incredibly forgiving for beginners. Yeast bread can feel intimidating, but this one walks you through each step with clear visual and tactile cues so you’ll know exactly what to look for.
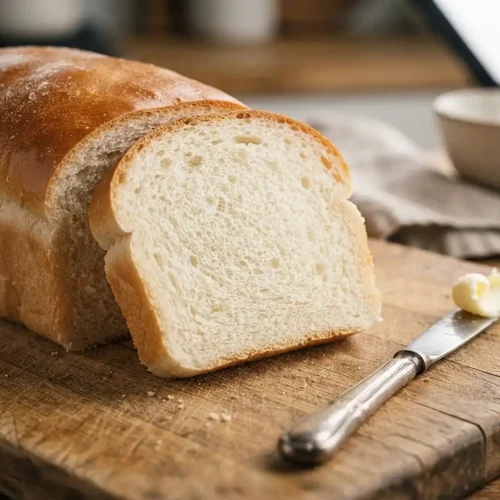
Publix White Mountain Bread
Ingredients
Ingredients
- 3 cups warm water 105-115°F
- 2 packages 1/4 ounce each active dry yeast
- ½ cup granulated sugar
- 1 tablespoon salt
- ¼ cup vegetable oil
- 7-8 cups all-purpose flour
Instructions
- In a large bowl, combine the warm water and yeast. Let stand for 5 minutes, or until the yeast is foamy.
- Stir in the sugar, salt, and vegetable oil.
- Gradually add 3 cups of flour, mixing well after each addition. The dough will be very sticky.
- Add remaining flour, 1/2 cup at a time, until the dough is stiff enough to handle.
- Turn the dough out onto a lightly floured surface and knead for 8-10 minutes, or until smooth and elastic.
- Place the dough in a greased bowl, turning once to grease the top. Cover and let rise in a warm place for 1-1.5 hours, or until doubled in size.
- Punch down the dough and divide it in half. Shape each half into a loaf and place in greased 9×5 inch loaf pans.
- Cover and let rise again for 30-45 minutes, or until doubled in size.
- Preheat oven to 375°F (190°C).
- Bake for 30-35 minutes, or until golden brown and the loaves sound hollow when tapped.
- Remove from pans and cool on a wire rack.
Notes
Ingredients for Publix White Mountain Bread
This recipe uses simple pantry staples you probably already have on hand. The magic happens when these basic ingredients come together and transform through the power of yeast and time.

| Ingredient | Amount | Notes |
|---|---|---|
| Warm water | 3 cups | 105-115°F—feels warm but not hot to the touch |
| Active dry yeast | 2 packages (1/4 oz each) | Check expiration date for best results |
| Granulated sugar | 1/2 cup | Feeds the yeast and adds subtle sweetness |
| Salt | 1 tablespoon | Enhances flavor and controls yeast activity |
| Vegetable oil | 1/4 cup | Keeps the bread tender and moist |
| All-purpose flour | 7-8 cups | Add gradually until dough reaches proper consistency |
The water temperature is crucial here. Too hot and you’ll kill the yeast, too cold and it won’t activate properly. I test mine with an instant-read thermometer, but if you don’t have one, the water should feel like a comfortable bath—warm but not uncomfortable on your wrist.
Don’t skip checking your yeast’s expiration date. I learned this the hard way after waiting two hours for dough that never rose. Fresh yeast makes all the difference in getting that beautiful rise and airy texture.
Step-by-Step Instructions for Perfect Yeast Bread
Making this publix white mountain bread is easier than you might think. The process is straightforward, and I’ll walk you through exactly what to look for at each stage so you can bake with confidence.
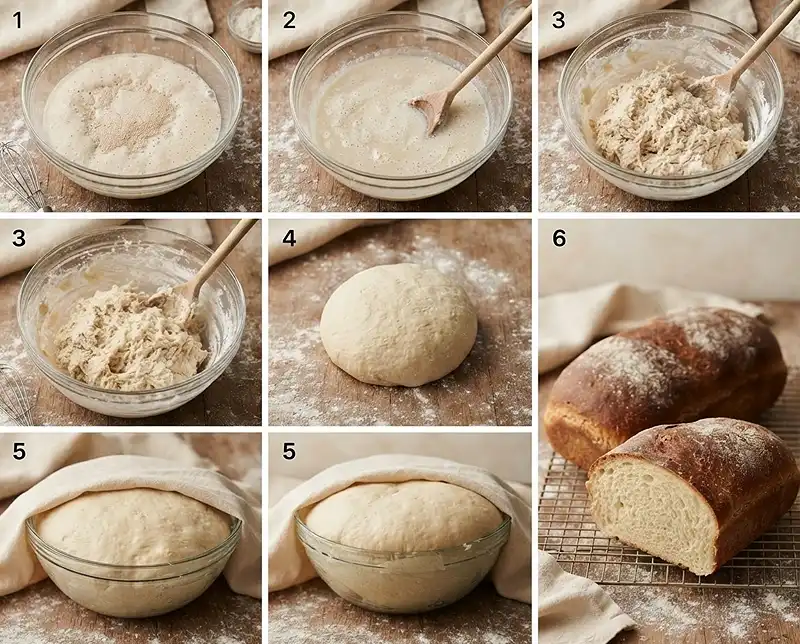
- Activate the yeast: In a large bowl, combine the warm water and yeast. Let stand for 5 minutes, or until the yeast is foamy and smells pleasantly yeasty. If nothing happens after 10 minutes, your water was too hot or your yeast is dead—start over with fresh yeast and check your water temperature.
- Mix the wet ingredients: Stir in the sugar, salt, and vegetable oil until everything is dissolved and well combined. The sugar will help feed the yeast and contribute to that golden crust we’re after.
- Start building the dough: Gradually add 3 cups of flour, mixing well after each addition. The dough will be very sticky at this point—that’s completely normal. I use a wooden spoon for this stage because the mixture is too wet to knead but too thick to whisk.
- Add remaining flour: Add the remaining flour 1/2 cup at a time, stirring after each addition, until the dough is stiff enough to handle. You’ll know it’s ready when it starts pulling away from the sides of the bowl and you can gather it into a shaggy ball. You might not need all 8 cups depending on humidity and how you measure flour.
- Knead the dough: Turn the dough out onto a lightly floured surface and knead for 8-10 minutes, or until smooth and elastic. This is where the magic happens—the gluten develops and gives the bread its structure. The dough should feel soft and springy, no longer sticky, and when you poke it, the indentation should slowly spring back.
- First rise: Place the dough in a greased bowl, turning once to grease the top. Cover with a clean kitchen towel or plastic wrap and let rise in a warm place for 1 to 1.5 hours, or until doubled in size. I like to put mine in the oven with just the light on—it creates the perfect warm, draft-free environment.
- Shape the loaves: Punch down the dough to release the gas buildup, then divide it in half. Shape each half into a loaf by flattening it into a rectangle, rolling it up tightly from the short end, and pinching the seams closed. Place each loaf seam-side down in a greased 9×5 inch loaf pan.
- Second rise: Cover and let rise again for 30-45 minutes, or until the dough has doubled in size and risen about an inch above the rim of the pan. This second rise is crucial for that light, fluffy texture.
- Preheat and prepare: While the loaves are rising, preheat your oven to 375°F (190°C). Make sure your oven is fully preheated before the bread goes in for even baking.
- Bake: Bake for 30-35 minutes, or until the tops are golden brown and the loaves sound hollow when tapped on the bottom. If the tops are browning too quickly, tent them loosely with aluminum foil for the last 10 minutes.
- Cool properly: Remove the loaves from the pans immediately and cool on a wire rack. This prevents the bottoms from getting soggy. I know it’s tempting, but try to wait at least 15 minutes before slicing—cutting into hot bread will give you a gummy texture.
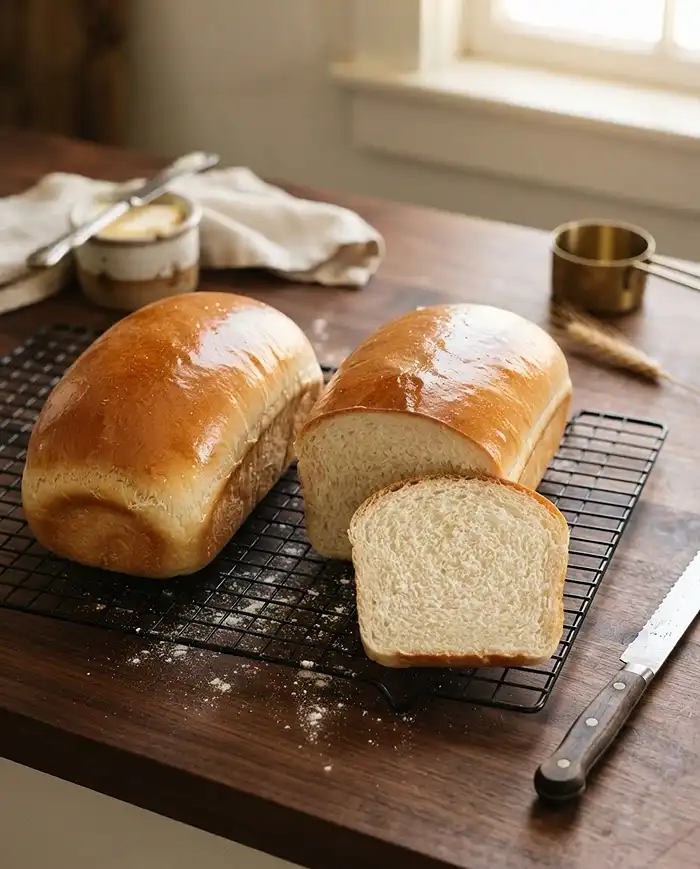
Expert Tips for Bakery-Quality Results
After making this homemade white bread dozens of times, I’ve picked up a few tricks that make a real difference in the final result.
Measure your flour correctly by spooning it into the measuring cup and leveling it off with a knife. Scooping directly from the bag packs the flour down and you’ll end up with too much, which makes the bread dense and dry.
The dough should be soft and slightly tacky but not sticky after kneading. If it’s sticking to your hands, add flour a tablespoon at a time. If it feels stiff and dry, wet your hands and knead in a bit more moisture.
Create a warm rising environment by turning your oven to the lowest setting for just one minute, then turning it off. The residual warmth is perfect for rising dough. Just remember to remove the bread before preheating for baking—I’ve forgotten this step more than once.
For an even softer crust, brush the hot loaves with melted butter right when they come out of the oven. This is a bakery trick that creates that tender, slightly shiny top crust.
Use a serrated bread knife and a gentle sawing motion to slice cooled bread. Pressing down with a regular knife will squish your beautiful loaf.
Creative Variations to Try
Once you’ve mastered the basic recipe, there are so many fun ways to customize this easy bread recipe to suit your taste.
For a honey wheat version, replace 2 cups of all-purpose flour with whole wheat flour and swap the sugar for honey. The bread will be slightly denser with a nutty flavor that’s perfect for heartier sandwiches.
Create a cinnamon swirl loaf by rolling out each portion of dough into a rectangle, brushing with melted butter, and sprinkling with a cinnamon-sugar mixture before rolling it up. This makes incredible French toast.
Add 1 cup of shredded cheese and 2 teaspoons of garlic powder to the dough for a savory garlic cheese bread that’s amazing alongside pasta or soup.
Make dinner rolls instead of loaves by dividing the dough into 24 pieces, shaping them into balls, and placing them in greased 9×13 inch pans. Reduce baking time to 18-22 minutes.
For a tangier flavor similar to sourdough, let the dough rise in the refrigerator overnight after the first rise, then bring to room temperature before shaping and completing the second rise.
Troubleshooting Common Bread-Making Issues
Even experienced bakers run into issues sometimes. Here’s how to fix the most common problems with yeast bread.
If your dough didn’t rise, the culprit is usually dead yeast or water that was too hot or too cold. Always check yeast expiration dates and water temperature before starting. The good news is you’ll know within that first 5 minutes if there’s a problem, so you can start over without wasting time.
Dense, heavy bread usually means too much flour was added or the dough wasn’t kneaded enough to develop the gluten. Remember that the dough should be soft and slightly tacky, not stiff. Knead for the full 8-10 minutes—your arms might get tired, but it’s worth it.
If the bread is dry and crumbly, you likely used too much flour or overbaked it. Next time, add flour more conservatively and check for doneness at 30 minutes. The internal temperature should reach 190-200°F.
A gummy texture inside means the bread was sliced while still too hot. I know waiting is hard, but that cooling time allows the structure to set properly. Let it cool for at least 15-20 minutes.
If your crust is too hard, try reducing the oven temperature by 25°F and baking a few minutes longer. You can also place a pan of water on the bottom rack while baking to create steam, which helps produce a softer crust.
Storage Guidelines for Fresh Bread
Proper storage keeps your publix white mountain bread fresh and delicious for days. Since homemade bread doesn’t contain preservatives like store-bought versions, following these guidelines ensures the best quality and prevents waste.
| Storage Method | Duration | Best For |
|---|---|---|
| Room temperature (bread bag or wrapped in foil) | 3-4 days | Immediate use, sandwiches, toast |
| Refrigerator (wrapped tightly) | Up to 1 week | Extending freshness in humid climates |
| Freezer (wrapped in plastic, then foil) | Up to 3 months | Long-term storage, batch baking |
Store the completely cooled bread at room temperature in a bread bag, wrapped in foil, or in an airtight container. Don’t refrigerate unless you live in a very hot, humid climate—refrigeration actually makes bread go stale faster due to a process called starch retrogradation.
For freezing, I slice the bread first so I can pull out individual slices as needed. Wrap the whole loaf (or individual slices) tightly in plastic wrap, then again in aluminum foil or place in a freezer bag. Label with the date so you remember when you made it.
To thaw frozen bread, leave it at room temperature for 2-3 hours, or toast individual slices directly from frozen. You can also refresh a whole loaf by wrapping it in foil and warming it in a 350°F oven for 10-15 minutes.
According to the USDA guidelines on food safety, if you spot any mold on bread, discard the entire loaf. Mold sends roots throughout the bread that aren’t always visible, so cutting around the moldy spot isn’t safe.
Publix White Mountain Bread FAQs
What is Publix White Mountain Bread?
Publix White Mountain Bread is a soft, slightly sweet white bread that has a light, fluffy texture. It is part of Publix’s bakery line and is known for its mild flavor and versatility, making it suitable for sandwiches, toast, or as a side with meals.
How should I store Publix White Mountain Bread?
Store Publix White Mountain Bread in a cool, dry place at room temperature, preferably in its original packaging or an airtight container to maintain freshness. For extended storage, you can freeze the bread for up to three months. Avoid refrigerating it as this can cause the bread to dry out and become stale more quickly.
Is Publix White Mountain Bread suitable for making sandwiches?
Yes, Publix White Mountain Bread is excellent for making sandwiches. Its soft texture and mild flavor make it a versatile choice that pairs well with a variety of fillings, from deli meats and cheeses to peanut butter and jelly. The bread holds up well without becoming soggy.
What are the main ingredients in Publix White Mountain Bread?
Publix White Mountain Bread typically contains enriched wheat flour, water, sugar, yeast, soybean oil, salt, and dough conditioners. It may also include added vitamins and minerals. For specific ingredient information and allergen details, check the product label as formulations may vary.
How many slices are in a loaf of Publix White Mountain Bread?
A standard loaf of Publix White Mountain Bread typically contains approximately 20 to 24 slices, depending on the thickness of each slice. The exact count may vary slightly between loaves due to the cutting process at the bakery.
Final Thoughts on Making Homemade White Bread
There’s something deeply satisfying about slicing into a loaf of warm, homemade bread that you made with your own hands. This publix white mountain bread recipe has become a weekend staple in my kitchen, and I hope it becomes one in yours too.
The beauty of this sandwich bread is its versatility—it works for everything from school lunch sandwiches to holiday stuffing to Sunday morning French toast. Once you’ve made it a few times, the process becomes second nature and you’ll find yourself whipping up a batch whenever you need it.
Don’t be intimidated if you’ve never made yeast bread before. Follow the visual and tactile cues in the recipe, trust the process, and give your dough the time it needs to rise properly. The yeast does most of the work—you’re just guiding it along.
I’d love to hear how your bread turns out! If you make this recipe, let me know in the comments or check out more of my favorite recipes. And if you’re on a bread-baking kick, you might also enjoy my viral TikTok cloud bread, 3-ingredient banana bread, or healthy oat flour banana bread. Happy baking!