Costco Key Lime Dessert Cups Copycat
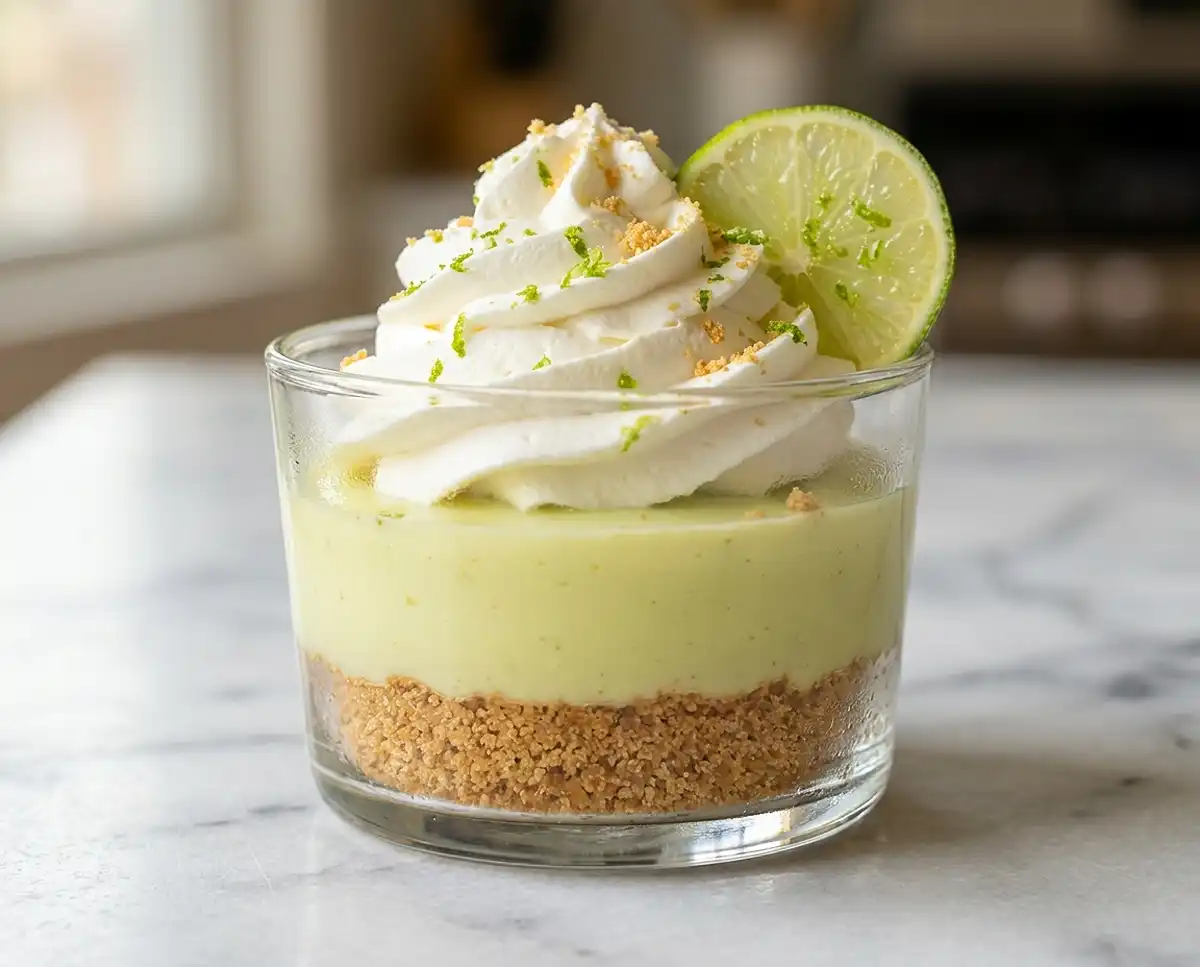
This copycat Costco key lime dessert cups recipe delivers that perfect balance of sweet and tangy, creamy filling, buttery graham cracker crust, and fluffy whipped topping—all in your own kitchen.
I’ve been obsessed with those Costco key lime pie cups for years. You know the ones—sitting in the bakery section, calling your name every single trip. One day I decided to stop buying them and just make my own version at home, and I’m so glad I did. This recipe tastes just as good, if not better, and you can make it whenever the craving hits.
The best part? You probably already have most of these ingredients in your pantry. Let me walk you through exactly how to make these tangy, creamy, utterly crave-worthy dessert cups.
Table of Contents
What Makes This Costco Key Lime Pie So Good
This copycat Costco key lime pie nails that signature tart-meets-sweet flavor that makes the original so addictive. The filling is silky smooth with just the right amount of citrus punch, and the graham cracker crust adds that essential buttery crunch.
You can bake this as one full pie or divide it into individual dessert cups—your choice. Either way, it’s ridiculously easy to make, requires no fancy equipment, and comes together in under an hour of active work. The hardest part is waiting for it to chill.
Plus, making it at home means you control the quality of every ingredient. Fresh key lime juice makes a noticeable difference, but I’ll be honest—I’ve used bottled juice in a pinch and it still turns out fantastic.
Why You’ll Love This Recipe
This recipe checks all the boxes for a keeper dessert. It’s make-ahead friendly, travels well, and impresses everyone who tries it. Here’s what makes it special:
Authentic Costco flavor: If you’ve been craving those bakery cups, this is it. The texture, the tang, the sweetness—it’s all here.
Simple ingredients: No weird additives or hard-to-find items. Just straightforward pantry staples and fresh citrus.
Foolproof method: Even if you’re new to pie-making, this one is forgiving. The filling comes together with just whisking, no stovetop cooking required.
Perfect for sharing: Whether you’re bringing dessert to a potluck or meal prepping treats for the week, this recipe delivers.
Customizable portions: Make one impressive pie or portion it into individual cups for easy serving and storage.
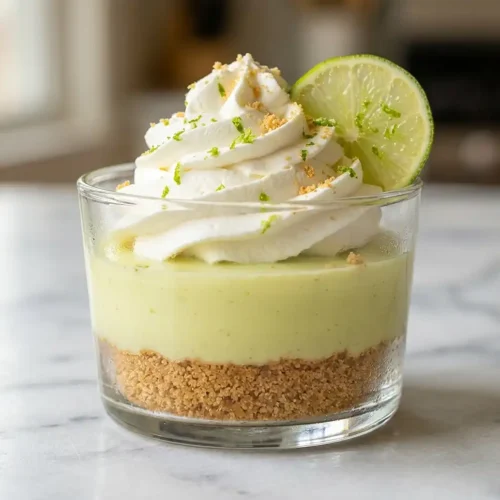
Costco Key Lime Dessert Cups
Ingredients
Ingredients
- 1 ½ cups graham cracker crumbs
- 5 tablespoons granulated sugar
- 6 tablespoons unsalted butter melted
- 2 14- ounce cans sweetened condensed milk
- ¾ cup fresh key lime juice about 15 key limes or bottled key lime juice
- ½ cup sour cream room temperature
- 2 large egg yolks room temperature
- 1 cup heavy whipping cream chilled
- 1 tablespoon powdered sugar
- 1 teaspoon pure vanilla extract
Instructions
- Preheat the Oven: Preheat oven to 350°F. Set aside a 9-inch pie plate.
- Make the Crust: In a medium mixing bowl, combine 1 1/2 cups graham cracker crumbs, 5 tablespoons granulated sugar, and 6 tablespoons unsalted butter. Stir until the texture resembles wet sand.
- Press the Crust: Press the mixture into the pie dish, covering the bottom and sides evenly. Use the back of a spoon or measuring cup to press it firmly.
- Bake the Crust: Bake for 8 minutes. Remove from the oven and set aside to cool completely.
- Make the Filling: In a large mixing bowl, whisk together 2 14-ounce cans sweetened condensed milk, 3/4 cup fresh key lime juice, 1/2 cup sour cream, and 2 large egg yolks until smooth and fully combined.
- Add the Filling to the Crust: Pour the filling into the cooled crust. Use a spatula to smooth the top.
- Bake the Pie: Bake for 15 to 20 minutes, just until the filling is set but still slightly jiggly in the center. Do not allow the top to brown.
- Cool the Pie: Place the pie on a cooling rack and let it cool at room temperature for 30 minutes.
- Chill the Pie: Cover with plastic wrap and refrigerate for at least 3 hours, or until fully set and chilled.
- Make the Whipped Topping: Using a stand or hand mixer, beat the cold 1 cup heavy whipping cream on high speed until soft peaks form. Add 1 tablespoon powdered sugar and 1 teaspoon pure vanilla extract. Continue whipping until stiff peaks form.
- Top the Pie: Spread or pipe the whipped cream over the chilled pie. Garnish with lime zest or crushed graham crackers, if desired.
- Serve: Serve cold. Store leftovers in the refrigerator.
Ingredients You’ll Need
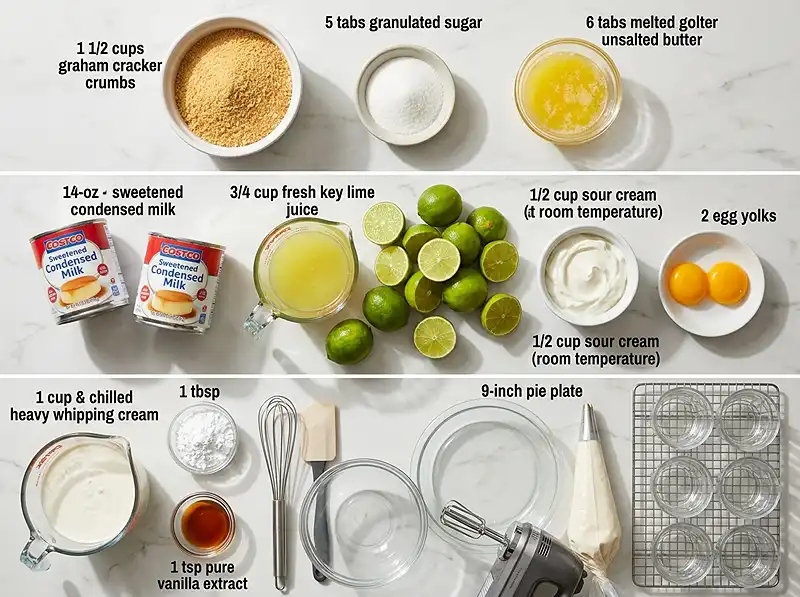
Let’s talk about what goes into making these Costco key lime dessert cups. Everything here plays an important role in getting that signature flavor and texture just right.
| Ingredient | Quantity | Notes |
|---|---|---|
| Graham cracker crumbs | 1 1/2 cups | Buy pre-made crumbs or pulse whole crackers in a food processor |
| Granulated sugar | 5 tablespoons | For the crust sweetness |
| Unsalted butter | 6 tablespoons | Melted and slightly cooled |
| Sweetened condensed milk | 2 (14-ounce) cans | The base of the filling—don’t substitute evaporated milk |
| Fresh key lime juice | 3/4 cup | About 15 key limes, or use bottled juice |
| Sour cream | 1/2 cup | Room temperature, adds tang and creaminess |
| Large egg yolks | 2 | Room temperature, helps set the filling |
| Heavy whipping cream | 1 cup | Chilled, for topping |
| Powdered sugar | 1 tablespoon | Sweetens the whipped cream |
| Pure vanilla extract | 1 teaspoon | Adds depth to the whipped topping |
About key limes: Key limes are smaller and more aromatic than regular Persian limes. They have a distinct floral note and sharper acidity. If you can’t find fresh key limes, bottled key lime juice works beautifully and saves you a ton of squeezing time. Regular lime juice will work in a pinch, though the flavor will be slightly different.
Sweetened condensed milk: This thick, sweet milk is what gives the filling its signature creamy texture and sets it without needing to cook a custard on the stovetop. Make sure you’re using sweetened condensed milk, not evaporated milk—they’re not interchangeable.
Room temperature matters: Bringing your sour cream and egg yolks to room temperature helps everything blend smoothly without lumps. Just set them out while you prep the crust.
Step-by-Step Instructions
Making this copycat Costco key lime pie is straightforward, but I’ll walk you through every detail so yours turns out perfectly. No guessing, no stress—just delicious results.
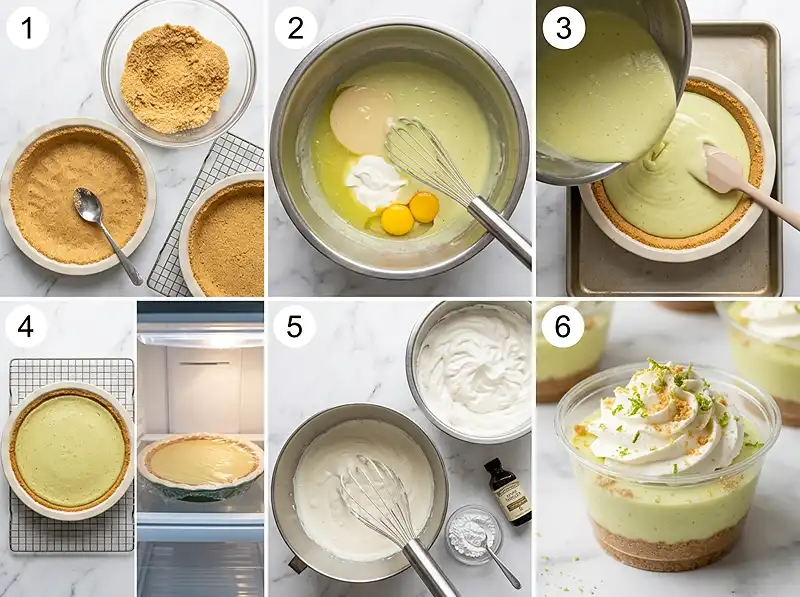
- Preheat the Oven: Set your oven to 350°F and grab a 9-inch pie plate. If you’re making individual cups, have those ready instead—mini tart pans or ramekins work great.
- Make the Crust: Dump the graham cracker crumbs, granulated sugar, and melted butter into a medium bowl. Use a fork to stir everything together until it looks like wet sand and holds together when you squeeze it. The texture should be evenly moist with no dry patches.
- Press the Crust: Pour the crumb mixture into your pie plate. Start by pressing it evenly across the bottom, then work your way up the sides. I like using the bottom of a measuring cup to really pack it down—you want it firm so it doesn’t crumble when you slice it later. Make sure the thickness is consistent all around.
- Bake the Crust: Pop it in the oven for exactly 8 minutes. You’re just setting it, not browning it. When it comes out, it should smell toasty and buttery. Set it on a cooling rack and let it cool completely before adding the filling—this prevents a soggy bottom.
- Make the Filling: In a large bowl, whisk together the sweetened condensed milk, key lime juice, sour cream, and egg yolks. Whisk briskly for about a minute until everything is smooth and fully combined. The mixture will thicken slightly as the acid from the lime juice reacts with the condensed milk—that’s exactly what you want.
- Add the Filling to the Crust: Pour your bright, pale yellow filling into the cooled crust. Use a spatula to smooth the top into an even layer. If you see any air bubbles, gently tap the pie plate on the counter a few times to release them.
- Bake the Pie: Slide it back into the oven for 15 to 20 minutes. You’re looking for the filling to be set around the edges but still have a slight jiggle in the very center—like a just-set custard. The top should stay pale; if it starts browning, it’s overbaked. This filling continues to set as it cools, so don’t worry if it seems a little soft.
- Cool the Pie: Take the pie out and set it on a cooling rack. Let it sit at room temperature for 30 minutes. This gradual cooling prevents cracking and helps the texture develop properly.
- Chill the Pie: Once it’s cooled to room temp, cover the whole thing with plastic wrap—press it gently onto the surface to prevent a skin from forming if you want. Refrigerate for at least 3 hours, but overnight is even better. The filling needs this time to firm up completely and develop its full flavor.
- Make the Whipped Topping: Right before serving, pour your cold heavy cream into a mixing bowl. Beat on high speed with a hand mixer or stand mixer until you see soft peaks forming—the cream will hold its shape but the peaks will curl over. Add the powdered sugar and vanilla extract, then keep beating until you get stiff peaks. The cream should stand up straight and hold its shape beautifully.
- Top the Pie: Spread the whipped cream over the chilled pie using a spatula, or get fancy and pipe it on with a pastry bag and star tip. I like adding a sprinkle of lime zest or crushed graham crackers on top for that bakery-style finish.
- Serve: Slice and serve cold. A sharp knife dipped in hot water and wiped clean between cuts gives you those pristine slices. Each bite should have creamy filling, crunchy crust, and fluffy topping all together.
Expert Tips for Perfect Key Lime Pie
Don’t skip the room temperature step. Cold eggs and sour cream don’t blend as smoothly and can create lumps in your filling. Just 20 minutes on the counter makes a difference.
Fresh juice makes it better. If you’re going through the effort of baking, fresh key lime juice really does elevate the flavor. That said, I keep bottled juice on hand for weeknight cravings and it still tastes amazing.
Watch the bake time closely. Overbaked filling gets grainy and can crack. Set a timer and check it at the 15-minute mark. Remember, it will firm up more as it chills.
Chill it overnight if you can. The flavors meld and deepen after a full night in the fridge. If you’re making this for a special occasion, bake it the day before.
Stabilize your whipped cream. If you’re making the pie more than a few hours ahead, add a teaspoon of cornstarch or a tablespoon of instant pudding mix to the whipped cream before beating. It’ll stay fluffy longer without weeping.
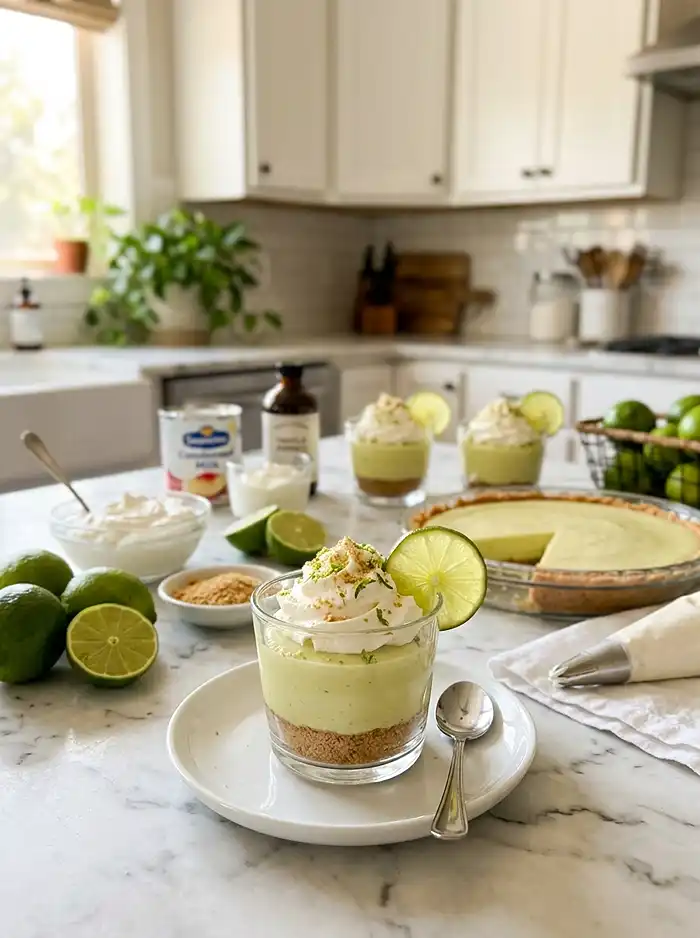
Make it in individual cups. Divide the crust and filling among 8 to 10 small cups or jars for perfect single servings. Adjust the bake time down to 12 to 15 minutes and check for that slight jiggle.
Variations to Try
Lemon version: Swap the key lime juice for fresh lemon juice to make a classic lemon pie. The process stays exactly the same.
Coconut crust: Mix 1/2 cup of sweetened shredded coconut into your graham cracker crust for a tropical twist that pairs beautifully with the lime flavor.
Chocolate drizzle: Melt some dark chocolate and drizzle it over the whipped cream topping. The bitterness of dark chocolate plays wonderfully against the sweet-tart filling.
Gingersnap crust: Use crushed gingersnap cookies instead of graham crackers. The spice adds a warm, complex layer that makes this feel even more special.
Lighter version: Replace half the heavy cream in the topping with Greek yogurt for a tangy, protein-packed alternative that’s still delicious.
Looking for more crowd-pleasing desserts? Try these chocolate crinkle cookies or this easy eggless vanilla cake.
Troubleshooting Common Issues
My crust is falling apart: You probably didn’t use enough butter or didn’t pack it firmly enough. The mixture should hold together when squeezed. If it’s too dry, add another tablespoon of melted butter.
The filling is runny: It needs more chill time. Pop it back in the fridge for a few more hours. If it’s still loose after overnight chilling, you may have undermeasured the lime juice or overbaked it slightly, which can prevent proper setting.
The top cracked: This usually happens from overbaking or cooling too quickly. The filling should still taste great—just cover it with extra whipped cream and no one will know.
The filling tastes too sweet: Add an extra tablespoon or two of lime juice to the filling before baking. Key lime pie should have a bright, tangy punch that balances the sweetness of the condensed milk.
My whipped cream deflated: Make sure your cream and bowl were both very cold, and don’t overbeat once you add the sugar. Beat just until stiff peaks form, then stop.
Storage and Make-Ahead Tips
This Costco key lime dessert cups recipe stores beautifully, which makes it perfect for meal prep or making ahead for entertaining. Here’s how to keep it fresh and delicious.
| Storage Method | Duration | Best Practices |
|---|---|---|
| Refrigerator (without topping) | Up to 4 days | Cover tightly with plastic wrap or foil to prevent absorbing fridge odors |
| Refrigerator (with topping) | Up to 2 days | The whipped cream stays freshest when added just before serving |
| Freezer (without topping) | Up to 2 months | Wrap well and thaw overnight in fridge before serving |
| Individual cups | Same as above | Cover each cup individually for grab-and-go convenience |
Make-ahead game plan: Bake the pie up to three days ahead and keep it covered in the fridge. Make the whipped cream topping the morning of serving, or even an hour before if you’re short on time. This approach gives you bakery-quality dessert with zero last-minute stress.
Freezing tips: Key lime pie freezes surprisingly well. Let it cool completely, then wrap the whole thing tightly in plastic wrap followed by aluminum foil. Thaw it overnight in the refrigerator before adding the whipped topping. The texture stays creamy and the flavor is just as bright.
Transporting: If you’re taking this to a party, keep it chilled until the last possible moment. A cooler with ice packs works perfectly. Add the whipped cream right before serving so it looks picture-perfect.
For more recipe ideas, check out my complete collection or try this zesty fiesta lime chicken for a savory counterpart to your key lime dessert.
Costco Key Lime Dessert Cups FAQs
What are Costco Key Lime Dessert Cups?
Costco Key Lime Dessert Cups are individual serving desserts featuring a tangy key lime filling topped with whipped cream and graham cracker crumbs. They come in a multi-pack container and are found in the refrigerated bakery section of Costco warehouses.
How many dessert cups come in a Costco package?
Costco typically sells their Key Lime Dessert Cups in packages containing 12 individual serving cups. The exact quantity may vary by location and availability, but the standard package contains a dozen cups.
How should I store Costco Key Lime Dessert Cups?
These dessert cups should be stored in the refrigerator at all times. Keep them refrigerated until ready to serve and consume them by the use-by date printed on the package. Do not freeze as this may affect the texture and quality of the whipped topping and filling.
How long do Costco Key Lime Dessert Cups last?
Unopened Costco Key Lime Dessert Cups typically last 5 to 7 days from the date of purchase when properly refrigerated. Always check the expiration date on the package. Once opened, individual cups should be consumed within 1 to 2 days for best quality and freshness.
Are Costco Key Lime Dessert Cups available year-round?
Availability of Costco Key Lime Dessert Cups can vary by location and season. While some Costco warehouses carry them regularly, they may be seasonal items at other locations or available only during warmer months. It’s best to check with your local Costco warehouse for current availability.
Time to Make Your Own Costco Key Lime Pie
There’s something so satisfying about recreating a beloved store-bought treat at home, especially when it tastes this good. These Costco key lime dessert cups have that perfect tangy-sweet balance, creamy texture, and buttery crust that keeps you coming back for more.
The best part? You don’t need to wait for your next Costco run or share with anyone unless you want to. Make this copycat Costco key lime pie this weekend and enjoy every single bite. Trust me, once you see how easy it is, you’ll be making it all summer long.
If you make this recipe, I’d love to hear how it turned out! Drop a comment below and let me know if you went with individual cups or one big beautiful pie. Happy baking!