Cheese Dreams Southern Appetizer Recipe
A nostalgic Southern party classic that’s ridiculously easy and always disappears first from the appetizer table.
I’ll never forget the first time I tasted cheese dreams at my neighbor’s Christmas open house. These golden, bubbly little bites were gone before I could grab seconds, and I spent the rest of the evening hunting down the recipe. If you’ve never had the pleasure of meeting this retro Southern gem, you’re in for a treat. They’re the kind of appetizer that looks humble but tastes absolutely divine.
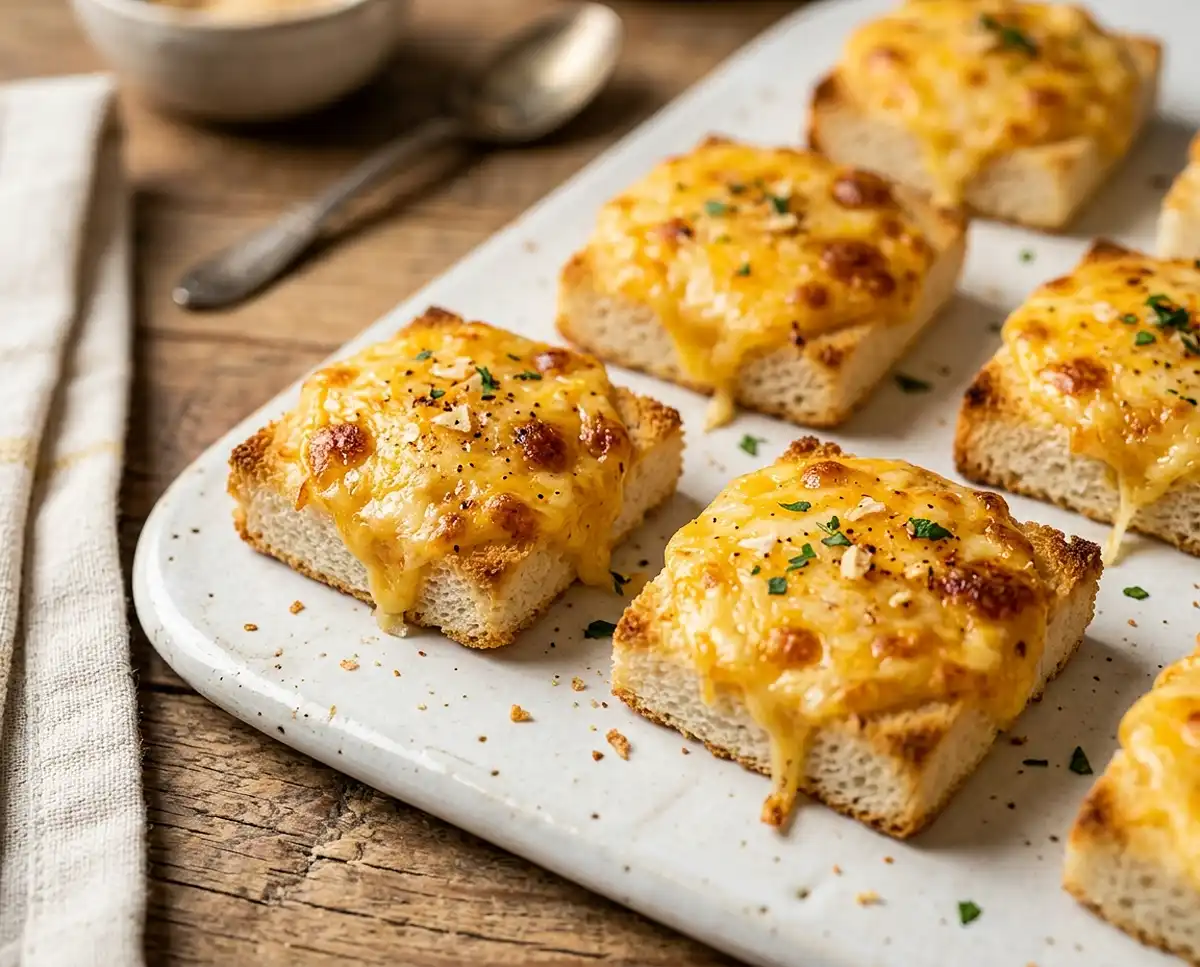
Cheese dreams are a classic Southern cheese appetizer made from white bread topped with a tangy, creamy cheese mixture and broiled until golden and bubbling. The result is a crispy-edged, melty-centered bite that’s part cheese toast, part fancy canapé, and completely addictive. They take about 15 minutes from start to finish and require ingredients you probably already have in your fridge.
Table of Contents
Why You’ll Love This Classic Cheese Dreams Recipe
This cheese dreams southern appetizer recipe is one of those rare dishes that checks every single box. It’s incredibly simple, uses basic pantry staples, and delivers that perfect combination of crispy and gooey that makes people keep reaching for just one more.
The tangy sharpness of cheddar mixed with creamy mayonnaise creates a spread that melts into something magical under the broiler. Each bite has crispy golden edges that give way to a warm, cheesy center. The subtle kick from Worcestershire sauce and optional cayenne adds just enough depth to keep things interesting without overwhelming anyone’s palate.
These work beautifully for every occasion. Need something quick for unexpected guests? Done in 15 minutes. Planning a fancy brunch or holiday party? They look elegant cut into triangles or fun shapes. Plus, you can prep the cheese mixture ahead and assemble them right before your guests arrive. They’re the ultimate easy party appetizers that don’t taste easy at all.
I love that this recipe connects us to Southern entertaining traditions. These retro cheese snacks have been gracing church potlucks, bridal showers, and bridge club gatherings for generations. There’s something wonderful about serving food that carries that kind of history and warmth.
Cheese Dreams Southern Appetizer
Ingredients
Ingredients
- 1 cup shredded sharp cheddar cheese
- ¼ cup mayonnaise
- ¼ teaspoon garlic powder
- Dash of Worcestershire sauce
- Pinch of cayenne pepper optional
- 1 loaf thin-sliced white bread crusts removed
- Butter softened
Instructions
- In a medium bowl, combine the shredded cheddar cheese, mayonnaise, garlic powder, Worcestershire sauce, and cayenne pepper (if using). Mix well until thoroughly combined.
- Spread a thin layer of the cheese mixture onto one side of each slice of bread.
- Cut each bread slice with the cheese mixture into quarters or desired shapes.
- Lightly butter a baking sheet.
- Place the cheese dreams on the prepared baking sheet, cheese side up.
- Broil for 2-4 minutes, or until the cheese is bubbly and golden brown. Watch carefully to prevent burning.
- Serve immediately.
Ingredients
This recipe keeps things beautifully simple with ingredients you likely have on hand. The quality of your cheddar makes a real difference here, so reach for a good sharp variety if you can. Here’s exactly what you’ll need to make about 24-32 cheese dreams, depending on how you cut them.
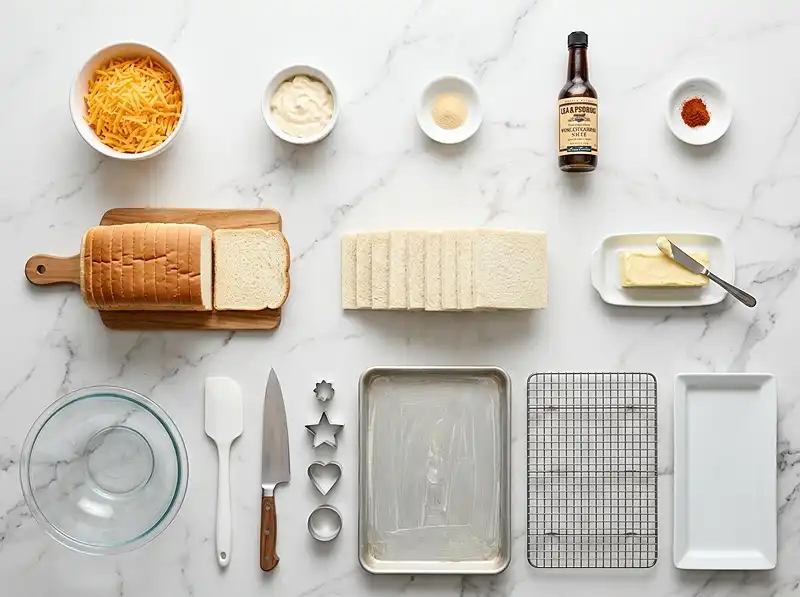
| Ingredient | Amount | Notes |
|---|---|---|
| Sharp cheddar cheese, shredded | 1 cup | Shred your own for best melting |
| Mayonnaise | 1/4 cup | Duke’s or Hellmann’s preferred |
| Garlic powder | 1/4 teaspoon | Not garlic salt |
| Worcestershire sauce | Dash | About 1/4 teaspoon |
| Cayenne pepper | Pinch (optional) | Adds gentle warmth |
| White bread, thin-sliced | 1 loaf | Crusts removed |
| Butter, softened | As needed | For greasing the pan |
A word about the cheese: pre-shredded cheese contains anti-caking agents that can affect how smoothly it melts. If you have five extra minutes, shredding a block of sharp cheddar yourself makes a noticeable difference in texture. The mixture becomes creamier and melts more evenly under the broiler.
The mayonnaise might seem like an odd addition if you’ve never made these before, but it’s the secret ingredient that makes everything work. It adds tang, helps the cheese spread easily, and contributes to that gorgeous golden color when broiled. Don’t skip it or substitute it with something else unless you’re testing a specific variation.
Step-by-Step Instructions
The beauty of this classic cheese dreams recipe is in its simplicity. You’ll mix, spread, cut, and broil. The whole process takes about 15 minutes, with most of that being hands-on prep. The actual cooking happens in a flash, so you’ll want everything ready before you turn on the broiler.
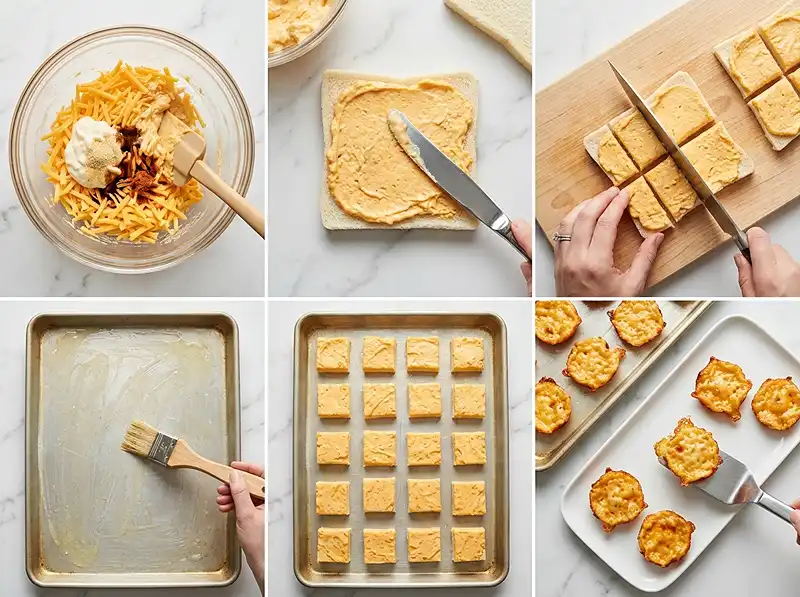
- Mix the cheese spread: In a medium bowl, combine the shredded sharp cheddar cheese, mayonnaise, garlic powder, Worcestershire sauce, and cayenne pepper if you’re using it. Stir everything together with a fork or spoon until you have a thick, cohesive mixture that looks almost like a chunky paste. The cheese should be evenly coated with the mayo and seasonings. This takes about a minute of good mixing.
- Spread the mixture on bread: Lay out your bread slices on a clean work surface. Using a butter knife or small offset spatula, spread a thin, even layer of the cheese mixture onto one side of each slice. You want to go almost to the edges, but you don’t need a thick layer. About an eighth of an inch is perfect. The mixture will spread as it melts, so resist the urge to pile it on too heavily.
- Cut into portions: Using a sharp knife, cut each prepared bread slice into quarters to make triangles or squares. You can also use small cookie cutters if you want fancy shapes for a special occasion. I usually just do simple diagonal cuts to make four triangles per slice. Work carefully so the cheese mixture doesn’t slide off.
- Prepare the baking sheet: Take a large baking sheet and lightly butter the surface using softened butter and a paper towel or pastry brush. This prevents sticking and adds a little extra richness to the bottoms. You can also line the pan with parchment paper if you prefer easier cleanup, though buttering gives better flavor.
- Arrange cheese dreams: Place your cut cheese dreams on the prepared baking sheet in a single layer, cheese side facing up. Leave a little space between each piece so heat can circulate. They won’t spread much, so you can fit quite a few on one sheet. Position your oven rack about 4-6 inches from the broiler element.
- Broil until golden: Turn your broiler to high and let it preheat for a minute or two. Slide the baking sheet under the broiler and watch closely. The cheese dreams will need 2-4 minutes total, depending on your broiler’s intensity. You’re looking for the cheese to bubble vigorously and turn golden brown with some darker spots around the edges. The transformation happens fast, so don’t walk away. If some pieces are browning faster than others, rotate the pan halfway through.
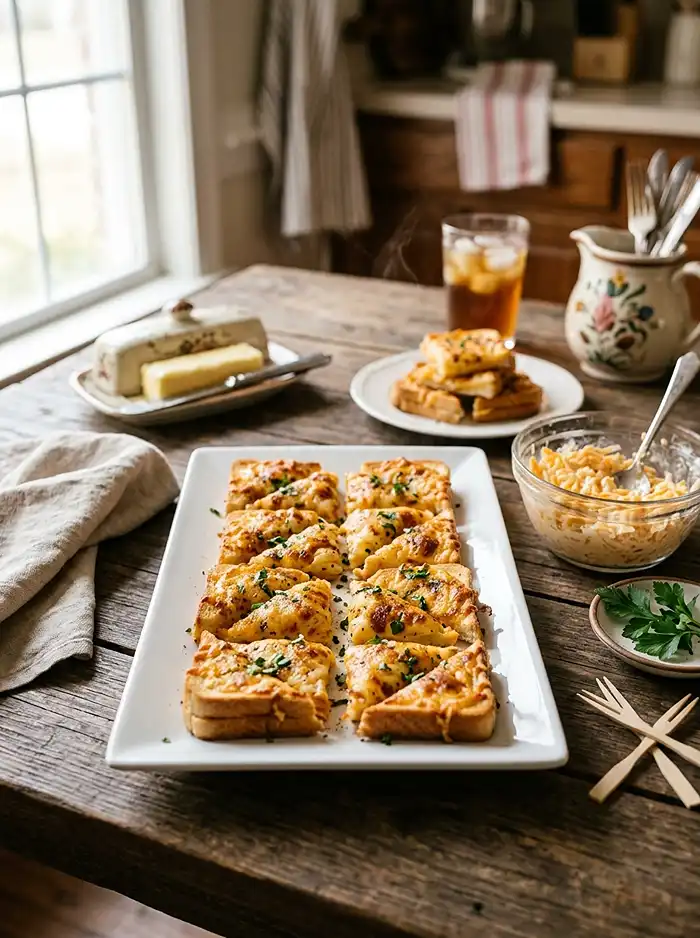
- Serve immediately: Remove the baking sheet from the oven as soon as the cheese dreams reach that perfect golden color. Let them cool for just a minute so nobody burns their mouth on molten cheese, then transfer them to a serving platter. These Southern cheese appetizers are absolutely best served warm, when the cheese is still gooey and the edges are at their crispiest.
The whole process moves quickly once you start broiling, so have your serving platter ready and stay close to the oven. Broilers vary wildly in temperature and intensity, so your timing might be different from mine. Trust your eyes more than the clock. You want bubbling, golden, slightly crispy cheese, not blackened or pale and barely melted.
Expert Tips for Perfect Cheese Dreams
After making these retro cheese snacks dozens of times for various gatherings, I’ve picked up a few tricks that make a real difference in the final result.
Use room temperature ingredients when making your cheese mixture. Cold shredded cheese and mayo straight from the fridge don’t blend together as smoothly. Let everything sit out for about 15 minutes before mixing, and you’ll get a much creamier, more spreadable consistency.
Remove those crusts properly. I know it seems fussy, but crust-free bread makes these feel more elegant and ensures even cooking. The crusts tend to burn before the cheese gets properly melted. Use a sharp serrated knife and cut them off in one smooth motion per side. Save the crusts for breadcrumbs or feed them to the birds.
Don’t make the cheese layer too thick. I learned this the hard way when my first batch had such a heavy topping that the bread got soggy before the cheese could brown. A thin, even layer works so much better. The bread should still have some presence in each bite, not just serve as a flimsy vehicle for cheese.
Keep an oven mitt on and your eyes on the broiler. I can’t stress this enough. The difference between perfectly golden and disappointingly burnt is about 30 seconds under a hot broiler. Stay in the kitchen, watch through the oven window, and be ready to pull them out the moment they look right.
Work in batches if you’re making a large quantity. It’s better to serve multiple rounds of perfectly broiled cheese dreams than one huge batch where half are overdone and half are underdone because they were crowded on the pan.
For the best flavor, shred a high-quality aged cheddar yourself. The difference between freshly shredded good cheese and pre-shredded supermarket cheese is remarkable. You’ll taste it in every bite. Check out Serious Eats’ explanation of why pre-shredded cheese doesn’t melt as well if you want the science behind this tip.
Delicious Variations to Try
While the classic version is perfection in its simplicity, this cheese dreams southern appetizer recipe is wonderfully adaptable once you’ve mastered the basic technique.
Try a bacon cheddar version by stirring in 3-4 strips of crumbled crispy bacon to your cheese mixture. The smoky, salty bits add incredible depth and make these even more irresistible. You can also sprinkle a bit of bacon on top right before broiling for visual appeal.
For a jalapeño popper twist, add 2 tablespoons of finely minced jalapeño to the cheese mixture and use a combination of cheddar and cream cheese. This gives you that beloved jalapeño popper flavor in an easier format that’s perfect for parties.
Make them herb garden style by mixing in a tablespoon of fresh chopped herbs like chives, parsley, or dill. This brightens the flavor and adds lovely green flecks throughout. It’s a nice option for spring and summer gatherings.
Create a pimento cheese version by adding 2 tablespoons of diced pimento peppers and replacing half the cheddar with cream cheese. This gives you that classic Southern pimento cheese flavor in a warm, melty form.
For a everything bagel variation, spread the cheese mixture as directed, then sprinkle everything bagel seasoning on top before broiling. The sesame seeds, garlic, and onion add wonderful flavor and crunch.
You can also experiment with different bread. Whole wheat adds a nutty flavor, sourdough brings tanginess, and rye creates an almost Reuben-like experience. Just make sure whatever bread you choose is sliced thin enough to get crispy at the edges.
Troubleshooting Common Issues
Even with a recipe this straightforward, sometimes things don’t go quite as planned. Here’s how to fix the most common problems.
If your cheese dreams are burning before the cheese melts, your broiler is too hot or your oven rack is positioned too close to the heating element. Move the rack down a notch and reduce the broiler temperature if your oven has that option. Some broilers are absolute fire dragons.
When the bread gets soggy instead of crispy, you’ve likely used too much cheese mixture or your mixture was too wet. Make sure you’re spreading a thin layer and that your mayonnaise-to-cheese ratio is correct. The bread should still be the structure, not a soggy mess barely holding together.
If the cheese mixture slides off while you’re cutting the bread, it wasn’t mixed thoroughly enough or you cut too aggressively. Make sure the mayo is fully incorporated into the cheese so it’s sticky and cohesive, and use a sharp knife with a gentle sawing motion when cutting rather than pressing down hard.
When some pieces are overdone while others are still pale, your oven has hot spots or you crowded the pan. Rotate the baking sheet halfway through broiling and make sure there’s space between each piece for air circulation. According to the USDA’s broiler safety guidance, proper spacing also ensures more even cooking and reduces fire risk.
If the flavor seems bland, you probably need more seasoning or a sharper cheese. Don’t be shy with the Worcestershire sauce, and make sure your cheddar is labeled “sharp” or “extra sharp.” Mild cheddar just doesn’t have enough punch for this recipe.
Storage and Reheating
Cheese dreams are absolutely at their peak when served fresh from the broiler, but sometimes you need to think ahead or deal with leftovers. Here’s how to handle storage and still maintain decent quality.
| Storage Method | Duration | Best Practice |
|---|---|---|
| Room temperature (unbaked) | 2 hours | Cover with plastic wrap if assembled ahead |
| Refrigerator (unbaked) | 4-6 hours | Best option for make-ahead, keep covered |
| Refrigerator (baked) | 2-3 days | Store in airtight container, won’t be crispy |
| Freezer (unbaked) | 1 month | Flash freeze on tray, then bag; broil from frozen |
The best make-ahead strategy is to prepare the cheese mixture up to 24 hours in advance and keep it covered in the refrigerator. When you’re ready to serve, spread it on bread and broil. The mixture actually benefits from some resting time as the flavors meld together beautifully.
You can also assemble the cheese dreams completely, cutting them into portions and arranging them on a parchment-lined baking sheet. Cover tightly with plastic wrap and refrigerate for up to 6 hours before broiling. Bring them closer to room temperature before broiling, or add an extra minute to the cooking time.
For freezing, assemble the cheese dreams and place them on a baking sheet in a single layer. Freeze until solid, about 2 hours, then transfer to a freezer bag or airtight container. When you’re ready to serve, broil them straight from frozen, adding 1-2 extra minutes to the cooking time. Watch them closely as they can go from frozen to burnt surprisingly quickly.
If you have leftover cooked cheese dreams, store them in an airtight container in the refrigerator. They’ll keep for 2-3 days, but they lose that magical crispy texture and become more chewy. You can reheat them in a 375°F oven for about 5 minutes to crisp them up a bit, but they’ll never quite match the fresh-from-the-broiler version.
For food safety, never leave cheese dreams at room temperature for more than 2 hours, as they contain mayonnaise and dairy. The USDA food safety guidelines recommend this timeline for perishable foods to prevent bacterial growth.
Cheese Dreams Southern Appetizer Recipe FAQs
What are cheese dreams and where do they originate?
Cheese dreams are a classic Southern appetizer consisting of open-faced sandwiches made with sharp cheddar cheese, mayonnaise, and seasonings spread on bread rounds and baked until golden and bubbly. They originated in the American South and became particularly popular at parties and gatherings in the mid-20th century, often served as an elegant yet simple finger food.
Can I make cheese dreams ahead of time?
Yes, cheese dreams can be prepared ahead in two ways. You can make the cheese mixture up to 2 days in advance and store it covered in the refrigerator, then assemble and bake just before serving. Alternatively, you can assemble the unbaked cheese dreams, freeze them on a baking sheet, then transfer to a freezer bag for up to 1 month. Bake directly from frozen, adding a few extra minutes to the cooking time.
What type of bread works best for cheese dreams?
White sandwich bread or party rye bread are the most traditional choices for cheese dreams. Many Southern cooks prefer using firm white bread cut into circles with a biscuit cutter or small glass. Party rye or pumpernickel rounds also work wonderfully. The key is using bread that is sturdy enough to hold the cheese mixture without becoming too soggy while baking.
What ingredients do I need for the cheese mixture?
The basic cheese dreams mixture requires sharp cheddar cheese (either shredded or grated), mayonnaise, and seasonings. Common additions include Worcestershire sauce, garlic powder, onion powder, cayenne pepper or hot sauce for a kick, and sometimes chopped green onions or pimentos. Some recipes also include crumbled bacon or diced jalapeños for extra flavor.
How long do I bake cheese dreams and at what temperature?
Cheese dreams are typically baked at 350 to 375 degrees Fahrenheit for about 10 to 15 minutes, or until the cheese mixture is bubbly and lightly golden on top. You can also broil them for 2 to 3 minutes at the end for extra browning, but watch carefully to prevent burning. They should be served warm for the best texture and flavor.
Give This Classic Southern Appetizer a Try
This cheese dreams southern appetizer recipe deserves a spot in your regular entertaining rotation. It’s proof that you don’t need complicated techniques or exotic ingredients to create something people genuinely love. Just good cheese, a few flavor boosters, and the magic of a hot broiler.
I’ve served these at elegant dinner parties and casual game days, and they disappear just as fast either way. There’s something universally appealing about warm, melty cheese on crispy bread. The fact that they come together in about 15 minutes makes them perfect for those moments when you need something impressive without the stress.
Make a batch this weekend and see for yourself why Southern cooks have been relying on this recipe for generations. Once you taste that first warm, golden bite with its crispy edges and gooey center, you’ll understand exactly why these simple little appetizers have earned their place in the Southern entertaining hall of fame.
If you loved this recipe, you’ll definitely want to check out more comfort food favorites on my all recipes page. And if you’re in a cheese-loving mood, don’t miss my cheesy funeral potatoes, cheesy ranch potatoes and smoked sausage, and easy cheesy hashbrown casserole. Come back and let me know how your cheese dreams turned out!