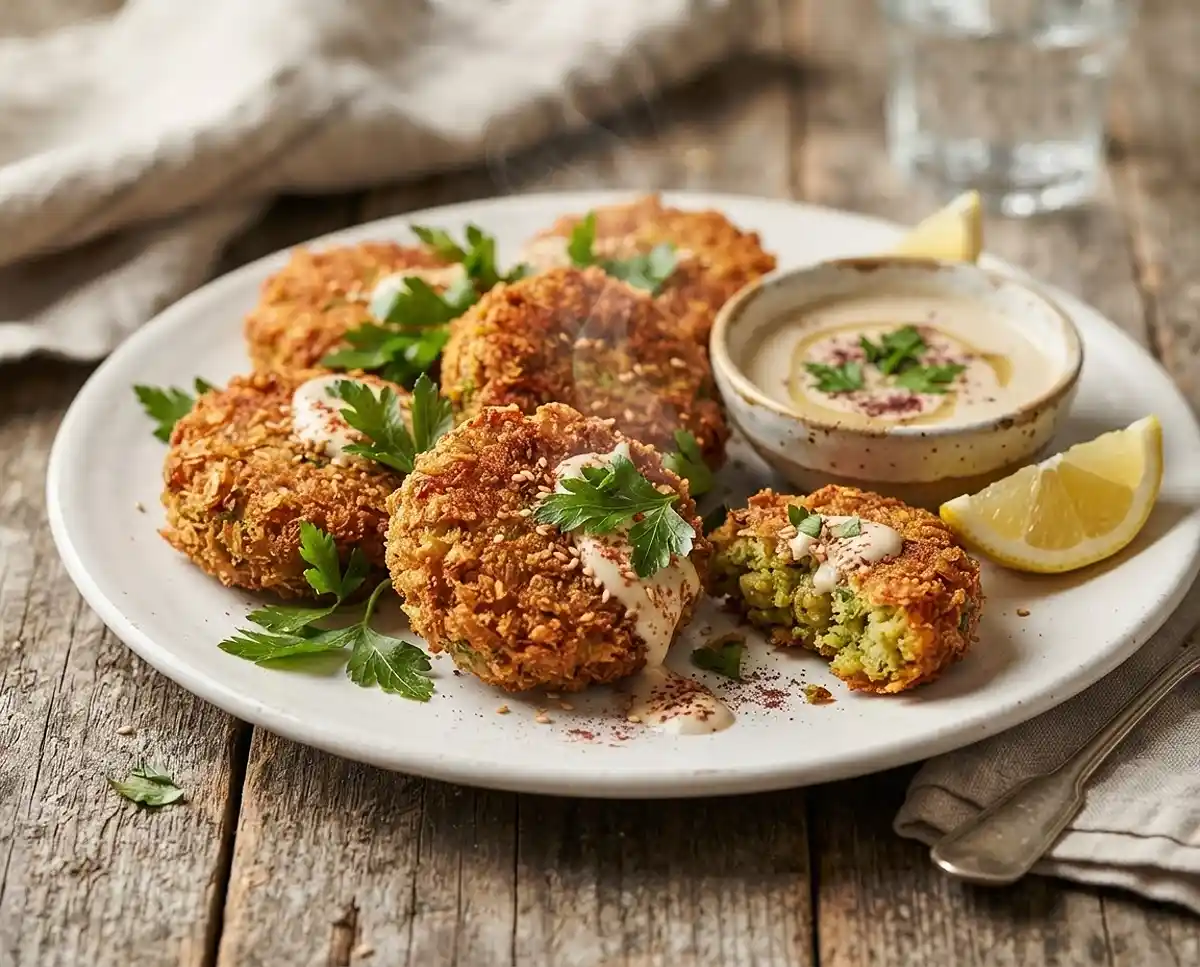
Canned Chickpea Falafel Recipe
Canned Chickpea Falafel Recipe makes crispy, golden falafel without an overnight soak. Easy, flavorful, and perfect when you’re craving homemade falafel fast.
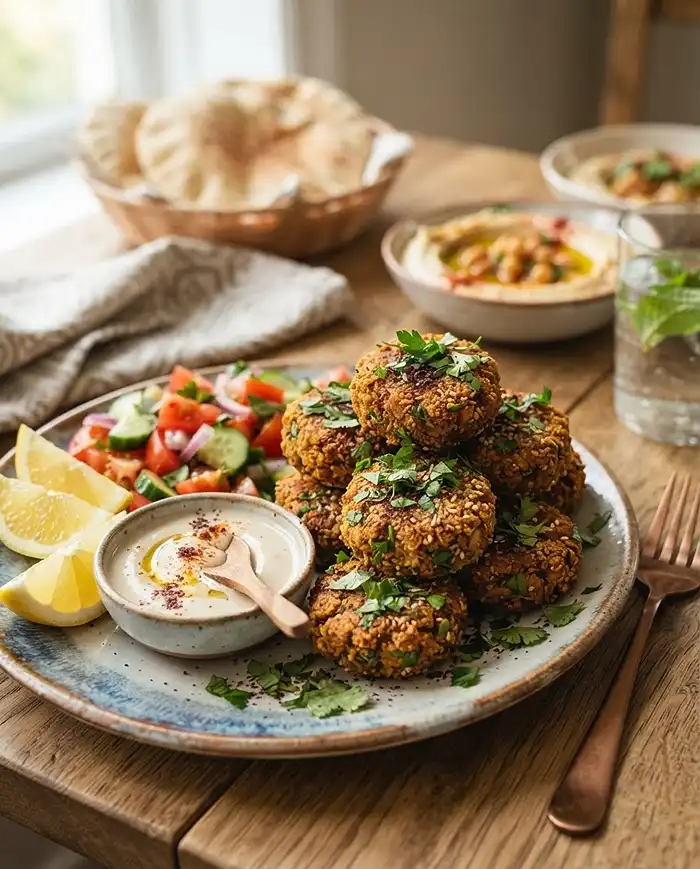
Canned Chickpea Falafel Recipe is a shortcut version of a classic favorite, giving you crispy, golden falafel without the overnight soak. It’s an easy way to satisfy a falafel craving when you want that homemade flavor without all the advance planning.
There’s something especially tempting about falafel fresh from the pan, with its warm spices and crisp exterior. If you love homemade falafel but don’t always remember to soak chickpeas ahead of time, this version is a practical recipe to keep close.
Table of Contents
How to Make Falafel with Canned Chickpeas
Ingredients
Ingredients
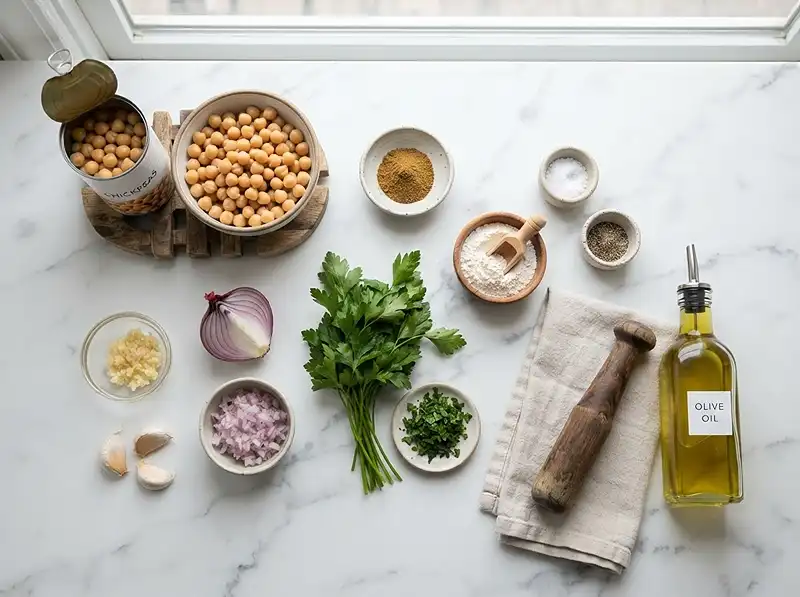
- 1 540 ml Can of chickpeas 19 ounces
- 3 whole cloves garlic minced
- ¼ medium red onion minced
- 2 tsp cumin
- 2 tbsp chopped fresh parsley
- 3 tbsp AP flour
- 1 tsp Salt
- Pepper to taste
- ¼ cup Ap Flour
Instructions
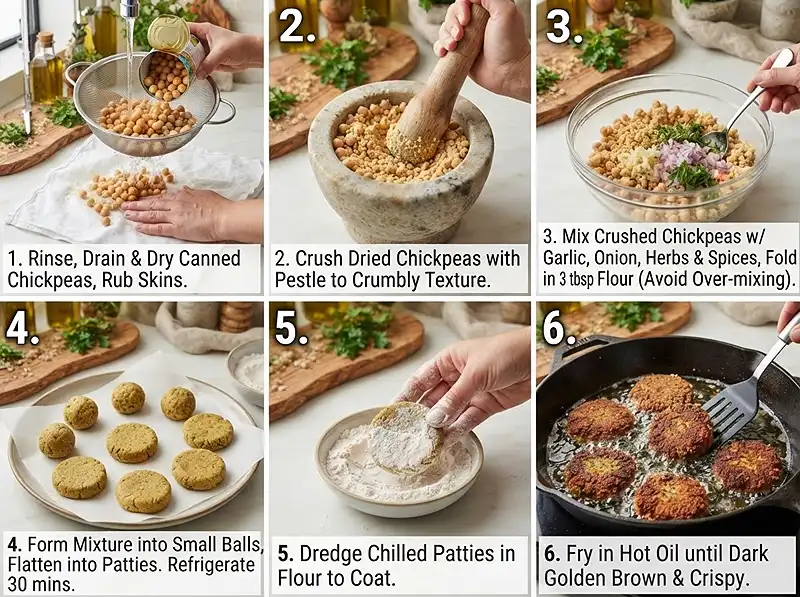
- Begin by opening the canned chickpeas, draining, and then rinsing them really well. Dry the chickpeas with a clean linen cloth, and at the same time gently rub the chickpeas to remove the skins. Pick out as many skins as possible.
- Using a pestle, (or the empty washed chickpea can), crush the chickpeas until they are crumbly in texture.
- Add the minced garlic, chopped red onion, parsley, cumin, salt, pepper, and 3 tbsp flour to the mixture, and mix together with a spoon. Avoid over-mixing to prevent the mixture from becoming to paste-like.
- Form the falafel mixture into little balls and then flatten them to make little patties. Refrigerate the patties for 30 minutes to help them firm up.
- To cook the falafel patties, heat a frying pan with some oil over medium heat. Dip the individual falafel patties in the 1/4 cup of flour to coat them, and then place them in the hot oil. Fry for 3-4 minutes on either side ot until dark golden brown.
- Serve the falafel patties right away, or keep them warm in a pre-heated oven. The falafel patties once cooked can also be cooled down, and then eaten at a later date, either cold in a falafel wrap, or reheated in the oven for a quick supper.
Ingredients
Everything here is pantry-friendly, and the fresh parsley is really the only thing you might need to grab. If you’ve got dried chickpeas and prefer to soak them yourself, go ahead—but the canned ones make this weeknight-doable without losing any of the flavor or texture you’re after.
| Ingredient | Notes |
|---|---|
| 1 can chickpeas (540 ml / 19 oz) | Drained and rinsed well; removing skins helps with texture |
| 3 cloves garlic, minced | Fresh is best; jarred garlic works in a pinch |
| 1/4 medium red onion, minced | Yellow or white onion works too |
| 2 tsp cumin | Ground cumin; toast it first if you want extra warmth |
| 2 tbsp fresh parsley, chopped | Flat-leaf or curly; cilantro is a great swap |
| 3 tbsp all-purpose flour | For binding the mixture |
| 1 tsp salt | Plus more to taste |
| Black pepper | Freshly ground if you’ve got it |
| 1/4 cup all-purpose flour | For dredging before frying |
| Neutral oil for frying | Vegetable, canola, or grapeseed |
Instructions
The key to getting these patties to hold together and cook up crispy is all in how you handle the chickpeas at the start. You want them dry, mostly skinless, and crushed just enough to hold a shape without turning into hummus. It’s a little hands-on, but it’s the difference between falafel and falling-apart-el.
Prep the Chickpeas
- Drain and rinse the chickpeas. Pop open the can, pour them into a colander, and give them a good rinse under cold water until the foam stops. This gets rid of that tinny taste and some of the excess starch.
- Dry and peel. Lay a clean kitchen towel or linen cloth on the counter, spread the chickpeas out on top, and gently pat them dry. Then give them a light rub with the towel—those little papery skins will start to slip right off. Pick out as many as you can without driving yourself crazy; getting most of them is good enough.
Crush and Mix
- Crush the chickpeas. Grab a pestle, a potato masher, or even the bottom of the rinsed chickpea can and press down on the chickpeas until they’re crumbly and broken up. “You want it chunky, not smooth,” my aunt used to say, waving her wooden spoon at me. Aim for a mix of small bits and some larger pieces—texture is your friend here.
- Add the aromatics and seasonings. Toss in the minced garlic, red onion, parsley, cumin, salt, pepper, and the 3 tablespoons of flour. Stir everything together with a spoon or your hands, just until it’s combined. Don’t overwork it or it’ll turn pasty and dense.
Shape and Chill
- Form the patties. Scoop up a heaping tablespoon of the mixture and roll it into a ball, then flatten it gently between your palms to make a patty about half an inch thick. They should hold together without crumbling—if they’re too dry, add a tiny splash of water; if they’re too wet, sprinkle in a bit more flour. Line them up on a plate or baking sheet.
- Refrigerate. Pop the whole tray into the fridge for 30 minutes. This firms everything up and makes them way easier to fry without falling apart. You can skip this if you’re in a rush, but they’ll be more fragile.
Fry Until Golden
- Heat the oil. Pour enough oil into a frying pan to come about a quarter inch up the sides and set it over medium heat. You want it hot enough that a pinch of flour sizzles when it hits the pan, but not so hot that it smokes.
- Dredge and fry. Spread the remaining 1/4 cup of flour on a plate. Take each chilled patty, press both sides into the flour to coat lightly, and shake off the excess. Lay them gently into the hot oil, giving each one a little space. “Don’t crowd the pan or they’ll steam instead of fry,” she’d remind me every time. Fry for 3 to 4 minutes on the first side, until deep golden brown, then flip and cook the other side the same way.
- Drain and serve. Lift the patties out with a slotted spatula and set them on a plate lined with paper towels to drain off the extra oil. Serve them right away while they’re crispy, or keep them warm in a low oven if you’re cooking in batches.
Pro Tips for Perfect Falafel
If your falafel keeps falling apart in the pan, the mixture might be too dry or the oil might not be hot enough. Make sure the chickpeas are crushed but still have some texture, and let the oil come up to temperature before you start frying. You can also try adding an extra tablespoon of flour or a beaten egg to the mixture if it’s really not holding together.
For extra flavor, toast the cumin in a dry pan for about a minute before adding it to the mix. It brings out a warm, nutty depth that makes the whole batch smell incredible. You can also add a pinch of cayenne or smoked paprika if you like a little heat.
If you want to bake these instead of frying, brush them lightly with oil and bake at 400°F on a parchment-lined sheet for about 20 to 25 minutes, flipping halfway through. They won’t be quite as crispy, but they’re still really good and a bit lighter.
Flavor Variations
Swap the parsley for fresh cilantro or mint, or use a mix of all three. A tablespoon of fresh dill is also lovely if you’re going for a more herbaceous vibe. You can add a teaspoon of coriander along with the cumin, or throw in some finely chopped jalapeño if you want a little kick.
For a Mediterranean twist, fold in a couple tablespoons of crumbled feta or some finely chopped sun-dried tomatoes. It’s not traditional, but it’s delicious. You can also serve these with different sauces—tahini, tzatziki, yogurt with lemon and garlic, or even a spicy harissa mayo.
Troubleshooting
If your patties are too soft and won’t hold a shape, refrigerate the mixture for another 15 minutes or add another tablespoon of flour. If they’re too dry and cracking, add a teaspoon of water or a drizzle of olive oil and mix gently. The texture should feel like wet sand that just holds together when you squeeze it.
Falafel that’s browning too fast on the outside but still raw inside means your oil is too hot. Turn the heat down to medium or medium-low and give each side a bit more time. If they’re greasy, the oil wasn’t hot enough to start with—they absorbed too much before they could crisp up.
Storage
These keep really well, which is one of the reasons I make a double batch whenever I’ve got the energy. Once they’re completely cool, stack them between layers of parchment paper in an airtight container and stash them in the fridge for up to four days. You can also freeze them for up to three months—just lay them flat on a baking sheet until solid, then transfer to a freezer bag.
| Storage Method | Duration |
|---|---|
| Room temperature | Up to 2 hours |
| Refrigerator | Up to 4 days |
| Freezer | Up to 3 months |
To reheat, skip the microwave if you can—it makes them soggy. Pop them in a 350°F oven for about 10 minutes, or until they’re warmed through and crispy again. You can also reheat them in a dry skillet over medium heat, flipping once or twice. If you’re eating them cold, they’re fantastic crumbled over salad or tucked into a wrap with hummus, cucumber, and tomato.
Leftover falafel also makes a great filling for grain bowls or a quick addition to any weeknight dinner when you need some extra protein.
How to Make Falafel with Canned Chickpeas FAQs
Can I use canned chickpeas instead of dried chickpeas to make falafel?
Yes, you can use canned chickpeas to make falafel, though the texture will be slightly different from traditional falafel made with dried chickpeas. Make sure to drain and thoroughly dry the canned chickpeas by patting them with paper towels or letting them air dry for about 30 minutes. This removes excess moisture and helps the falafel hold together better during frying.
Why do my canned chickpea falafels fall apart when cooking?
Canned chickpeas contain more moisture than soaked dried chickpeas, which can cause falafels to fall apart. To prevent this, ensure you drain and dry the chickpeas thoroughly, add a binding agent like flour or breadcrumbs (2-4 tablespoons), and refrigerate the mixture for at least 30 minutes before shaping. You can also add an egg or use a food processor to create a paste-like consistency that holds together better.
What ingredients do I need to make falafel with canned chickpeas?
For basic canned chickpea falafel, you need one 15-ounce can of chickpeas (drained and dried), fresh parsley, fresh cilantro, onion, garlic (3-4 cloves), cumin, coriander, salt, pepper, baking powder, and flour or breadcrumbs for binding. Some recipes also include lemon juice, cayenne pepper, or additional spices for extra flavor. All ingredients are blended together to form a thick, moldable mixture.
Should I bake or fry falafel made from canned chickpeas?
Both methods work for canned chickpea falafel. Frying in oil at 350-375 degrees Fahrenheit gives the most authentic crispy exterior and takes about 3-4 minutes per side. Baking is a healthier option: brush the falafels with oil and bake at 375-400 degrees Fahrenheit for 25-30 minutes, flipping halfway through. Baked falafel will be less crispy but still delicious and lower in fat.
How long can I store falafel mixture made with canned chickpeas before cooking?
You can store uncooked falafel mixture made with canned chickpeas in an airtight container in the refrigerator for up to 2 days. In fact, chilling the mixture for at least 30 minutes to an hour before shaping and cooking actually improves the texture and helps the falafels hold together better. You can also freeze shaped uncooked falafels for up to 3 months and cook them directly from frozen, adding a few extra minutes to the cooking time.