Best Bread and Butter Pickle Recipe for Canning
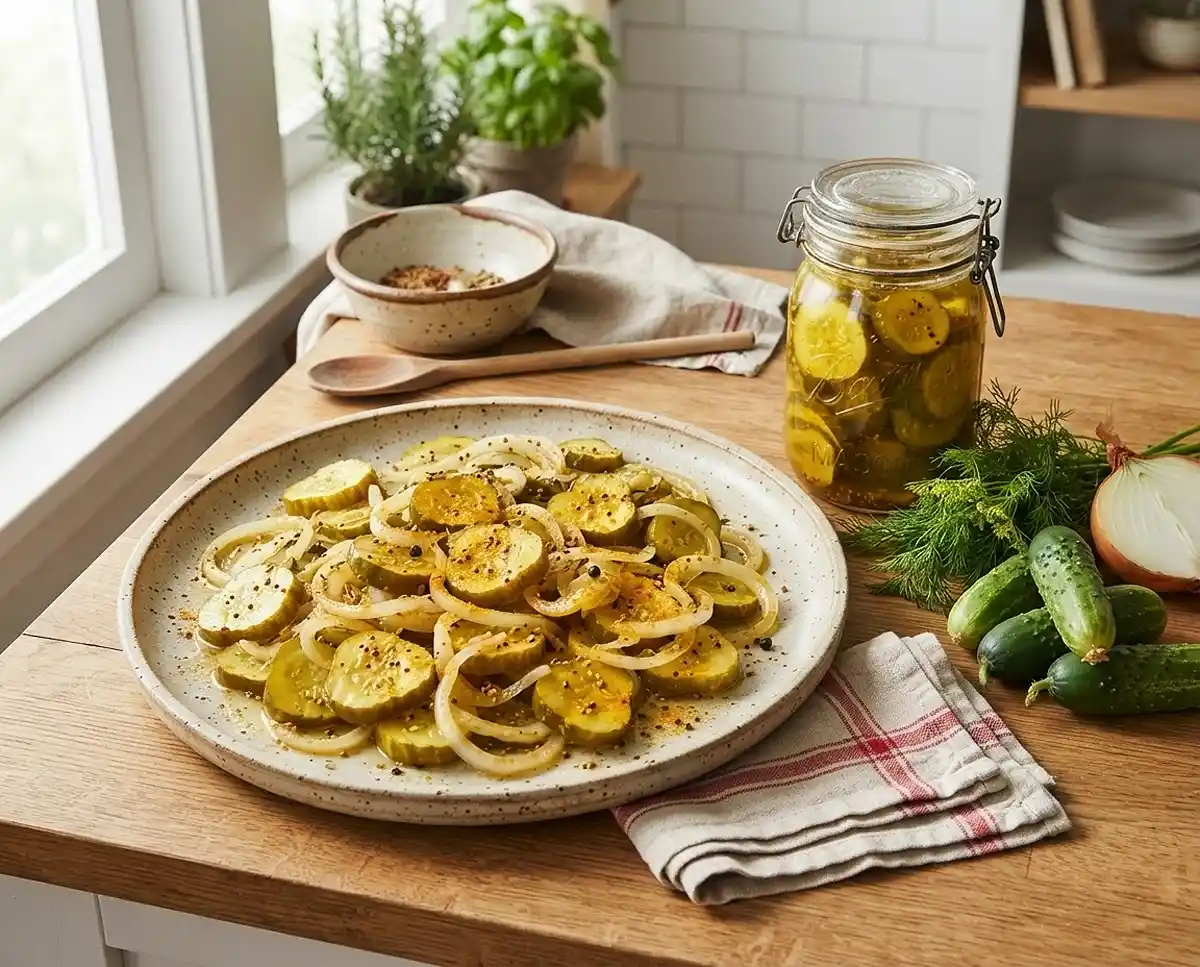
These homemade Bread and Butter Pickle Recipe for Canning are sweet, tangy, and absolutely irresistible—perfect for your pantry, your burgers, and your next cheese board.
I’ve been making this bread and butter pickle recipe for canning every summer for the past six years, and it’s the one recipe my family actually requests by name. There’s something deeply satisfying about lining up those golden jars on the counter, hearing those lids pop as they seal, and knowing you’ve just made something genuinely delicious that’ll last all year long.
If you’ve never tried canning pickles before, don’t worry. This recipe walks you through every single step, from salting your cucumbers to processing your jars. And if you’re already a canning pro, you’re going to love how balanced and flavorful these sweet and tangy pickles turn out.
Table of Contents
Quick Recipe Snapshot
This bread and butter pickle recipe for canning yields about 6 to 8 pint jars of perfectly crisp, golden pickles. You’ll start by salting your cucumbers and onions to draw out moisture, then pack them into jars with a sweet-and-spicy brine. After a quick boiling water bath, you’ll have shelf-stable pickles that taste even better after a few weeks of mellowing in the jar.
Total time from start to sealed jars is about 4 to 5 hours, including the salting rest period. The actual hands-on time is closer to an hour, which makes this a very doable weekend project.
Why You’ll Love This Recipe
First off, these homemade bread and butter pickles taste worlds better than anything you’ll find at the store. The brine has the perfect balance of sweetness and tang, with warm spices that make every bite interesting without overwhelming the fresh cucumber flavor.
The texture is spot-on too. That salting step at the beginning isn’t just tradition—it really does keep your pickles crisp and snappy instead of limp and soggy. I learned that the hard way my first year, when I skipped it and ended up with jars of mushy disappointment.
This recipe is also incredibly forgiving. The measurements are straightforward, the process is methodical, and as long as you follow basic canning safety rules, you’ll end up with beautiful jars every single time. Plus, these pickles make fantastic gifts. I keep a stash specifically for hostess gifts, teacher appreciation, and those moments when you need to bring something homemade to a potluck.
And let’s be real—there’s something just plain magical about opening a jar of summer cucumbers in the middle of February. It’s like a little burst of sunshine on your sandwich.
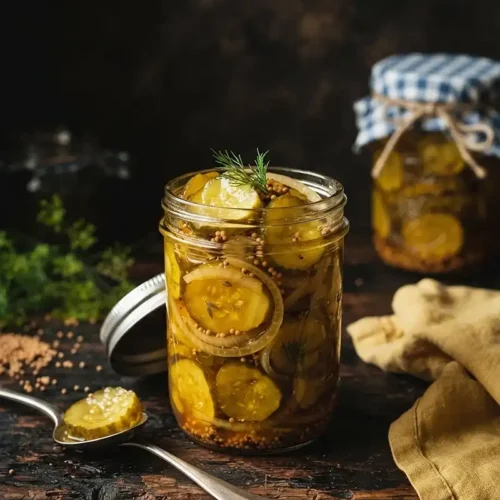
Bread and Butter Pickle Recipe for Canning
Ingredients
Ingredients
- 4 pounds pickling cucumbers sliced into 1/4-inch rounds
- 4 large sweet onions thinly sliced
- ½ cup pickling salt
- 4 cups white vinegar 5% acidity
- 4 cups sugar
- 2 tablespoons mustard seeds
- 1 tablespoon celery seeds
- 1 teaspoon ground turmeric
- ½ teaspoon whole cloves optional
- Fresh dill sprigs optional, for jars
Instructions
- In a large bowl, combine the sliced cucumbers and onions. Sprinkle with pickling salt, mix well, and cover with ice. Let stand for 3 hours. Drain thoroughly and rinse with cold water; drain again. This step helps to draw out excess water and keep the pickles crisp.
- Prepare your canning jars and lids according to standard canning procedures (wash jars, sterilize if desired, and keep hot).
- In a large non-reactive pot, combine the vinegar, sugar, mustard seeds, celery seeds, turmeric, and whole cloves (if using). Bring the mixture to a boil over medium-high heat, stirring until the sugar is dissolved.
- Add the drained cucumber and onion mixture to the boiling brine. Bring back to a gentle boil and cook for 5 minutes. Do not overcook, as this can make the pickles soft.
- Carefully pack the hot pickle mixture into the hot, prepared canning jars, leaving 1/2 inch headspace. If desired, add a sprig of fresh dill to each jar.
- Ladle hot brine over the pickles, ensuring vegetables are completely covered and maintaining 1/2 inch headspace. Remove any air bubbles.
- Wipe jar rims clean, center lids on jars, and apply screw bands until fingertip-tight.
- Process jars in a boiling water canner for 10 minutes. Adjust for altitude if necessary.
- Turn off heat, remove canner lid, and let jars stand for 5 minutes. Carefully remove jars from canner and place on a towel-lined surface to cool completely, undisturbed, for 12-24 hours. Do not retighten screw bands.
- Check seals. Lids should be concave and not flex when pressed. Store properly sealed jars in a cool, dark place for up to 1 year. Any unsealed jars should be refrigerated and consumed within a few weeks.
Ingredients
This pickle canning recipe uses simple, straightforward ingredients that you can find at any grocery store. The key is using the right type of cucumbers and making sure your vinegar has the correct acidity level for safe canning.
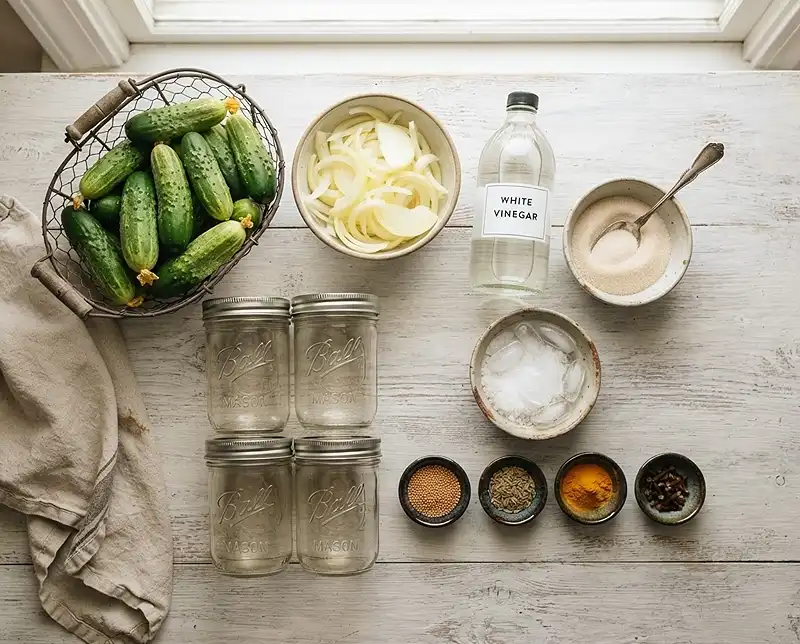
| Ingredient | Quantity | Notes |
|---|---|---|
| Pickling cucumbers | 4 pounds, sliced into 1/4-inch rounds | Look for firm, small to medium cucumbers without soft spots |
| Sweet onions | 4 large, thinly sliced | Vidalia or Walla Walla work beautifully |
| Pickling salt | 1/2 cup | Use pure pickling salt, not iodized table salt |
| White vinegar (5% acidity) | 4 cups | Check the label to ensure 5% acidity for safe canning |
| Sugar | 4 cups | Regular granulated white sugar |
| Mustard seeds | 2 tablespoons | Yellow mustard seeds are traditional |
| Celery seeds | 1 tablespoon | Adds a subtle earthy flavor |
| Ground turmeric | 1 teaspoon | Gives the pickles their golden color |
| Whole cloves | 1/2 teaspoon (optional) | Adds warmth, but skip if you’re not a fan |
| Fresh dill sprigs | Optional, for jars | Purely for looks and a hint of flavor |
A quick word about cucumbers: you really do want actual pickling cucumbers here, not regular slicing cucumbers. Pickling cucumbers are shorter, bumpier, and have thicker skins and fewer seeds, which means they stay crunchier in the brine. I usually find them at farmers markets in mid to late summer, but many grocery stores carry them during peak season too.
And please, please use pickling salt. Regular table salt contains iodine and anti-caking agents that can make your brine cloudy and your pickles weirdly colored. Pickling salt is inexpensive and lasts forever, so it’s worth grabbing a box if you’re serious about canning pickles.
Step-by-Step Instructions
Take your time with this process, especially if it’s your first time canning. Everything here is designed to give you safe, delicious, shelf-stable pickles, so don’t skip steps or rush through the timing.
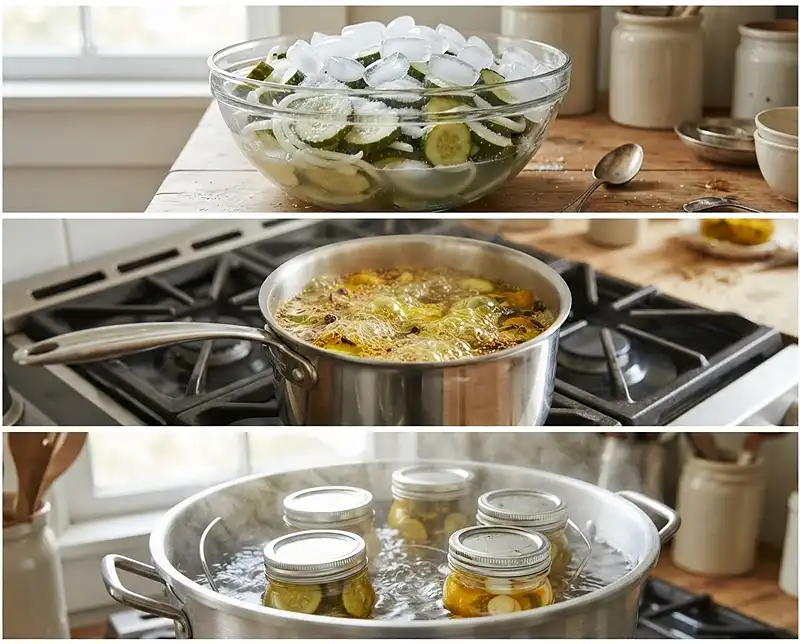
- Salt the cucumbers and onions. In a large bowl, combine the sliced cucumbers and onions. Sprinkle with the pickling salt and mix everything together with your hands so the salt is evenly distributed. Cover the mixture with a thick layer of ice—I usually use about 4 cups of ice cubes. Let this stand for 3 hours at room temperature. This salting step draws out excess moisture, which is the secret to keeping your pickles crisp instead of soft and mushy. After 3 hours, drain the mixture thoroughly in a colander, rinse it well with cold water to remove the excess salt, and drain again. Give the colander a few good shakes to get rid of as much water as possible.
- Prepare your canning jars and lids. While your cucumbers are resting, wash your jars, lids, and bands in hot soapy water. You can sterilize the jars if you want (I usually run mine through the dishwasher), but since we’re processing these pickles for 10 minutes, sterilization isn’t strictly required. Keep the jars hot until you’re ready to fill them—I usually leave mine in a pot of simmering water or in a warm oven set to 200 degrees. Have your lids ready in a small bowl of hot (not boiling) water.
- Make the brine. In a large non-reactive pot (stainless steel or enamel-coated work great; avoid aluminum or copper), combine the vinegar, sugar, mustard seeds, celery seeds, turmeric, and whole cloves if you’re using them. Bring this mixture to a boil over medium-high heat, stirring occasionally until the sugar completely dissolves. The kitchen will start to smell sharp and tangy—that’s the vinegar doing its thing. Don’t worry, the smell mellows once everything’s combined with the cucumbers.
- Cook the pickles. Add your drained cucumber and onion mixture to the boiling brine. Bring everything back to a gentle boil and cook for exactly 5 minutes, stirring gently once or twice. The cucumbers will turn from bright green to a more muted olive-green color, and they’ll start to look a little translucent around the edges. This is perfect. Don’t cook them longer than 5 minutes or they’ll start to get soft.
- Pack the jars. Working quickly but carefully (everything is very hot at this point), use a slotted spoon to pack the hot pickle mixture into your hot prepared jars. I like to use a wide-mouth funnel to keep things tidy. Leave about 1/2 inch of headspace at the top of each jar. If you want to add a sprig of fresh dill to any of your jars, tuck it in along the side now—it looks pretty and adds a subtle hint of dill flavor.
- Add the brine. Ladle the hot brine over the pickles in each jar, making sure all the vegetables are completely covered but still maintaining that 1/2 inch of headspace. Use a non-metallic utensil (I use a chopstick) to gently slide around the inside of the jar and release any trapped air bubbles. Add a bit more brine if needed after removing bubbles.
- Seal the jars. Wipe the rim of each jar with a clean, damp cloth or paper towel to remove any sticky brine or bits of pickle. Even a tiny bit of residue can prevent a proper seal. Center a lid on each jar, then screw on a band until it’s fingertip-tight—that means tightened just until you meet resistance, not cranked down as hard as you can.
- Process in a boiling water canner. Place your filled jars on the rack in your canner (the water should be hot but not boiling yet). Lower the rack into the canner, making sure the jars are covered by at least 1 inch of water. Put the lid on the canner, turn the heat to high, and bring the water to a full rolling boil. Once it’s boiling, set your timer for 10 minutes. If you’re at an altitude above 1,000 feet, you’ll need to add processing time—check a reliable canning guide for altitude adjustments in your area.
- Cool the jars. When the timer goes off, turn off the heat and remove the canner lid. Let the jars sit in the hot water for 5 minutes—this helps prevent thermal shock. Then, using a jar lifter, carefully remove the jars and place them on a towel-lined counter or cutting board. Don’t tilt the jars or disturb them. Let them sit completely undisturbed for 12 to 24 hours. You’ll start hearing the beautiful “ping” or “pop” sound of lids sealing within the first few hours. That sound never gets old.
- Check the seals and store. After the jars have cooled completely, press down on the center of each lid. If it doesn’t move or flex, you have a good seal. The lid should also be slightly concave (curved down in the middle). Remove the screw bands, wipe down the jars if there’s any sticky residue, and label them with the date. Store properly sealed jars in a cool, dark place like a pantry or basement—they’ll keep for up to a year. If any jars didn’t seal properly, just pop them in the fridge and eat those pickles within a few weeks.
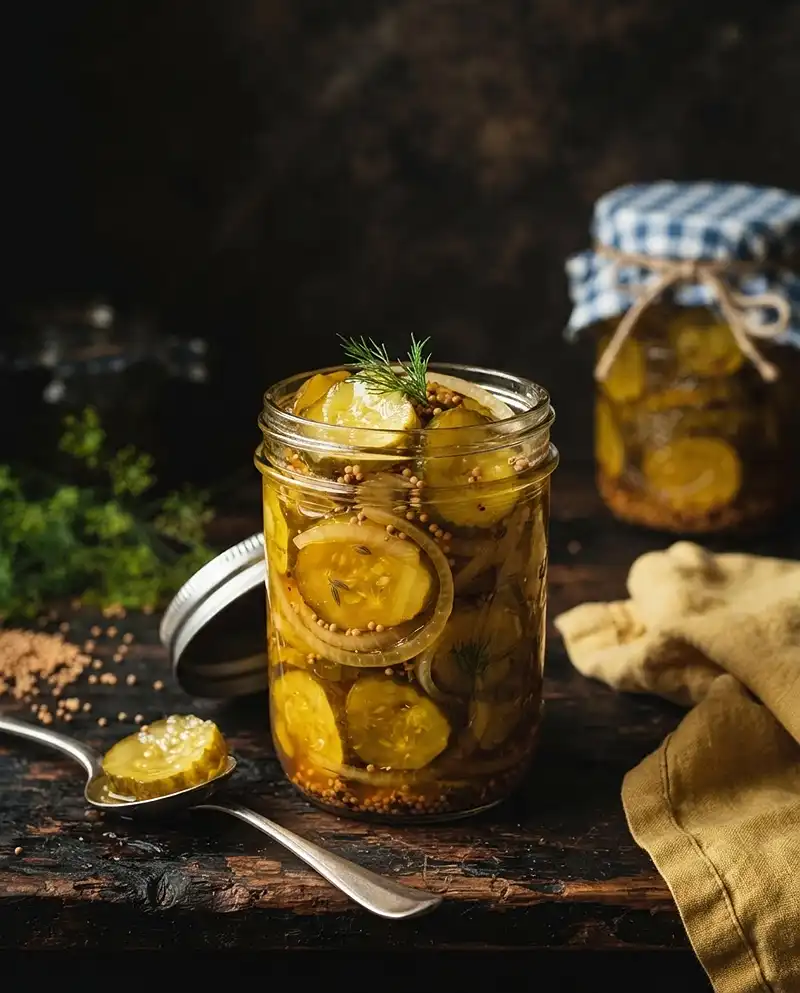
Expert Tips for Perfect Pickles
After making batch after batch of these over the years, I’ve picked up a few tricks that make the whole process smoother and the results even better.
Use the freshest cucumbers you can find, ideally picked within 24 hours. The fresher the cucumber, the crisper your final pickle will be. If you’re buying from a farmers market, ask when they were picked. If you’re growing your own, try to can them the same day you harvest.
Don’t skip the ice in the salting step. Some recipes just call for salting, but adding ice keeps everything cold, which also helps maintain that crisp texture. I’ve tested it both ways, and the ice really does make a difference.
Make sure your brine stays at a rolling boil when you add the cucumbers, and don’t let them cook longer than 5 minutes. Overcooked pickles are one of the most common mistakes, and once they’re soft, there’s no fixing them.
If you’re new to canning, invest in a proper canning kit with a jar lifter, magnetic lid wand, and wide-mouth funnel. These tools aren’t expensive and they make the whole process so much easier and safer. Trying to fish hot jars out of boiling water with tongs is a recipe for burned fingers and broken jars.
Let your pickles mellow for at least two weeks before you open the first jar. I know it’s tempting to crack one open right away, but the flavors really do develop and meld over time. The pickles I open at the two-week mark are good; the ones I open at the two-month mark are spectacular.
Variations to Try
Once you’ve made the basic recipe a few times, it’s fun to play around with variations. Here are some of my favorite tweaks.
For spicy bread and butter pickles, add 1 to 2 teaspoons of red pepper flakes to the brine, or tuck a few slices of fresh jalapeño into each jar before adding the brine. The sweetness of the pickles plays beautifully against a little heat.
If you want a more pronounced dill flavor, increase the fresh dill and add a teaspoon of dill seeds to the brine along with the other spices. You’ll end up with something that sits right between classic bread and butter pickles and dill pickles—I call them “dill butter pickles” and they’re fantastic on sandwiches.
You can also swap out some of the cucumbers for other vegetables. I’ve made batches with half cucumbers and half zucchini, or added in some thinly sliced bell peppers for color and crunch. Just make sure whatever you add is fresh and firm.
For a less sweet version, reduce the sugar to 3 cups instead of 4. You’ll still get that characteristic bread and butter flavor, but with a bit more tang coming through. Some people actually prefer this version with rich, fatty foods like pork chops or grilled cheese.
Troubleshooting Common Issues
Even with a straightforward recipe like this one, things can occasionally go sideways. Here’s how to handle the most common problems.
If your pickles turn out soft or mushy, it’s usually because the cucumbers weren’t fresh enough, the salting step was skipped or shortened, or they were cooked too long in the brine. Unfortunately, there’s no way to fix soft pickles after they’re canned. The good news is they’re still safe to eat and they still taste good—they’re just not as crunchy as you’d like. Use them in relish or tartar sauce where texture is less important.
Cloudy brine can happen if you used iodized table salt instead of pickling salt, or if the cucumbers were moldy or dirty when you started. Cloudiness from salt is purely cosmetic and the pickles are still safe to eat. If the cloudiness is from spoilage (which is rare with proper canning), you’ll also notice an off smell or sliminess—toss those jars.
If some jars didn’t seal, don’t panic. Check that the rim was clean and the lid was new (you can’t reuse the flat lids). Put unsealed jars in the fridge and eat them first. You can also reprocess unsealed jars within 24 hours if you want—just reheat the contents, use a new lid, and process again.
Floating pickles are mostly a cosmetic issue that happens when there’s too much air in the jar or the pickles are very fresh and full of air pockets. They’re still perfectly safe to eat. To minimize floating, pack your jars firmly (but not so tight you crush anything) and be thorough about removing air bubbles before sealing.
Storage and Shelf Life
Proper storage is what makes canning pickles worth the effort in the first place. When you do it right, you’re rewarded with months of delicious pickles ready whenever you need them.
| Storage Method | Shelf Life | Notes |
|---|---|---|
| Sealed jars (pantry) | Up to 1 year | Store in a cool, dark place away from direct sunlight |
| Opened jars (refrigerator) | 2 to 3 months | Always use clean utensils when scooping out pickles |
| Unsealed jars (refrigerator) | 3 to 4 weeks | Still safe and delicious, just not shelf-stable |
Store your sealed jars in a cool, dark spot where the temperature stays fairly consistent. A basement is ideal, but a pantry or kitchen cabinet away from the stove works too. Avoid places that get hot or have big temperature swings, like garages or outdoor sheds, as heat can affect the seal and quality over time.
Before you open a jar, always check that the seal is still good and look for any signs of spoilage like mold, off smells, or a bulging lid. Properly canned pickles that have been stored correctly should look and smell bright and tangy when you open them. If anything seems off, don’t taste it—just toss it.
Once you open a jar, keep it refrigerated with the lid on tight. These pickles will stay crisp and delicious for months in the fridge as long as you keep them submerged in their brine and use clean utensils every time you grab one.
For more information on safe home canning practices, the National Center for Home Food Preservation is an excellent resource.
Bread and Butter Pickle Recipe for Canning FAQs
How long do I need to process bread and butter pickles in a water bath canner?
Process pint jars of bread and butter pickles in a boiling water bath canner for 10 minutes, and quart jars for 15 minutes. Adjust processing time by adding 1 minute for every 1,000 feet above sea level. Start timing only after the water returns to a full rolling boil. This ensures the pickles are safely preserved and shelf-stable for up to one year.
Do I need to use pickling salt for bread and butter pickles or can I use regular table salt?
While pickling salt is preferred because it dissolves easily and keeps the brine clear, you can use other salts with caution. Avoid iodized table salt as it can darken the pickles and make the brine cloudy. Kosher salt works well but use 1.5 times the amount called for since it is less dense than pickling salt. Sea salt can be used if it is pure and free of additives.
Can I reduce the sugar in bread and butter pickle recipes for canning?
It is not recommended to significantly reduce sugar in bread and butter pickle recipes intended for canning. The sugar content affects both the flavor and the preservation process by contributing to the overall acidity and balance of the brine. Reducing sugar can affect the safety and shelf life of your canned pickles. If you prefer less sweet pickles, look for tested low-sugar recipes specifically designed for safe canning.
Why do I need to soak cucumbers in ice water before making bread and butter pickles?
Soaking sliced cucumbers in ice water for 1 to 2 hours before pickling helps maintain their crisp texture. The cold temperature firms up the cucumber flesh by slowing enzyme activity that causes softening. Some recipes also call for salting the cucumbers during this process, which draws out excess moisture and further enhances crunchiness. After soaking, drain the cucumbers well before adding them to the hot pickling brine.
How can I tell if my canned bread and butter pickles sealed properly?
After removing jars from the water bath canner, let them cool undisturbed for 12 to 24 hours. You should hear a pinging sound as the lids seal. Once cooled, press the center of each lid – it should not flex up and down. A properly sealed lid will be slightly concave and will not move when pressed. You can also remove the screw band and gently try to lift the jar by the lid – a sealed lid will hold firm. Any unsealed jars should be refrigerated and used within 2 to 3 weeks.
Serving Suggestions
These sweet and tangy pickles are incredibly versatile. Obviously, they’re perfect on any sandwich or burger—the sweetness cuts through rich meats and cheeses beautifully. I always put them out when we’re grilling in the summer.
They’re also fantastic chopped up in potato salad, egg salad, or tuna salad. The sweet-tart brine adds so much more flavor than plain pickles. And if you’ve never tried bread and butter pickles on a cheese board, you’re missing out. They pair especially well with sharp cheddar, creamy brie, and smoked gouda.
My husband likes to eat them straight out of the jar as a snack, and honestly, I can’t blame him. They’re that good.
For more homemade staples that pair beautifully with these pickles, check out homemade BBQ sauce, homemade pasta sauce, and homemade mayonnaise.
Final Thoughts
This bread and butter pickle recipe for canning is one of those projects that looks more complicated than it actually is. Yes, there are several steps, and yes, you need to pay attention to timing and technique. But once you’ve made your first batch and heard those lids pop into place, you’ll understand why so many people get completely hooked on home canning.
There’s something deeply satisfying about transforming a pile of fresh cucumbers into rows of golden jars that’ll last through the winter. It connects you to your food in a way that’s rare these days, and the end result tastes so much better than anything you’ll find at the store.
If you try this recipe, I’d love to hear how it turns out. Do you add extra spice? Go heavy on the dill? Make a double batch because one is never enough? Leave a comment and let me know—I always learn something new from readers who put their own spin on my recipes.
Now go grab some cucumbers and get canning. Your future self will thank you when you crack open that first jar in the middle of winter.