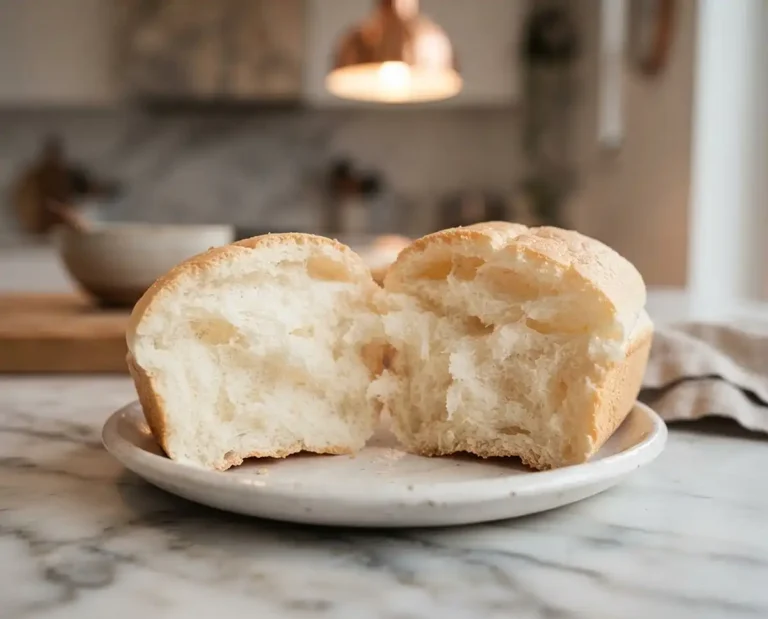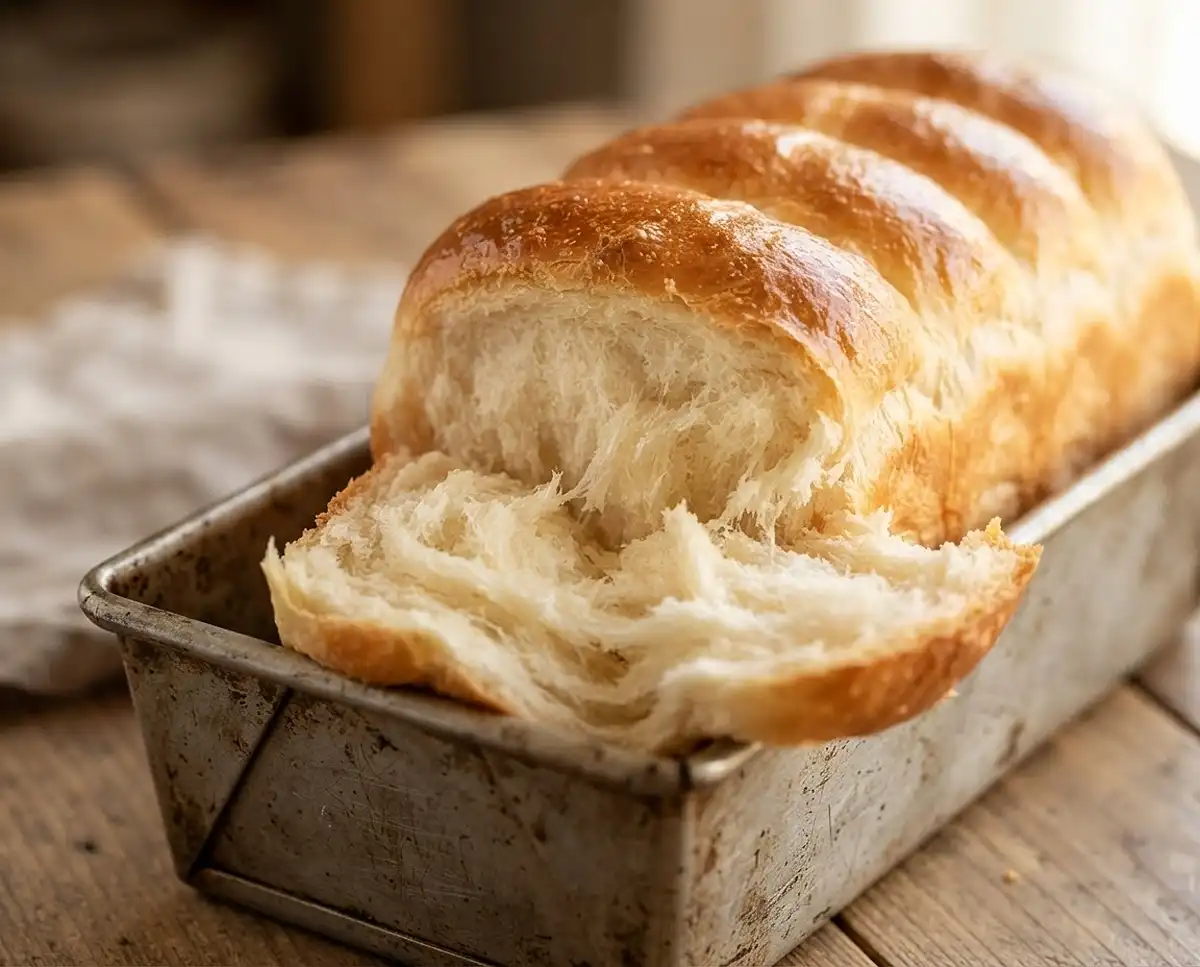
Fluffy Japanese Milk Bread Recipe
Soft, fluffy, and impossibly tender, Japanese milk bread is the pillowy loaf that stays fresh for days and makes every sandwich feel like a luxury.
I’ll never forget the first time I pulled apart a slice of Japanese milk bread. The texture was so soft and stretchy, I honestly thought something magical had happened in my oven. That cloudlike crumb and barely-there sweetness made me wonder why I’d been settling for regular sandwich bread my whole life.
This recipe uses a simple technique called tangzhong—a cooked flour paste that locks moisture into the dough—and it’s the secret behind that signature soft texture. Once you try it, you’ll understand why this bread has taken over bakeries and home kitchens everywhere.
Table of Contents
Quick Answer: What Makes Japanese Milk Bread Special?
Japanese milk bread is an ultra-soft, slightly sweet loaf made with a tangzhong starter—a mixture of flour and liquid cooked into a paste before being added to the dough. This technique helps the bread retain moisture, giving it that famous fluffy texture and keeping it fresh for nearly a week. It’s richer than standard white bread but not as heavy as brioche, making it perfect for toast, sandwiches, or just tearing apart with butter.
Why You’ll Love This Japanese Milk Bread
This bread hits every mark. It’s soft enough to squish between your fingers but sturdy enough to hold up to thick sandwich fillings. The slightly sweet flavor works with both savory and sweet toppings, and the texture stays wonderfully tender for days without going stale.
The tangzhong method might sound fancy, but it only takes five minutes and one small saucepan. You don’t need any special equipment beyond a stand mixer (or some patient hands), and the dough itself is forgiving and easy to work with. Even if you’re new to bread baking, this recipe walks you through every step with clear visual cues so you know exactly what to look for.
And honestly? There’s something deeply satisfying about slicing into a homemade loaf that’s better than anything you can buy at the store. The smell alone makes your kitchen feel like a bakery, and the taste is worth every minute of rising time.
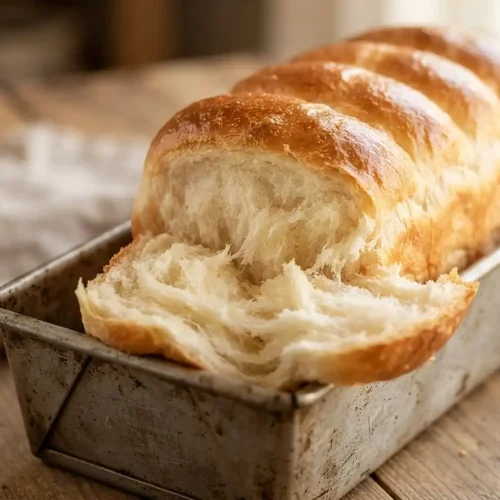
Japanese Milk Bread
Ingredients
Tangzhong
- 3 tablespoons 43g water
- 3 tablespoons 43g milk, whole preferred
- 2 tablespoons 14g King Arthur Unbleached Bread Flour
Dough
- 2 ½ cups 300g King Arthur Unbleached Bread Flour
- 2 tablespoons 14g King Arthur Baker’s Special Dry Milk or nonfat dry milk
- ¼ cup 50g granulated sugar
- 1 teaspoon 6g table salt
- 1 tablespoon instant yeast
- ½ cup 113g milk, whole preferred
- 1 large egg
- 4 tablespoons 57g unsalted butter, melted
Instructions
- To make the tangzhong: Combine all of the ingredients in a small saucepan, and whisk until no lumps remain.
- Place the saucepan over low heat and cook the mixture, whisking constantly, until thick and the whisk leaves lines on the bottom of the pan, about 3 to 5 minutes.
- Transfer the tangzhong to a small mixing bowl or measuring cup and let it cool to lukewarm.
- To make the dough: Weigh your flour; or measure it by gently spooning it into a cup, then sweeping off any excess. Combine the tangzhong with the remaining dough ingredients, then mix and knead — by mixer or bread machine — until a smooth, elastic dough forms; this could take almost 15 minutes in a stand mixer.
- Shape the dough into a ball, and let it rest in a lightly greased bowl, covered, for 1 to 1 1/2 hours, until puffy but not necessarily doubled in bulk.
- Gently deflate the dough and divide it into four equal pieces; if you have a scale each piece will weigh between 170g and 175g.
- Flatten each piece of dough into a 5″ x 8″ rectangle, then fold the short ends in towards one another like a letter. Flatten the folded pieces into rectangles again (this time about 3″ x 6″) and, starting with a short end, roll them each into a 4″ log.
- Place the logs in a row of four — seam side down and side by side — in a lightly greased 9″ x 5″ loaf pan.
- Cover the loaf and allow it to rest/rise for 40 to 50 minutes, until puffy.
- Toward the end of the rising time, preheat the oven to 350°F.
- To bake the bread: Brush the loaf with milk and bake it for 30 to 35 minutes, until it’s golden brown on top and a digital thermometer inserted into the center reads at least 190°F.
- Remove the loaf from the oven and cool it in the pan until you can transfer it safely to a rack to cool completely.
- Storage information: Store leftover bread, well wrapped, at cool room temperature for 5 to 7 days; freeze for longer storage.
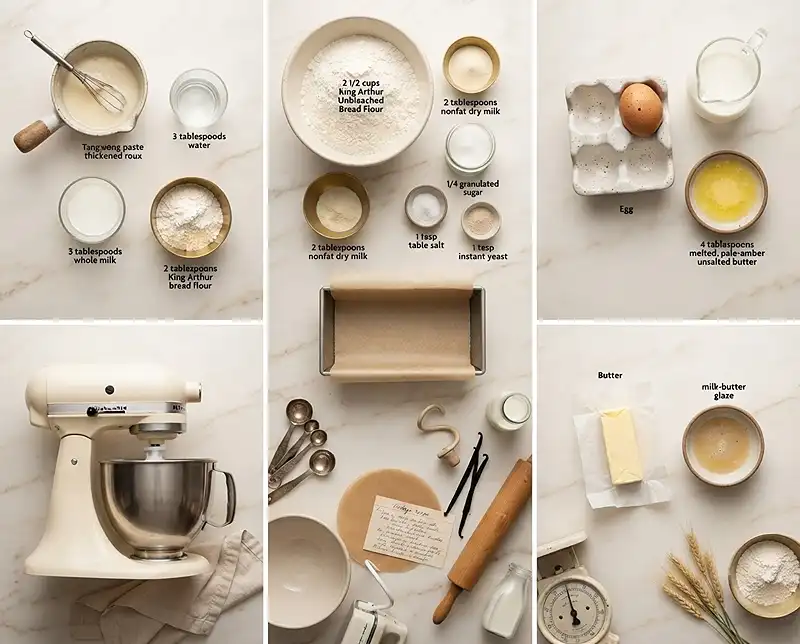
Ingredients for Japanese Milk Bread
This recipe uses everyday ingredients you probably already have, plus one technique that transforms them into something extraordinary. The tangzhong is what sets this bread apart, so don’t skip it—it’s easier than it sounds and makes all the difference in texture.
| Ingredient | Amount | Notes |
|---|---|---|
| Water (for tangzhong) | 3 tablespoons (43g) | Room temperature is fine |
| Milk (for tangzhong) | 3 tablespoons (43g) | Whole milk preferred for richness |
| Bread flour (for tangzhong) | 2 tablespoons (14g) | King Arthur or any bread flour |
| Bread flour (for dough) | 2 1/2 cups (300g) | Bread flour gives better structure |
| Dry milk powder | 2 tablespoons (14g) | Baker’s Special or nonfat dry milk |
| Granulated sugar | 1/4 cup (50g) | Adds subtle sweetness |
| Table salt | 1 teaspoon (6g) | Balances the sweetness |
| Instant yeast | 1 tablespoon | Also called rapid-rise yeast |
| Milk (for dough) | 1/2 cup (113g) | Whole milk preferred |
| Large egg | 1 | Room temperature works best |
| Unsalted butter | 4 tablespoons (57g) | Melted and slightly cooled |
About bread flour: It has more protein than all-purpose flour, which helps create that chewy, stretchy texture Japanese milk bread is known for. If you only have all-purpose, the bread will still turn out soft, just slightly less structured.
Why dry milk powder? It boosts the milk flavor and helps the crust brown beautifully without adding extra liquid to the dough. You can find it in the baking aisle near the evaporated milk.
Instant yeast vs. active dry: Instant yeast can be mixed directly into the flour, which makes this recipe faster. If you only have active dry yeast, you can use the same amount—just proof it in the warm milk first before adding it to the dough.
Step-by-Step Instructions for Japanese Milk Bread
Making Japanese milk bread is a two-part process: first you cook the tangzhong starter, then you mix and knead the dough. The whole process takes about three hours from start to finish, but most of that is hands-off rising time. Your active work is maybe 20 minutes, and the results are absolutely worth it.
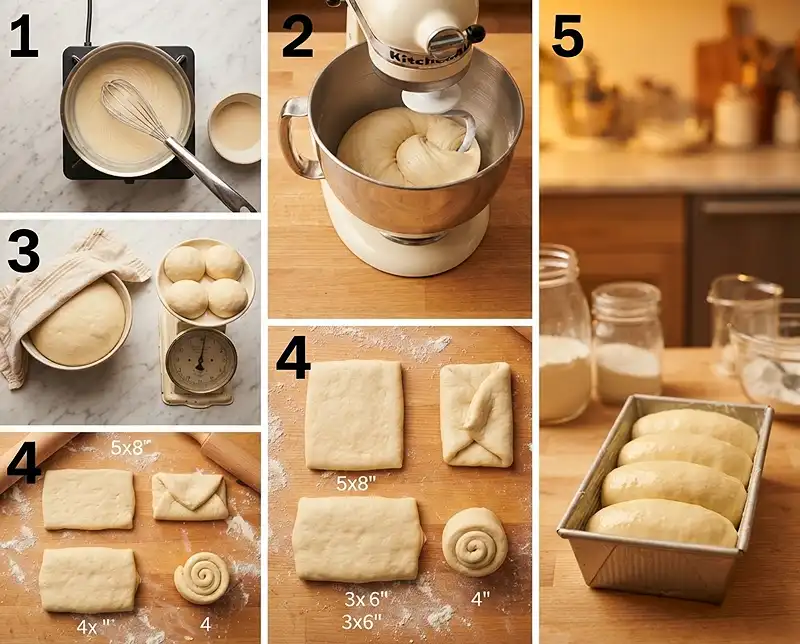
- Make the tangzhong starter: Combine the 3 tablespoons water, 3 tablespoons milk, and 2 tablespoons bread flour in a small saucepan. Whisk it really well until there are no lumps—this only takes about 30 seconds, but it matters because lumps won’t cook out later.
- Cook the tangzhong: Place the saucepan over low heat and whisk constantly as it heats up. After about 3 to 5 minutes, the mixture will suddenly thicken into a paste that looks like thick pudding. You’ll know it’s ready when your whisk leaves visible trails on the bottom of the pan that stay for a second before filling back in. Don’t rush this step—if it’s not thick enough, it won’t have the same effect on the dough.
- Cool the tangzhong: Scrape the cooked paste into a small bowl or measuring cup and let it cool until it’s just warm to the touch, not hot. This usually takes about 10 minutes. If it’s too hot when you add it to the dough, it can kill the yeast.
- Weigh or measure the flour carefully: If you have a kitchen scale, weigh out 300g of bread flour for the most accurate results. If you’re measuring by volume, spoon the flour gently into your measuring cup and level it off with a knife—don’t scoop directly from the bag or pack it down, or you’ll end up with too much flour and a denser loaf.
- Combine the dough ingredients: Add the cooled tangzhong, the 2 1/2 cups bread flour, dry milk powder, sugar, salt, instant yeast, 1/2 cup milk, egg, and melted butter to the bowl of your stand mixer. You can also do this in a bread machine or by hand if you prefer.
- Mix and knead the dough: Using the dough hook attachment, mix on low speed until everything comes together into a shaggy dough, then increase to medium speed. Knead for about 12 to 15 minutes total. The dough will be sticky at first, but resist the urge to add more flour—it should eventually pull away from the sides of the bowl and become smooth, elastic, and just slightly tacky. When you stretch a small piece between your fingers, it should form a thin, translucent “windowpane” without tearing.
- First rise: Shape the dough into a smooth ball and place it in a lightly greased bowl. Cover it with plastic wrap or a damp towel and let it rise in a warm spot for 1 to 1 1/2 hours. It should look puffy and feel airy, though it might not fully double in size—that’s okay. A good test is to poke it gently with your finger; if the indent stays and doesn’t spring back, it’s ready.
- Divide the dough: Turn the dough out onto a clean counter and gently press it down to deflate it. Divide it into four equal pieces. If you have a scale, each piece should weigh between 170g and 175g. Even without a scale, just eyeball it as evenly as you can.
- Shape the dough pieces: Working with one piece at a time, press or roll it into a rectangle roughly 5 inches by 8 inches. Fold the two short ends toward the middle, like you’re folding a letter into thirds. Then press or roll that folded piece into a smaller rectangle, about 3 inches by 6 inches. Starting from one of the short ends, roll the dough up tightly into a little log about 4 inches long. Repeat with the other three pieces.
- Arrange in the pan: Place all four logs seam-side down in a row, side by side, in a greased 9-inch by 5-inch loaf pan. They should fit snugly together.
- Second rise: Cover the pan loosely and let the dough rise again for 40 to 50 minutes. It should puff up and look pillowy, rising almost to the top of the pan. If you gently press the dough, it should feel light and airy, not dense.
- Preheat the oven: About 10 minutes before the dough is done rising, preheat your oven to 350°F so it’s fully heated when you’re ready to bake.
- Brush with milk and bake: Right before baking, brush the top of the loaf gently with a little milk using a pastry brush. This gives the crust a beautiful golden color. Bake for 30 to 35 minutes, until the top is a rich golden brown and a digital thermometer inserted into the center of the loaf reads at least 190°F. If the top starts browning too quickly, you can tent it loosely with foil for the last 10 minutes.
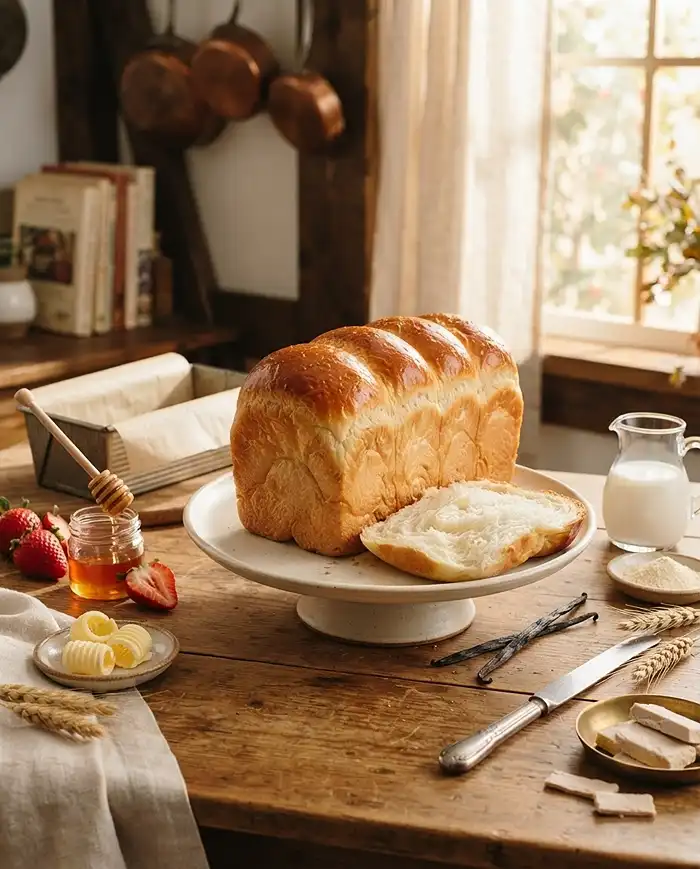
- Cool the bread: Remove the loaf from the oven and let it sit in the pan for about 5 minutes, then carefully turn it out onto a wire rack. Let it cool completely before slicing—this takes about an hour, and I know it’s hard to wait, but cutting into it too soon can make the texture gummy.
Expert Tips for Perfect Japanese Milk Bread
Use a scale if you can. Bread baking is all about ratios, and weighing your ingredients—especially the flour—gives you the most consistent results. If you don’t have a scale, just be extra careful with your measuring technique.
Don’t skip the tangzhong. Yes, it’s an extra step, but it’s what makes this bread stay soft for days instead of going stale overnight. The cooked flour mixture traps water in the dough, and that moisture is what keeps the crumb tender.
Knead long enough. Fifteen minutes can feel like forever when you’re standing there watching the mixer, but proper gluten development is what gives this bread its signature stretchy, pillowy texture. If you’re kneading by hand, it might take even longer—just keep going until the dough is smooth and elastic.
Watch the dough, not the clock. Rising times can vary depending on how warm your kitchen is. In the summer, your dough might rise faster; in the winter, it could take longer. Use the visual and touch cues I mentioned in the steps rather than relying only on the timer.
Don’t overbake. Japanese milk bread should be golden on top but still soft. If you bake it too long, the crust gets tough and the inside dries out. A thermometer is your best friend here—pull it out as soon as it hits 190°F.
Let it cool completely. I know this is torture, but the texture really does set as the bread cools. Slicing it while it’s still warm can squish the delicate crumb and make it gummy. If you absolutely can’t wait, at least give it 30 minutes.
Variations on Japanese Milk Bread
Dinner rolls: Instead of shaping the dough into logs for a loaf, divide it into 12 equal pieces and shape each into a smooth ball. Place them in a greased 9×13-inch pan and let them rise until puffy, then bake at 350°F for about 20 to 25 minutes. They’re perfect for soft, pillowy rolls that pull apart beautifully.
Cinnamon swirl loaf: After rolling each piece into a rectangle in step 9, brush it with melted butter and sprinkle it generously with cinnamon sugar before rolling it up. The result is a sweet, swirled loaf that’s amazing toasted with butter.
Chocolate marble bread: Reserve about one-third of the dough after the first rise and knead in 2 tablespoons of cocoa powder. Shape the plain and chocolate doughs separately, then twist them together before placing them in the pan. You’ll get a gorgeous marbled effect when you slice it.
Whole wheat version: Replace up to half of the bread flour with whole wheat flour for a heartier texture and nuttier flavor. You might need to add a tablespoon or two more milk since whole wheat flour absorbs more liquid. Similar to how you’d adapt healthier quick breads, this version won’t be quite as fluffy, but it’s still wonderfully soft.
Savory herb bread: Reduce the sugar to 1 tablespoon and add 2 tablespoons of chopped fresh herbs (like rosemary or thyme) and a teaspoon of garlic powder to the dough. It’s perfect for sandwiches or alongside soup.
Troubleshooting Japanese Milk Bread
My tangzhong didn’t thicken: The heat was probably too low or you didn’t cook it long enough. Put it back on the stove over low heat and keep whisking until it’s thick like pudding and leaves trails when you stir it.
The dough is really sticky and won’t come together: Japanese milk bread dough is supposed to be slightly tacky, but if it’s so sticky it’s coating your hands and the bowl, you might have measured the flour incorrectly. Add flour a tablespoon at a time until it becomes workable. Just don’t add too much, or the bread will be dense.
The dough didn’t rise: Your yeast might have been old, or the liquid was too hot and killed the yeast. Check the expiration date on your yeast, and make sure the tangzhong and milk are just lukewarm, not hot, when you add them. You can also try proofing the yeast in a little warm milk with a pinch of sugar first to make sure it’s active.
The bread is dense instead of fluffy: This usually means the dough wasn’t kneaded long enough to develop the gluten, or you added too much flour. Make sure you knead until the dough passes the windowpane test, and measure your flour carefully.
The top browned too quickly: Every oven is a little different. If your bread is getting too dark before the inside is cooked through, tent it loosely with aluminum foil for the last 10 to 15 minutes of baking. You can also try lowering the oven temperature to 325°F and baking a few minutes longer.
The bread has a weird shape: This can happen if the dough pieces aren’t rolled evenly or if one section rose faster than the others. Make sure each log is about the same size and placed snugly in the pan. Also check that your oven heats evenly—if one side is hotter, the bread can rise unevenly.
Storage and Freezing Japanese Milk Bread
One of the best things about Japanese milk bread is how well it keeps. The tangzhong method locks in moisture, so this loaf stays soft and fresh much longer than regular bread. Proper storage makes all the difference, though.
| Storage Method | Duration | Best Practices |
|---|---|---|
| Room temperature | 5 to 7 days | Wrap tightly in plastic wrap or store in an airtight container or bag |
| Refrigerator | Not recommended | The fridge dries out bread faster—stick with room temp storage |
| Freezer | Up to 3 months | Wrap tightly in plastic, then foil, or use a freezer bag. Slice before freezing for easy toasting |
At room temperature: Let the bread cool completely, then wrap it tightly in plastic wrap or place it in a resealable plastic bag, squeezing out as much air as possible. Store it on your counter or in a bread box, away from direct sunlight and heat. It should stay soft and delicious for about a week.
Don’t refrigerate: I learned this the hard way—refrigerating bread actually makes it go stale faster because of a process called starch retrogradation. Room temperature is always better for bread unless it has perishable fillings.
Freezing for later: Japanese milk bread freezes beautifully. For the best results, let the loaf cool completely, then wrap it tightly in plastic wrap followed by a layer of aluminum foil or a freezer bag. If you slice it before freezing, you can pull out individual slices and toast them straight from the freezer. The bread will keep for up to three months, and when you thaw it, it tastes almost as good as fresh. To thaw a whole loaf, leave it wrapped on the counter for a few hours, or unwrap it and warm it in a 300°F oven for about 10 minutes.
Refreshing day-old bread: If your bread has been sitting out for a few days and isn’t quite as soft, you can refresh it by wrapping it loosely in foil and warming it in a 300°F oven for about 5 to 10 minutes. A light spritz of water on the crust before warming helps, too.
Japanese Milk Bread FAQs
What is Japanese Milk Bread?
Japanese Milk Bread, also known as Hokkaido milk bread or shokupan, is a soft, fluffy, and slightly sweet white bread that originated in Japan. It has a distinctive pillowy texture and fine crumb, achieved through a special technique called tangzhong, which involves cooking a portion of the flour and liquid into a roux before adding it to the dough. This bread stays fresh and soft for days longer than regular bread.
What is the tangzhong method used in Japanese Milk Bread?
The tangzhong method is a water roux technique where a small portion of flour and liquid (water or milk) is cooked together until it forms a thick paste or gel, usually at around 65 degrees Celsius. This cooked mixture is then cooled and added to the bread dough. The tangzhong helps the dough retain more moisture, resulting in a softer, fluffier texture and extends the shelf life of the bread by keeping it fresh longer.
Why is Japanese Milk Bread so soft and fluffy?
Japanese Milk Bread achieves its signature softness through several factors: the tangzhong method which increases moisture retention, the use of milk and butter which add fat and tenderness, enriched dough with eggs that create a softer crumb, and careful kneading that develops gluten for structure while maintaining lightness. The high hydration level and gentle baking process also contribute to its cloud-like texture.
How long does Japanese Milk Bread stay fresh?
Japanese Milk Bread typically stays fresh and soft for 4 to 5 days when stored properly at room temperature in an airtight container or sealed plastic bag. Thanks to the tangzhong method, it maintains its moisture and soft texture much longer than regular bread. For extended storage, it can be frozen for up to 3 months and thawed at room temperature or lightly toasted when needed.
What can I use Japanese Milk Bread for?
Japanese Milk Bread is incredibly versatile and can be used for many purposes. It makes excellent toast, sandwiches, and French toast due to its soft texture. It’s perfect for sweet applications like bread pudding or as dinner rolls. Many people enjoy it simply with butter or jam. The bread is also commonly used for making fluffy slider buns, thick-cut toast topped with various ingredients, or even savory dishes like katsu sandos, a popular Japanese sandwich.
Final Thoughts on Japanese Milk Bread
Once you’ve made Japanese milk bread at home, it’s hard to go back to store-bought loaves. The texture, the flavor, the way it stays soft for nearly a week—it’s just on another level. And while the process takes a few hours, most of that is hands-off time where the dough is doing its thing and you’re free to go about your day.
This bread is perfect for everything from morning toast to lunchtime sandwiches to late-night snacking (no judgment here). It’s also a surprisingly impressive recipe to share with friends and family. People always ask for the recipe when they try it, and honestly, that’s one of the best compliments a home baker can get.
If you’ve been intimidated by bread baking, this is a great recipe to start with. The steps are straightforward, the ingredients are simple, and the results are so rewarding. Give it a try, and I think you’ll be hooked. And if you’re already a bread-baking fan, this one deserves a permanent spot in your rotation.
Once you’ve perfected this loaf, you might also enjoy trying other homemade breads like pickles to go with your sandwiches, or experimenting with sweeter options. Happy baking!