Best Protein Ice Cream Recipe Ninja Creami
Creamy, dreamy, and packed with protein—this easy Ninja Creami recipe turns your favorite protein powder into the silkiest ice cream you’ll ever make at home.
I’ll be honest—I was skeptical the first time someone told me I could make legitimately good ice cream with protein powder. But after my first bite of this homemade protein ice cream straight from my Ninja Creami, I was completely sold. It’s thick, creamy, and tastes like actual ice cream, not some chalky protein shake that’s been frozen solid.
This recipe has become my weeknight treat, my post-workout reward, and honestly, sometimes my breakfast when I’m feeling rebellious. No judgment here.
Table of Contents
What Makes This the Best Protein Ice Cream Recipe Ninja Creami
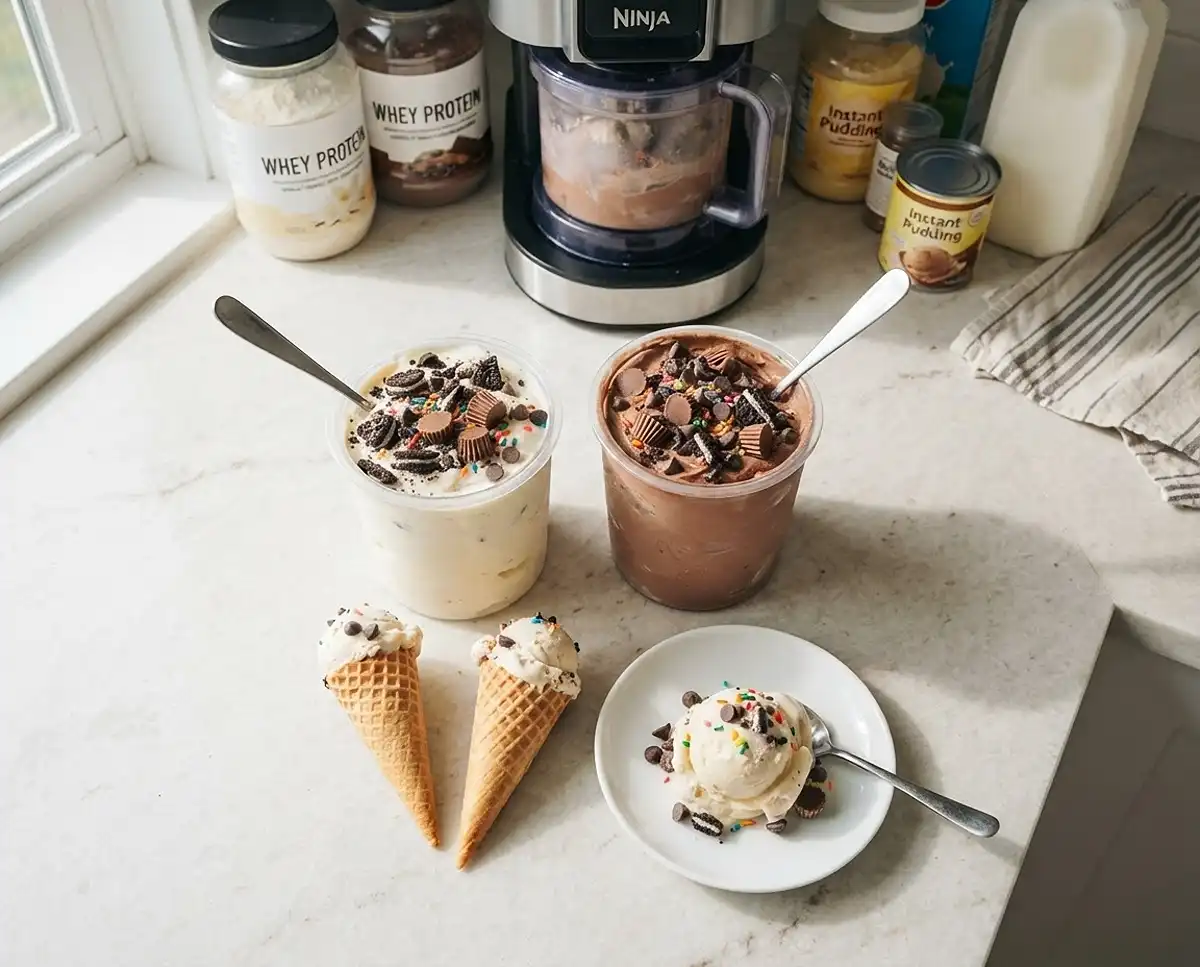
This is hands down the best protein ice cream recipe Ninja Creami fans have been asking for. It combines protein powder with instant pudding mix—yes, pudding mix is the secret weapon—to create an ice cream base that comes out incredibly smooth every single time.
The pudding mix adds body and creaminess that protein powder alone just can’t achieve. Plus, you only need three main ingredients and about two minutes of actual work. The Ninja Creami does all the heavy lifting while you sleep.
You’ll get a pint of high-protein ice cream that rivals anything from the store, minus the price tag and ingredient list you can’t pronounce.
Why You’ll Love This Perfect Ninja Creami Protein Ice Cream
This recipe checks every single box. It’s incredibly simple—just whisk three ingredients together and freeze. There’s no cooking, no tempering eggs, no standing over a stove stirring custard.
The texture is legitimately creamy, not icy or grainy like some homemade protein ice creams turn out. You can customize it endlessly with different protein powder flavors and mix-ins. And each serving packs about 20-25 grams of protein depending on your protein powder, so you can feel good about that second scoop.
It’s also way more budget-friendly than buying those fancy high-protein pints at the grocery store. When you break down the cost per serving, you’re saving serious money while controlling exactly what goes into your dessert.
Plus, it’s ready whenever you want it. Keep a couple pints in your freezer, and you’ve got a healthy-ish treat on demand.
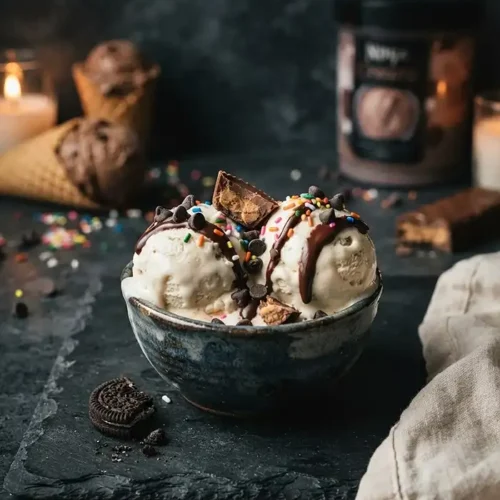
Best Protein Ice Cream Recipe Ninja Creami
Ingredients
Vanilla Version
- 1 ½ scoops vanilla protein powder Clean Simple Eats is my favorite
- 2 tbsp vanilla instant pudding sugar-free or regular
- 1 ½ cups milk
Chocolate Version
- 1 ½ scoops chocolate protein powder
- 2 tbsp chocolate instant pudding sugar-free or regular
- 1 ½ cups milk
- 1-2 tsp cocoa powder
Optional Mix-Ins
- chocolate chips
- peanut butter cups
- sprinkles
- mini m&m’s
- crushed Oreos or cookies
- crushed pretzels
Instructions
- Mix protein powder, pudding mix and milk in Ninja Creami pint container using a small whisk or spoon until combined. Note: Give it a taste to see if you’d prefer to add 1-2 tbsp of sweetener at this step.
- Freeze for 24 hours on a level surface.
- Place pint container in the Ninja Creami outer bowl and secure lid with blade, install onto machine. Run lite ice cream mode x1, check consistency.
- Run re-spin mode x1 if needed. If still crumbly, spin again!
- If you’re adding mix-ins, create a small hole in the center and then add in any mix-ins that you want before pressing the mix-in button.
- Scoop and enjoy!
Ingredients for the Best Protein Ice Cream Recipe Ninja Creami
The beauty of this recipe is how minimal the ingredient list is. You probably have most of these in your pantry already, and if you don’t, they’re all easy to find at any grocery store.
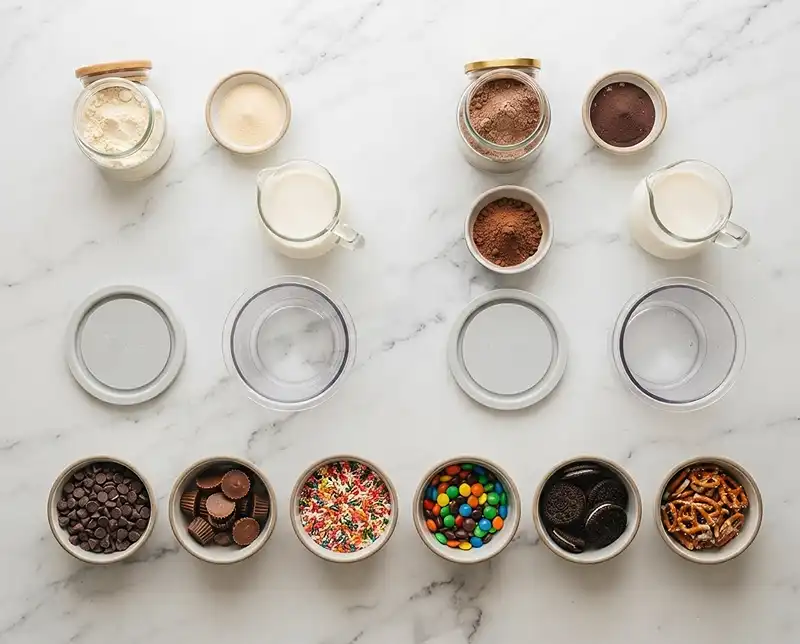
| Ingredient | Amount | Notes |
|---|---|---|
| Vanilla protein powder | 1 1/2 scoops | Clean Simple Eats is my favorite, but any brand works |
| Vanilla instant pudding | 2 tbsp | Sugar-free or regular both work great |
| Milk | 1 1/2 cups | Any milk works—dairy, almond, oat, cashew |
| Chocolate protein powder | 1 1/2 scoops | For chocolate version |
| Chocolate instant pudding | 2 tbsp | For chocolate version |
| Cocoa powder | 1-2 tsp | Optional, for deeper chocolate flavor |
| Mix-ins (optional) | 1/4-1/3 cup | Chocolate chips, peanut butter cups, sprinkles, mini M&Ms, crushed Oreos, crushed pretzels |
Choosing Your Protein Powder
Not all protein powders are created equal when it comes to making ice cream. I’ve tested this recipe with at least a dozen different brands, and here’s what I’ve learned.
Whey protein isolate tends to give the smoothest, creamiest results. It blends beautifully and doesn’t leave any grittiness. Whey concentrate works too, though it can be slightly less smooth.
Plant-based proteins like pea, rice, or hemp protein work, but they sometimes need an extra re-spin to get perfectly creamy. They can also have a slightly different texture—still delicious, just a touch different.
Collagen protein makes a softer, almost soft-serve texture that some people love. It’s less scoopable than whey-based versions but melts beautifully in your mouth.
Flavor matters too. Vanilla is the most versatile and lets you customize with mix-ins. Birthday cake flavor is amazing if you want something fun. Chocolate obviously works for chocolate ice cream. I’d avoid anything too artificial-tasting, as freezing tends to intensify flavors.
The Magic of Instant Pudding Mix
Let me tell you about the game-changer in this recipe—instant pudding mix. This isn’t just a random addition. The pudding mix contains emulsifiers and stabilizers that help create that smooth, creamy ice cream texture we’re all after.
These ingredients help the mixture freeze in a way that prevents large ice crystals from forming. That’s why your protein ice cream comes out silky instead of icy.
You can absolutely use sugar-free pudding mix if you’re watching your sugar intake. I honestly can’t tell the difference in the final product. Both versions work equally well.
Some people ask if they can skip the pudding mix entirely. You can, but your ice cream will be icier and less creamy. If you really want to avoid it, adding a tablespoon of cornstarch or a teaspoon of xanthan gum can help, though the texture still won’t be quite as perfect.
Instructions for Perfect Ninja Creami Protein Ice Cream
This process is so straightforward that you’ll have it memorized after making it once. The hardest part is waiting the full 24 hours for it to freeze—and trust me, you really do need the full time.
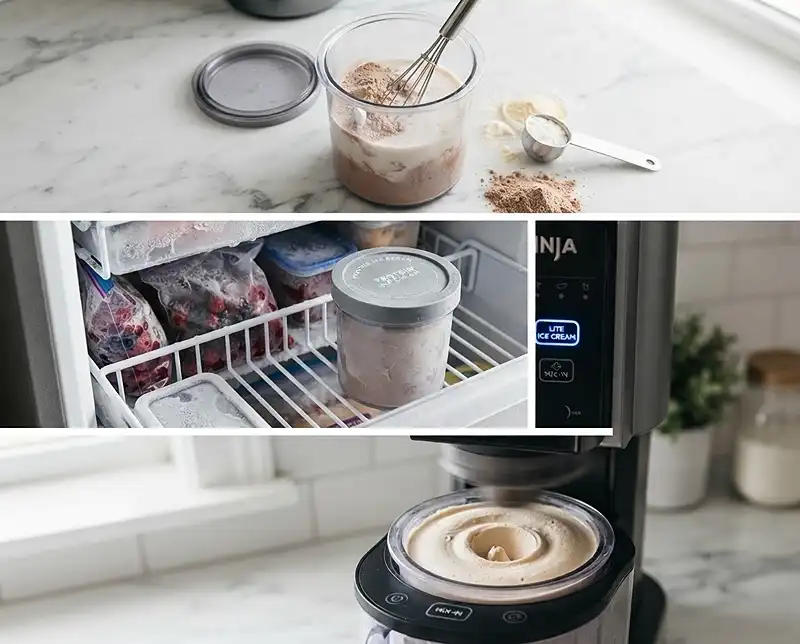
- Mix your base: Pour your milk into your Ninja Creami pint container first, then add the protein powder and pudding mix. Using a small whisk or spoon, stir everything together until it’s completely combined with no clumps. This takes about a minute of stirring. Give it a taste at this point—if you have a sweet tooth and want it sweeter, add 1-2 tablespoons of your favorite sweetener like honey, maple syrup, or a sugar substitute.
- Freeze it solid: Secure the lid on your pint container and place it in the freezer on a completely level surface. This is important—if it’s tilted, your ice cream will freeze unevenly and won’t process correctly. Let it freeze for a full 24 hours. I know it’s tempting to check it early, but resist. The mixture needs to be frozen completely solid all the way through.
- Process in your Ninja Creami: Take your frozen pint out of the freezer and remove the lid. Place the pint container into the Ninja Creami outer bowl, then secure the lid with the blade attachment. Lock it onto your machine. Select the lite ice cream mode and press start. Let the machine do its thing—it’ll take a few minutes and sound like it’s working hard, which is normal.
- Check the consistency: Once the cycle finishes, carefully remove the outer bowl and check your ice cream. It should be creamy and smooth. If it looks a bit crumbly or powdery on top, don’t worry—that’s normal for the first spin. Just run the re-spin mode once. If it’s still looking crumbly after that, run re-spin one more time. Sometimes it takes two or three spins to get perfect, especially with certain protein powder brands.
- Add your mix-ins: If you’re keeping it plain, you can skip to eating. But if you want mix-ins (and why wouldn’t you?), use a spoon to create a small well or hole in the center of your ice cream. Add about 1/4 to 1/3 cup of your favorite mix-ins—chocolate chips, crushed cookies, peanut butter cups, whatever sounds good. Press the mix-in button and let the machine incorporate everything evenly.
- Serve immediately: Scoop your protein ice cream into a bowl and enjoy right away. The texture is perfect straight from the machine—soft, creamy, and scoopable. If you want to store leftovers, put the lid back on the pint and return it to the freezer.

Expert Tips for the Creamiest Results
After making this recipe at least fifty times (not exaggerating—I have a problem), I’ve picked up some tricks that make a real difference.
Always freeze your pint completely level. I keep a small leveler in my freezer just for this. An uneven freeze means uneven processing, which means weird texture.
Don’t be afraid to run re-spin multiple times. Some protein powders just need more processing. I’ve run re-spin three or four times on certain batches, and it’s always worth it for that perfect creaminess.
Let your pint sit on the counter for about 5 minutes before processing if you’ve had it in the freezer for longer than 24 hours. Super cold pints sometimes need a tiny bit of tempering to process smoothly.
Use cold milk when mixing your base. It helps everything incorporate better and starts the freezing process on the right foot.
Measure your protein powder with a scale if you have one. Scoops can vary wildly in size, and too much protein powder will make your ice cream dense and chalky. About 35-40 grams is usually right for 1 1/2 scoops.
If your protein powder is naturally sweetened and quite sweet on its own, you probably don’t need extra sweetener. But if it’s unflavored or lightly flavored, a tablespoon or two of sweetener really helps the ice cream taste like dessert.
Variations to Try
Once you’ve mastered the basic vanilla and chocolate versions, the world is your protein-packed oyster. Here are some of my favorite variations.
For cookies and cream, use vanilla base and add crushed Oreos as your mix-in. About 4-5 cookies, crushed into chunks, is perfect.
Peanut butter cup version: Use chocolate base and add chopped peanut butter cups. I like to throw in a tablespoon of actual peanut butter into the base too for extra flavor.
Mint chocolate chip: Add 1/4 teaspoon peppermint extract to your vanilla base, plus a drop of green food coloring if you want it to look the part. Mix in chocolate chips at the end.
Strawberry cheesecake: Use vanilla base with strawberry protein powder if you have it, or add 2 tablespoons of strawberry jam to the mixture before freezing. Mix in crushed graham crackers at the end.
Birthday cake: Use birthday cake or vanilla protein powder, add extra sprinkles to the base before freezing, then mix in more sprinkles and crushed golden Oreos at the end.
Coffee lovers: Add 1-2 tablespoons of instant coffee or espresso powder to your vanilla base. Trust me on this one—it’s incredible.
You can also experiment with different milk types. Oat milk makes it extra creamy. Coconut milk gives it a subtle tropical flavor. Fairlife or ultra-filtered milk adds even more protein.
Troubleshooting Common Issues
Even with a simple recipe like this, things can occasionally go sideways. Here’s how to fix the most common problems.
If your ice cream comes out icy and crumbly, you likely need more fat in your base. Try using whole milk instead of skim, or add a tablespoon of heavy cream. The pudding mix should prevent this, but some protein powders are just finicky.
If it’s too soft and won’t hold its shape, your pint might not have been frozen long enough, or you used too much liquid. Make sure you’re measuring accurately and giving it the full 24 hours in the freezer.
If it’s rock hard and won’t process properly, let it sit on the counter for 5-10 minutes before putting it in the machine. Also check that your freezer isn’t set too cold—around 0°F is ideal.
If the texture is gritty or chalky, that’s usually the protein powder. Some brands just don’t blend as smoothly. Running extra re-spin cycles can help, or try switching to a different protein powder brand next time.
If it tastes too protein-y or artificial, you need more sweetener or flavoring. Add a tablespoon of honey, maple syrup, or vanilla extract to your base next time. Some protein powders just have a stronger taste that needs balancing.
If the blade is struggling and the machine sounds like it’s really straining, your pint is probably frozen too hard. Let it temper on the counter for 10 minutes and try again.
Storage Guidelines
The best time to eat your Perfect Ninja Creami Protein Ice Cream is right after processing, when it’s at that perfect soft-serve consistency. But if you have leftovers or want to meal prep several pints, here’s what you need to know.
| Storage Method | Duration | Best Practices |
|---|---|---|
| Ninja Creami pint in freezer | Up to 2 weeks | Keep lid tightly sealed; may need to re-spin before serving |
| Freezer-safe container | 1-2 weeks | Press plastic wrap directly on surface to prevent freezer burn |
| After re-processing | Best within 3-4 days | Texture is best when freshly made; gets icier over time |
When you want to eat ice cream that’s been stored in the freezer, you’ll need to let it sit on the counter for about 5-10 minutes to soften slightly. You can also pop it back in the Ninja Creami and run a quick re-spin to refresh the texture.
I like to keep 2-3 pints frozen and ready to go at all times. I’ll mix up several different flavors on Sunday, freeze them, and then I have quick high-protein desserts all week long.
According to the USDA guidelines on frozen dessert storage, homemade ice cream maintains best quality for about 1-2 months in the freezer, though it’s safe indefinitely if kept at 0°F or below. In reality, protein ice cream is best within the first two weeks for optimal texture and taste.
Pairing Suggestions
This protein ice cream is fantastic on its own, but it also pairs wonderfully with other treats. Try it alongside this viral butter-dipped ice cream for an over-the-top dessert experience.
It’s also perfect with fresh fruit—especially berries—or drizzled with a little warm peanut butter or chocolate sauce. If you’re feeling fancy, make it into an ice cream sandwich with your favorite cookies.
For a fun summer twist, serve it alongside this refreshing watermelon juice. The contrast between cold, creamy ice cream and fresh, fruity juice is amazing on a hot day.
You can even use it as a topping for other desserts. I’ve crumbled fruit roll-up ice cream over this protein version for a fun texture contrast.
Best Protein Ice Cream Recipe Ninja Creami FAQs
What makes protein ice cream in the Ninja Creami different from regular ice cream?
Protein ice cream made in the Ninja Creami is healthier and higher in protein content, typically containing 20-30 grams of protein per serving compared to regular ice cream’s 2-4 grams. It uses protein powder, low-fat milk or Greek yogurt as a base instead of heavy cream, resulting in fewer calories and less sugar while still achieving a creamy texture through the Ninja Creami’s unique blending process.
What are the essential ingredients for a basic protein ice cream recipe in the Ninja Creami?
The essential ingredients include 1 cup of unsweetened almond milk or low-fat milk, 1 scoop of protein powder (typically 30 grams), 2-3 tablespoons of sweetener like monk fruit or stevia, and a pinch of xanthan gum for texture. Optional additions include sugar-free pudding mix, vanilla extract, or cocoa powder for chocolate flavor. These ingredients are mixed, frozen for 24 hours, then processed in the Ninja Creami.
How long does it take to make protein ice cream in the Ninja Creami?
The total time includes 5 minutes for mixing ingredients, 24 hours of freezing time in the Ninja Creami pint container, and 2-3 minutes of processing in the machine. While the actual hands-on time is minimal, you need to plan ahead for the freezing period. After the first spin cycle, you may need to re-spin once or twice for optimal creaminess.
Why is my Ninja Creami protein ice cream coming out icy or crumbly?
Icy or crumbly texture usually occurs due to insufficient fat content or improper ratios. To fix this, add a tablespoon of cream cheese, Greek yogurt, or a small amount of coconut cream to your base mixture. Using xanthan gum also helps prevent ice crystals. If it’s already made and crumbly, use the Re-Spin function on your Ninja Creami, or add a splash of milk and process again until smooth.
Can I use any type of protein powder for Ninja Creami ice cream?
While you can use most protein powders, some work better than others. Whey protein isolate and casein protein produce the creamiest results. Vanilla and chocolate flavored proteins are most versatile. Plant-based proteins like pea or brown rice protein can work but may result in a slightly grainier texture. Avoid collagen protein as it doesn’t freeze well. The key is using high-quality protein powder without too many additives that might affect texture.
Enjoy Your Homemade Protein Ice Cream
There you have it—the best protein ice cream recipe Ninja Creami owners have been searching for. With just three basic ingredients and a little patience while it freezes, you can make ice cream that’s creamy, delicious, and packed with protein.
The beauty of this recipe is how endlessly customizable it is. Once you nail down the basic vanilla or chocolate version, you can experiment with different flavors, mix-ins, and variations until you find your perfect combination.
I’d love to hear how your protein ice cream turns out! What flavor combinations are you trying first? Drop a comment below and let me know. And if you’re looking for more fun frozen treats, check out these creamy yogurt noodles for another unique dessert idea.
Now go mix up a pint, stick it in the freezer, and get ready for the creamiest, most satisfying high-protein treat you’ve ever made at home. Your taste buds and your muscles will thank you.