Mediterranean Farro Halloumi Salad with Fresh Herbs
A hearty farro halloumi salad that brings nutty grains, crispy golden cheese, and bright Mediterranean flavors together in one satisfying bowl that works as lunch, dinner, or your new favorite potluck dish.
I’ll be honest—I used to think grain salads were boring. Then I discovered farro, that chewy ancient grain with just the right bite, and paired it with golden, squeaky halloumi. Now I make this at least twice a month, and it’s the first thing to disappear at any gathering.
This is the kind of salad that actually fills you up, tastes better the next day, and makes you feel good about eating something both delicious and wholesome.
Table of Contents
What Makes This Farro Halloumi Salad Special
This recipe is just the beginning. Over in the Grain & Protein Bowls collection, you’ll find even more dishes that are just as easy and packed with flavor. Go take a peek — your next favorite is waiting.
This is a complete meal-in-a-bowl situation. The farro gives you that satisfying, nutty chew that pasta salad promises but never quite delivers. The halloumi—oh, the halloumi—gets crispy on the outside while staying soft inside, adding a salty richness that makes the whole thing addictive.
You get fresh crunch from cucumbers and tomatoes, brightness from loads of herbs, and a zippy lemon vinaigrette that pulls everything together. It’s Mediterranean without being fussy, vegetarian without feeling like something’s missing, and actually tastes better after sitting for a bit.
Plus, you can serve it warm, cold, or somewhere in between. That’s the kind of flexibility I need in my life.
Why You’ll Love This Halloumi Salad Recipe
This mediterranean farro salad checks every box without trying too hard. Here’s why it’s become one of my most-requested recipes:
The texture combination is absolutely perfect. You’ve got chewy farro, crispy-edged halloumi, juicy tomatoes, crunchy cucumber, and those fresh herbs adding little bursts of flavor in every bite. Nothing gets soggy or mushy, even after a day in the fridge.
It’s actually filling. I’m talking real, stick-with-you satisfaction. The farro and halloumi together give you enough protein and fiber that you’re not raiding the snack cabinet an hour later. This is legitimate main-dish territory.
The prep is mostly hands-off. While the farro simmers, you chop vegetables. While the halloumi cooks, you whisk the dressing. Everything comes together in under 45 minutes, with minimal actual work on your part.
It travels beautifully. Pack it for lunch, bring it to a picnic, take it to a potluck—it holds up like a champ. No wilted greens, no sad soggy situation. Just a hearty, flavorful salad that looks as good as it tastes.
You can make it ahead. In fact, I prefer it after it’s had a few hours to let the flavors meld. The farro soaks up that lemony dressing, the onions mellow out, and everything gets more delicious. That’s my kind of recipe.

Farro Halloumi Salad
Ingredients
Ingredients
- 1 cup farro
- 2 cups water or vegetable broth
- 8 ounces halloumi cheese sliced
- 1 tablespoon olive oil for cooking halloumi
- 1 pint cherry tomatoes halved
- 1 cucumber diced
- ¼ red onion thinly sliced
- ½ cup chopped fresh parsley
- ¼ cup chopped fresh mint
For the Lemon Vinaigrette
- ¼ cup olive oil
- 2 tablespoons fresh lemon juice
- 1 teaspoon Dijon mustard
- 1 clove garlic minced
- Salt and black pepper to taste
Instructions
- Cook the farro: Rinse the farro under cold water. In a medium saucepan, combine the farro with 2 cups of water or vegetable broth. Bring to a boil, then reduce heat to low, cover, and simmer for 25-30 minutes, or until the farro is tender and has absorbed most of the liquid. Drain any excess liquid and fluff with a fork. Let cool slightly.
- Prepare the halloumi: While the farro is cooking, heat 1 tablespoon of olive oil in a non-stick skillet over medium heat. Add the sliced halloumi and cook for 2-3 minutes per side, or until golden brown and slightly crispy. Remove from heat and slice into bite-sized pieces.
- Make the vinaigrette: In a small bowl, whisk together 1/4 cup olive oil, lemon juice, Dijon mustard, minced garlic, salt, and pepper until well combined.
- Assemble the salad: In a large bowl, combine the cooked farro, seared halloumi, cherry tomatoes, cucumber, red onion, parsley, and mint.
- Dress and serve: Pour the lemon vinaigrette over the salad and toss gently to combine. Serve immediately or chill for later.
Ingredients for This Vegetarian Farro Salad
This is a straightforward ingredient list without any hard-to-find items. You’ll need some good-quality farro, a block of halloumi, plenty of fresh vegetables, and herbs. The vinaigrette comes together with pantry staples you probably already have.

| Ingredient | Amount | Notes |
|---|---|---|
| Farro | 1 cup | Pearled cooks faster; whole grain has more chew |
| Water or vegetable broth | 2 cups | Broth adds more flavor |
| Halloumi cheese | 8 ounces, sliced | Don’t skip this—it’s the star |
| Olive oil (for cooking) | 1 tablespoon | For frying the halloumi |
| Cherry tomatoes | 1 pint, halved | Any ripe tomatoes work |
| Cucumber | 1, diced | English or Persian are best |
| Red onion | 1/4, thinly sliced | Soak in cold water if too sharp |
| Fresh parsley | 1/2 cup, chopped | Flat-leaf has better flavor |
| Fresh mint | 1/4 cup, chopped | Don’t use dried—it won’t be the same |
| For the Lemon Vinaigrette: | ||
| Olive oil | 1/4 cup | Good quality makes a difference |
| Fresh lemon juice | 2 tablespoons | From about 1 large lemon |
| Dijon mustard | 1 teaspoon | Helps emulsify the dressing |
| Garlic | 1 clove, minced | Fresh only, please |
| Salt and black pepper | To taste | Start with 1/2 teaspoon each |
Ingredient Notes and Substitutions
Farro: This ancient grain is what gives this salad its hearty backbone. Pearled farro has the outer bran removed and cooks in about 25 minutes. Whole grain or semi-pearled takes longer but has a chewier texture. You can substitute spelt berries, wheat berries, or even barley if you can’t find farro, though cooking times will vary. According to the Whole Grains Council, these ancient grains provide excellent fiber and nutrients.
Halloumi: This Cypriot cheese has a high melting point, which means it gets beautifully golden and crispy instead of turning into a puddle. It’s naturally salty with a squeaky texture when fresh, creamy when cooked. You can find it at most grocery stores now, usually near the specialty cheeses. If you absolutely can’t find it, grilled firm tofu or paneer work as substitutes, but honestly, the halloumi is what makes this special.
Fresh herbs: Both parsley and mint are essential here. They’re not just garnish—they add brightness and complexity that dried herbs can’t match. The parsley provides an earthy freshness, while the mint cuts through the richness of the cheese. Basil can join the party too if you have it.
Vegetables: Cherry tomatoes stay firm and sweet. Regular tomatoes work but can make things watery, so seed them first. For the cucumber, I prefer English or Persian varieties because they have fewer seeds and thinner skins. No need to peel them.
Red onion: A little goes a long way. If raw onion is too sharp for you, soak the slices in cold water for 10 minutes, then drain and pat dry. This mellows the bite while keeping the crunch.
Step-by-Step Instructions for Making Farro Halloumi Salad
This comes together in stages, which makes it feel easier than it is. You’ll cook the farro, sear the halloumi, prep the vegetables, whisk the dressing, and toss everything together. Nothing complicated, just good timing.

- Cook the farro: Start by rinsing your farro under cold water in a fine-mesh strainer—this removes any dust or debris. Combine it with 2 cups of water or vegetable broth in a medium saucepan. I use broth when I have it because it adds another layer of flavor. Bring everything to a boil over high heat, then immediately reduce to low, cover with a lid, and let it simmer gently for 25-30 minutes. You’ll know it’s done when the grains are tender with a pleasant chew and most of the liquid is absorbed. It should still have a little bite—not mushy. Drain any excess liquid through a strainer, fluff with a fork, and let it cool slightly while you prep everything else.
- Prepare the halloumi: While that farro is doing its thing, slice your halloumi into pieces about 1/4-inch thick. Pat them dry with paper towels—this helps them get crispier. Heat 1 tablespoon of olive oil in a non-stick skillet over medium heat. Once the oil shimmers, add your halloumi slices in a single layer without crowding. Let them cook undisturbed for 2-3 minutes until the bottom is golden brown with crispy edges. Flip and cook the other side for another 2-3 minutes. You’ll hear a satisfying sizzle and smell that wonderful toasty cheese aroma. Remove from heat and let them cool just enough to handle, then cut into bite-sized pieces. I usually do squares or triangles, whatever feels right.
- Make the vinaigrette: In a small bowl, whisk together 1/4 cup olive oil, 2 tablespoons fresh lemon juice, 1 teaspoon Dijon mustard, and 1 minced garlic clove. Season with salt and pepper—I start with about 1/2 teaspoon of each. Whisk vigorously until the dressing emulsifies and looks creamy rather than separated. The mustard helps bring it together. Taste it and adjust the seasoning. It should be bright and tangy with a good balance of acid and fat.
- Assemble the salad: In your largest mixing bowl, combine the slightly cooled farro, those gorgeous golden halloumi pieces, halved cherry tomatoes, diced cucumber, thinly sliced red onion, chopped parsley, and chopped mint. Use your hands or a large spoon to gently toss everything together, distributing all the components evenly. Take a moment to appreciate how pretty it looks before you dress it.
- Dress and serve: Pour that lemon vinaigrette over the entire salad. Using a large spoon or salad servers, toss gently but thoroughly to coat everything with the dressing. You want every grain and vegetable to get some of that lemony goodness. Taste and adjust seasoning with more salt, pepper, or lemon juice if needed. You can serve this immediately while the halloumi is still slightly warm, or refrigerate it for later. Both ways are delicious.

Expert Tips for the Best Results
Don’t overcook the farro. It should be tender but still have a pleasant chew, almost like al dente pasta. Overcooked farro gets mushy and loses that satisfying texture that makes this salad work.
Get the halloumi really crispy. The key is a hot pan and patience. Don’t move it around or flip it too early. Let it sit undisturbed until it develops that golden crust. This crispy exterior against the creamy interior is what makes halloumi so special.
Use fresh lemon juice. Bottled stuff doesn’t have the same bright, vibrant flavor. You need that fresh acidity to cut through the richness of the cheese and balance all the flavors.
Don’t overdress the salad. You can always add more dressing, but you can’t take it away. Start with about three-quarters of the vinaigrette, toss, taste, then add more if needed. Farro will absorb dressing as it sits, so if you’re making this ahead, you might want to reserve a bit to freshen it up before serving.
Chop your herbs properly. Use a sharp knife and a gentle rocking motion. Bruised herbs turn dark and bitter. You want clean cuts that release flavor without damaging the leaves.
Let it rest. If you have time, let the dressed salad sit for 15-30 minutes before serving. This allows the farro to absorb the dressing and all the flavors to meld together. It’s good immediately, but better with a little patience.
Variations to Try
Add roasted vegetables: Toss in roasted red peppers, zucchini, or eggplant for extra heartiness and a smoky depth. This works especially well if you’re serving the salad warm.
Include some greens: A handful of arugula or baby spinach adds a peppery bite and makes this even more substantial. Stir them in just before serving so they don’t wilt.
Try different cheeses: If halloumi isn’t your thing, grilled feta holds up surprisingly well, or try cubed fresh mozzarella for a milder flavor. Just skip the cooking step with mozzarella.
Switch up the grains: This works beautifully with quinoa for a gluten-free version, or try bulgur for a quicker-cooking option. Brown rice or freekeh are great too, though they’ll change the texture slightly.
Add protein: While the halloumi provides plenty, you can bulk this up with chickpeas, white beans, or grilled chicken for an even heartier meal. Similar to my chickpea feta avocado salad, legumes work wonderfully here.
Make it spicy: Add a pinch of red pepper flakes to the dressing or toss in some sliced Calabrian chiles. A little heat plays nicely with the salty cheese.
Include fruit: Pomegranate seeds add jewel-like pops of sweetness, or try dried cranberries for a chewy contrast. Check out my quinoa pistachio cranberry salad for more inspiration on fruit in grain salads.
Change the dressing: A balsamic vinaigrette works beautifully here, or try tahini-lemon for a creamier, nuttier option that feels more Middle Eastern.
Troubleshooting Common Issues
Farro is too chewy or hard: It needs more cooking time. Add a splash more water and continue simmering, checking every 5 minutes. Different brands and types cook at different rates.
Farro is mushy: You cooked it too long or used too much liquid. Next time, check it at 20 minutes and drain it promptly. The good news is you can still use mushy farro—just think of it as a creamier salad.
Halloumi won’t get crispy: Your pan wasn’t hot enough, or the cheese was too wet. Make sure you pat the slices completely dry and get your pan nice and hot before adding them. Don’t overcrowd the pan either.
Halloumi is too rubbery: You cooked it too long or at too high a heat. Halloumi should get golden and slightly crispy but still have give when you bite it. Medium heat is your friend here.
Salad tastes bland: You need more salt, acid, or both. Grains need more seasoning than you think. Add more salt to the dressing, squeeze in extra lemon juice, or add a splash of vinegar to brighten everything up.
Salad is too wet or watery: Your tomatoes or cucumber released too much liquid. Next time, seed your tomatoes or use a firmer variety. You can also drain the salad through a strainer and remix it with fresh dressing.
Raw onion is too sharp: Soak the sliced onion in cold water for 10 minutes, then drain and pat dry. This removes the harsh sulfur compounds while keeping the crunch.
Everything stuck together: You didn’t let the farro cool enough before mixing, or you didn’t use enough dressing. Warm grains clump. Let them cool to room temperature and toss them with a fork before adding other ingredients.
Storage and Make-Ahead Instructions
This farro halloumi salad is one of those magical recipes that actually improves with time. The farro continues to absorb the dressing, the flavors meld together, and everything tastes more cohesive. It’s perfect for meal prep or making ahead for gatherings.
| Storage Method | Duration | Best Practices |
|---|---|---|
| Refrigerator (assembled salad) | 3-4 days | Store in airtight container; refresh with lemon juice before serving |
| Refrigerator (components separate) | 4-5 days | Keep cooked farro, halloumi, vegetables, and dressing separate; assemble when ready |
| Freezer (farro only) | 2-3 months | Freeze cooked farro in portions; other ingredients don’t freeze well |
| Room temperature | 2 hours max | According to FDA food safety guidelines, don’t leave out longer |
For make-ahead success, I recommend cooking the farro and preparing the dressing up to 3 days in advance. Store them separately in the refrigerator. You can also cook and slice the halloumi ahead, though it’s best reheated briefly in a skillet to crisp it up again before adding to the salad.
Chop your vegetables the morning of or the night before, keeping them in separate containers to prevent watery accumulation. Assemble everything within a few hours of serving for the best texture and flavor.
When storing the completed salad, keep it in an airtight container in the refrigerator. Before serving leftovers, taste and add a squeeze of fresh lemon juice or a drizzle of olive oil to brighten it up. The farro will have absorbed most of the dressing, so this little refresh makes a big difference.
The halloumi will soften as it sits in the refrigerator but still tastes delicious. If you prefer it crispy, you can remove the pieces, reheat them in a skillet, and return them to the salad. I usually don’t bother—I love it both ways.
Serving Suggestions
This salad is incredibly versatile. Serve it as a main course for lunch or a light dinner, or as a substantial side dish alongside grilled meats or fish. It works beautifully at room temperature, which makes it perfect for picnics, potlucks, or packed lunches.
For a complete Mediterranean meal, pair it with some warm pita bread and hummus. It also goes wonderfully with my herb roasted potato salad for a vegetarian feast that’ll feed a crowd.
Try it alongside grilled lamb, roasted chicken, or baked fish for a more elaborate dinner. The brightness of the salad cuts through rich proteins beautifully.
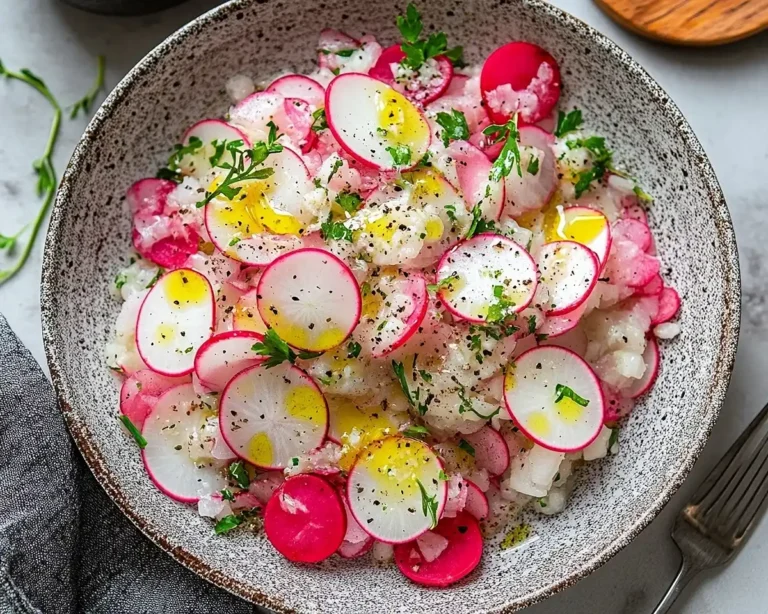
For a lighter presentation similar to my Gordon Ramsay radish salad, serve it on a bed of arugula or mixed greens for extra freshness and color.
Farro Halloumi Salad FAQs
What is farro halloumi salad?
Farro halloumi salad is a nutritious Mediterranean-inspired dish that combines cooked farro, a hearty ancient grain, with grilled or pan-fried halloumi cheese. The salad typically includes fresh vegetables like tomatoes, cucumbers, and leafy greens, along with herbs and a light dressing. The combination of nutty farro and salty, squeaky halloumi creates a satisfying texture and flavor profile that works well as a main course or side dish.
How do you prepare farro for the salad?
To prepare farro for salad, rinse the grains under cold water, then cook them in a pot with a 3:1 ratio of water to farro. Bring to a boil, reduce heat to low, cover, and simmer for 25-40 minutes depending on the type of farro until the grains are tender but still chewy. Drain any excess water, then spread the farro on a baking sheet to cool completely before adding to your salad. This prevents the salad from becoming soggy and allows the dressing to coat the grains evenly.
Can farro halloumi salad be made ahead of time?
Yes, farro halloumi salad can be partially prepared ahead of time. You can cook the farro and prepare the vegetables up to two days in advance, storing them separately in the refrigerator. However, it’s best to cook the halloumi and assemble the salad just before serving to maintain the cheese’s characteristic squeaky texture and prevent the greens from wilting. If you must assemble early, add delicate greens and the dressing at the last minute for the best results.
What are good substitutions for halloumi in this salad?
If you cannot find halloumi or want an alternative, feta cheese is a popular substitute that provides a similar salty, tangy flavor, though it won’t have the same firm texture. For a vegan option, you can use marinated and grilled tofu or tempeh. Paneer, an Indian cheese, also works well as it holds its shape when cooked. Fresh mozzarella or grilled goat cheese can work too, though they will create a different flavor profile and softer texture than traditional halloumi.
How long does farro halloumi salad keep in the refrigerator?
Farro halloumi salad will keep in the refrigerator for up to 3 days when stored in an airtight container. However, the halloumi cheese is best enjoyed fresh and may become rubbery when cold. The farro will absorb more dressing over time, so you may need to refresh the salad with additional dressing before serving leftovers. For best results, store the grilled halloumi separately and add it to portions as needed. Avoid adding delicate greens until serving if you plan to have leftovers.
Final Thoughts
This farro halloumi salad has become one of those recipes I return to again and again, especially when I want something satisfying that doesn’t feel heavy. It’s the perfect balance of textures and flavors—nutty, salty, fresh, and bright all at once.
What I love most is how forgiving and adaptable it is. You can follow the recipe exactly or make it your own with whatever vegetables and herbs you have on hand. The foundation of chewy farro and crispy halloumi works with so many variations.
Whether you’re meal prepping for the week, bringing something impressive to a potluck, or just want a really good lunch, this vegetarian farro salad delivers. It’s proof that simple, quality ingredients treated well can create something truly special.
Give it a try, and I bet it becomes a regular in your rotation too. Let me know how it turns out—I always love hearing which variations people come up with!